Einleitung
Using a metal spudger may cause damage but it is the most efficient tool to use. There is a sticky adhesive under the top button compartment followed by a metal piece then a rubber piece. Once you get the first part off the rest is simple.
Was du brauchst
-
-
Insert the flat end of wide metal spudger into the seam of the plastic buffer surrounding the buttons and pry it open.
-
-
-
-
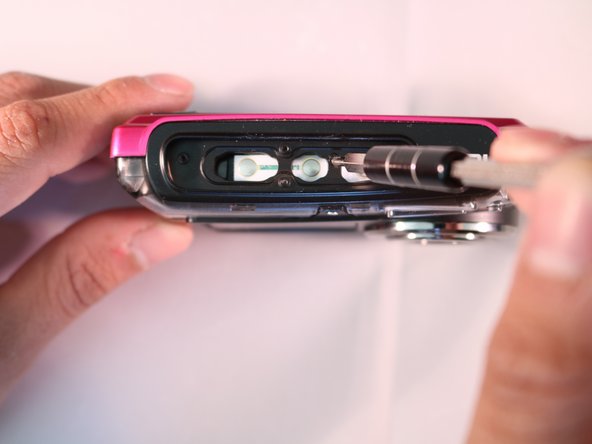
Use A #00 Phillips head screwdriver and turn counterclockwise to remove the four indicated screws.
-
Set the screws aside.
-


To reassemble your device, follow these instructions in reverse order.
To reassemble your device, follow these instructions in reverse order.
Team

Marist, Team 1-3, Laflen Spring 2016 Mitglied von Marist, Team 1-3, Laflen Spring 2016
MARS-LAFLEN-S16S1G3
2 Mitglieder
5 Anleitungen geschrieben