Diese Version enthält möglicherweise inkorrekte Änderungen. Wechsle zur letzten geprüften Version.
Was du brauchst
-
Dieser Schritt ist noch nicht übersetzt. Hilf mit, ihn zu übersetzen!
-
Remove the SD card from the SD card slot.
-
-
Dieser Schritt ist noch nicht übersetzt. Hilf mit, ihn zu übersetzen!
-
Use the opening tool to separate the front and rear panels by slipping the tool underneath the screen edge and sliding it around the entire device.
-
-
Dieser Schritt ist noch nicht übersetzt. Hilf mit, ihn zu übersetzen!
-
Remove the speaker cable from its socket by gripping both sides of the white connector piece with tweezers and pulling straight out.
-
-
Dieser Schritt ist noch nicht übersetzt. Hilf mit, ihn zu übersetzen!
-
Using a #00 Phillips screwdriver, remove the following screws:
-
Five 3mm Phillips #00 screws
-
-
-
Dieser Schritt ist noch nicht übersetzt. Hilf mit, ihn zu übersetzen!
-
Gently lift the battery, pulling away from the tab holding it in place at the bottom.
-
While holding the battery up, use a pair of tweezers to remove the battery cable from its connector.
-
-
Dieser Schritt ist noch nicht übersetzt. Hilf mit, ihn zu übersetzen!
-
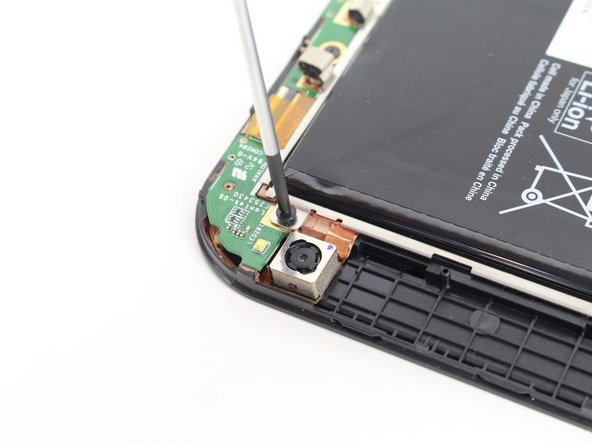
Using a #00 Philips screwdriver, remove the screw attaching daughter board.
-
Remove the yellow tape using a pair of tweezers.
-
-
Dieser Schritt ist noch nicht übersetzt. Hilf mit, ihn zu übersetzen!
-
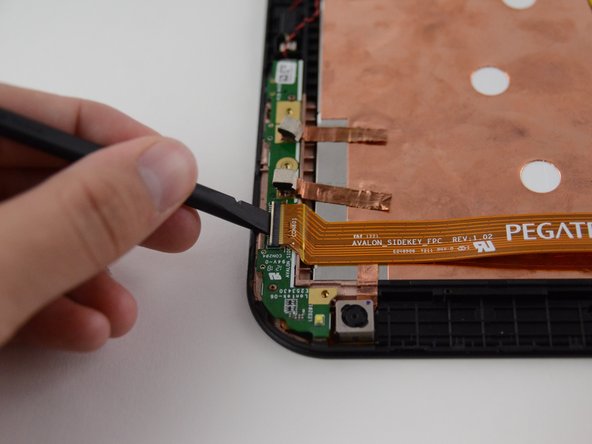
Unlock the ribbon cable housing using tweezers and/or a spudger.
-
Gently pull the ribbon cable out of its housing using the tweezers or your hands.
-
-
Dieser Schritt ist noch nicht übersetzt. Hilf mit, ihn zu übersetzen!
-
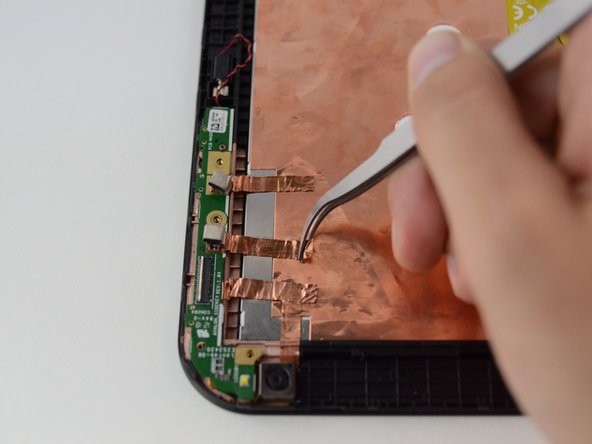
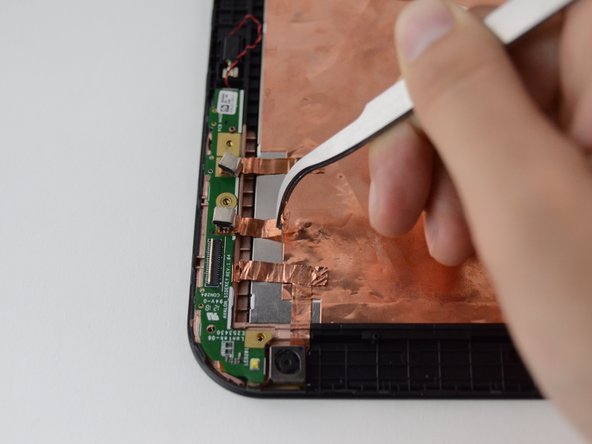
Pull copper tape away from the back, keeping it connected to the green rear camera board.
-
-
Dieser Schritt ist noch nicht übersetzt. Hilf mit, ihn zu übersetzen!
-
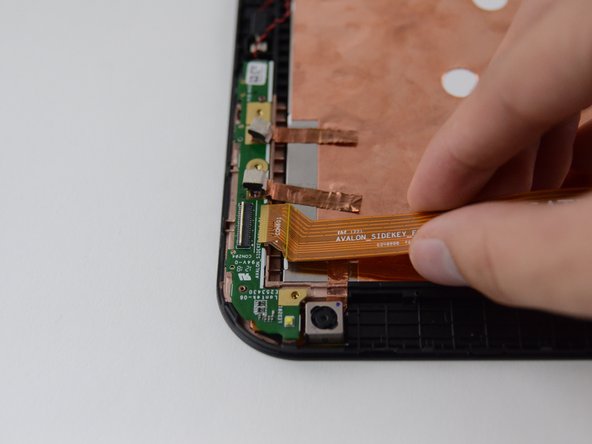
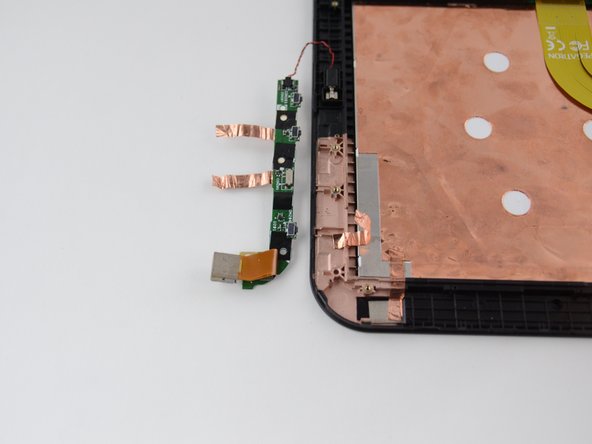
Using your hands remove daughter board by lifting it off of the tablet chassis. Flip it over and place it next to the tablet face-down.
-
-
Dieser Schritt ist noch nicht übersetzt. Hilf mit, ihn zu übersetzen!
-
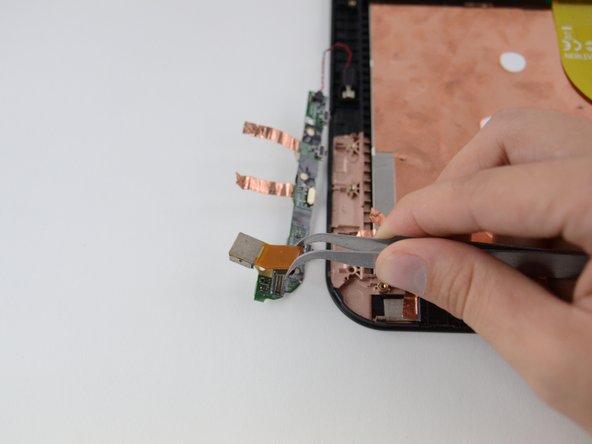
Gently pinch the ribbon cable connector between two fingers or with tweezers and pull it straight outwards. The ribbon cable connector should disconnect and the camera can now be replaced.
-


Team

Cal Poly, Team 14-26, Maness Fall 2014 Mitglied von Cal Poly, Team 14-26, Maness Fall 2014
CPSU-MANESS-F14S14G26
4 Mitglieder
12 Anleitungen geschrieben