Zum Hauptinhalt wechseln

Toshiba HD-A2 Optical Lens Replacement

Was du brauchst

  1. Toshiba HD-A2 Optical Lens Replacement, Top Panel: Schritt 1, Bild 1 von 1
    • Remove the three 6mm Phillips head screws on the back of the DVD player with a Phillips #1 screwdriver.

  2. Toshiba HD-A2 Optical Lens Replacement: Schritt 2, Bild 1 von 2 Toshiba HD-A2 Optical Lens Replacement: Schritt 2, Bild 2 von 2
    • Remove the two 3mm Phillips screws on each side of the DVD player using the Phillips #1 screwdriver.

  3. Toshiba HD-A2 Optical Lens Replacement: Schritt 3, Bild 1 von 1
    • Using your hand, gently lift the black top panel and safely place it off to the side.

  4. Toshiba HD-A2 Optical Lens Replacement, Optical Drive: Schritt 4, Bild 1 von 3 Toshiba HD-A2 Optical Lens Replacement, Optical Drive: Schritt 4, Bild 2 von 3 Toshiba HD-A2 Optical Lens Replacement, Optical Drive: Schritt 4, Bild 3 von 3
    • Remove five 6mm Phillips screws with a Phillips #2 screwdriver.

    • The 2 screws on the right of the cartridge are better shown in the second and third photos.

  5. Toshiba HD-A2 Optical Lens Replacement: Schritt 5, Bild 1 von 2 Toshiba HD-A2 Optical Lens Replacement: Schritt 5, Bild 2 von 2
    • Remove the remaining four 6mm Phillips screws.

  6. Toshiba HD-A2 Optical Lens Replacement: Schritt 6, Bild 1 von 3 Toshiba HD-A2 Optical Lens Replacement: Schritt 6, Bild 2 von 3 Toshiba HD-A2 Optical Lens Replacement: Schritt 6, Bild 3 von 3
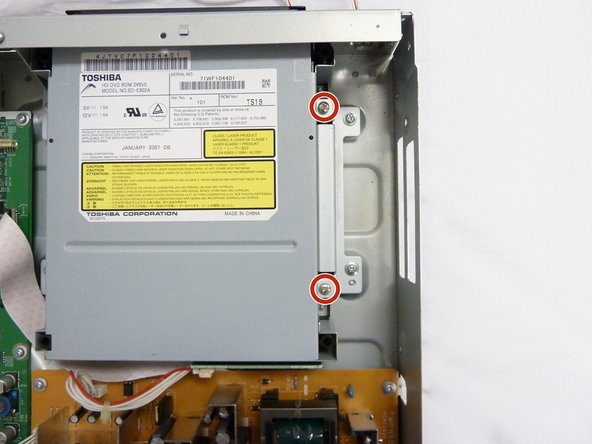
    • Using your fingers, gently remove the metal pieces on each side of the cartridge and carefully place them aside.

  7. Toshiba HD-A2 Optical Lens Replacement: Schritt 7, Bild 1 von 2 Toshiba HD-A2 Optical Lens Replacement: Schritt 7, Bild 2 von 2
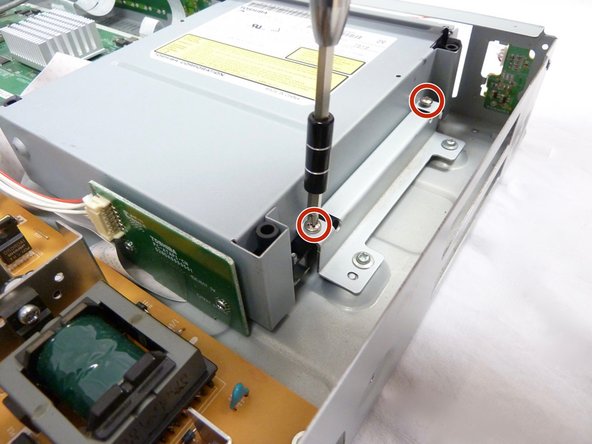
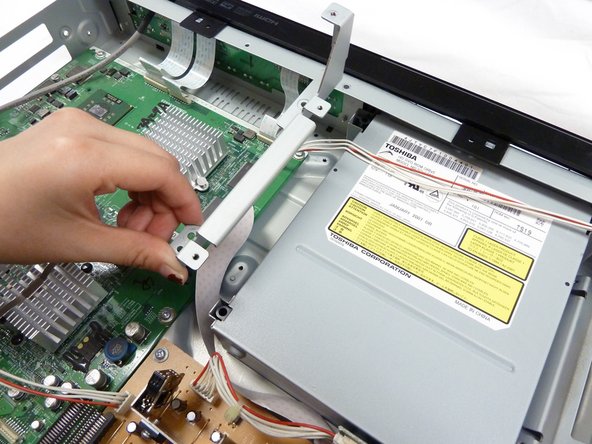
    • Gently lift the cartridge. Remove two 4mm Phillips screws from the green circuit board.

  8. Toshiba HD-A2 Optical Lens Replacement: Schritt 8, Bild 1 von 1
    • Using your fingers, gently pull off the wires.

  9. Toshiba HD-A2 Optical Lens Replacement: Schritt 9, Bild 1 von 2 Toshiba HD-A2 Optical Lens Replacement: Schritt 9, Bild 2 von 2
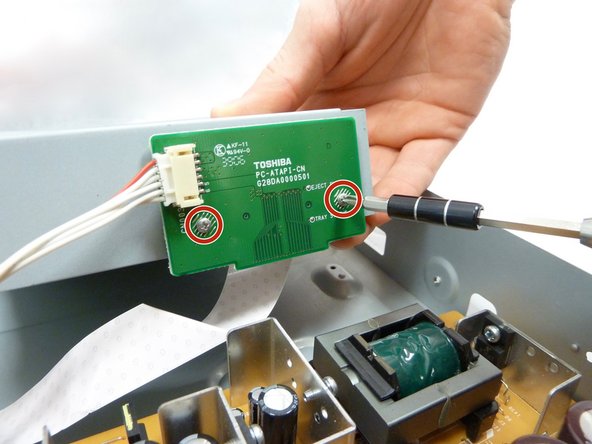
    • Using your fingers, pull off the green circuit board from the cartridge and carefully place it down.

    • Be careful not to rip the tape attaching the green circuit boards together.

  10. Toshiba HD-A2 Optical Lens Replacement: Schritt 10, Bild 1 von 2 Toshiba HD-A2 Optical Lens Replacement: Schritt 10, Bild 2 von 2
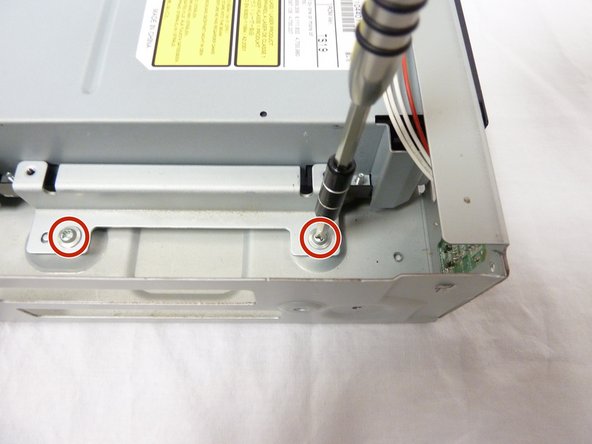
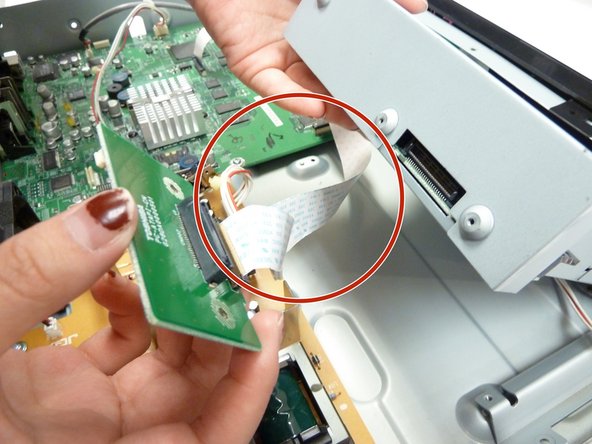
    • Flip the cartridge over to the bare side with no stickers. Remove four 10mm Phillips screws from each corner.

  11. Toshiba HD-A2 Optical Lens Replacement: Schritt 11, Bild 1 von 2 Toshiba HD-A2 Optical Lens Replacement: Schritt 11, Bild 2 von 2
    • Using your hands, gently lift the lid and carefully place it aside.

  12. Toshiba HD-A2 Optical Lens Replacement: Schritt 12, Bild 1 von 3 Toshiba HD-A2 Optical Lens Replacement: Schritt 12, Bild 2 von 3 Toshiba HD-A2 Optical Lens Replacement: Schritt 12, Bild 3 von 3
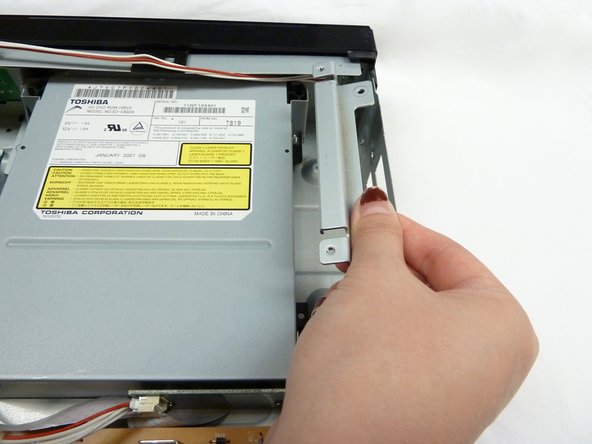
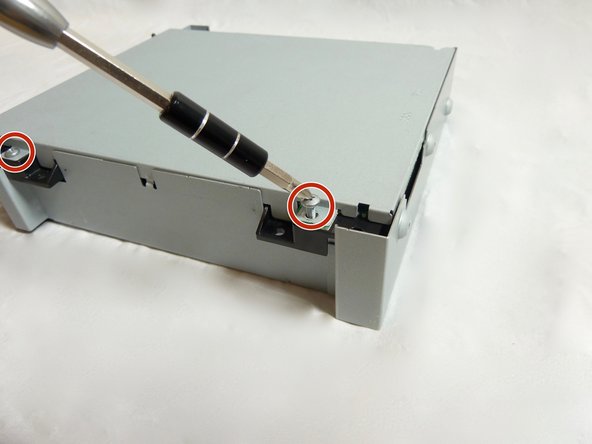
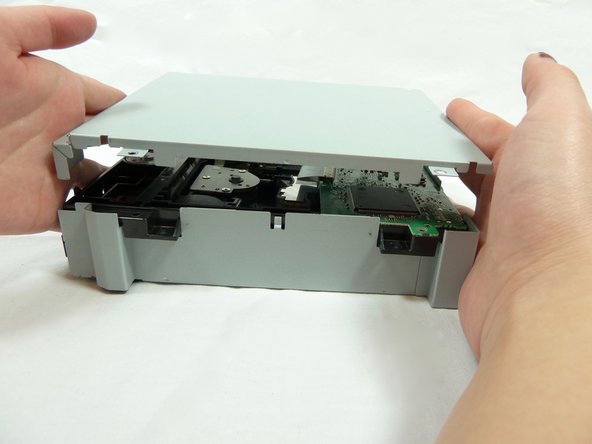
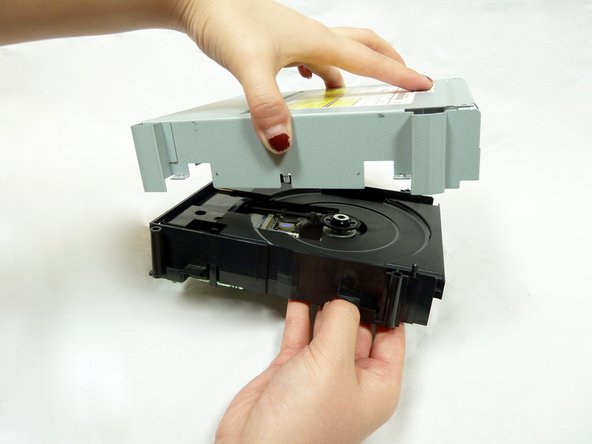
    • Flip over the cartridge. Using your hands, gently lift the rest of the silver case.

  13. Toshiba HD-A2 Optical Lens Replacement, Optical Lens: Schritt 13, Bild 1 von 1
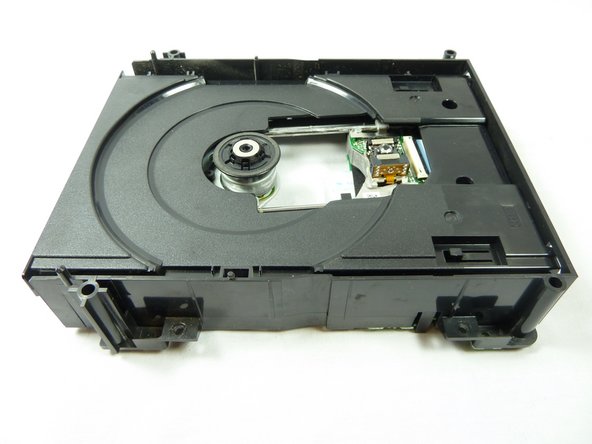
    • The optical lens will be resting aside the small green circuit board.

  14. Toshiba HD-A2 Optical Lens Replacement: Schritt 14, Bild 1 von 2 Toshiba HD-A2 Optical Lens Replacement: Schritt 14, Bild 2 von 2
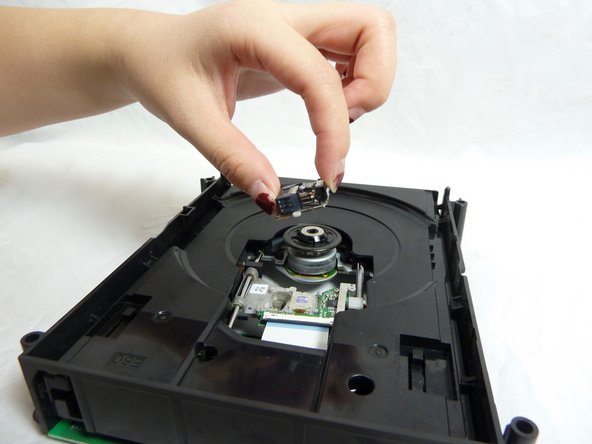
    • Using a prying tool, wedge the edge of the tool underneath the end of the optical lens closest to the green circuit board. Gently push down to pop off the optical lens.

Abschluss

To reassemble your device, follow these instructions in reverse order.

Nouriyah Saleh

Mitglied seit: 10/22/18

800 Reputation

6 Anleitungen geschrieben

Team

UC Davis, Team S11-G1, Lore Fall 2018 Mitglied von UC Davis, Team S11-G1, Lore Fall 2018

UCD-LORE-F18S11G1

3 Mitglieder

6 Anleitungen geschrieben

0 Kommentare

Kommentar hinzufügen

Seitenaufrufe:

Letzte 24 Stunden: 2

Letzte 7 Tage: 3

Letzte 30 Tage: 17

Insgesamt: 544