Diese Anleitung enthält neuere Änderungen. Wechsel zur neuesten unüberprüften Version.
Einleitung
In this guide, you will learn how to disassemble the broken/damaged keyboard from the rest of the laptop as well as how to replace it. This guide will also teach you what the proper and necessary tools are for this repair.
Was du brauchst
-
-
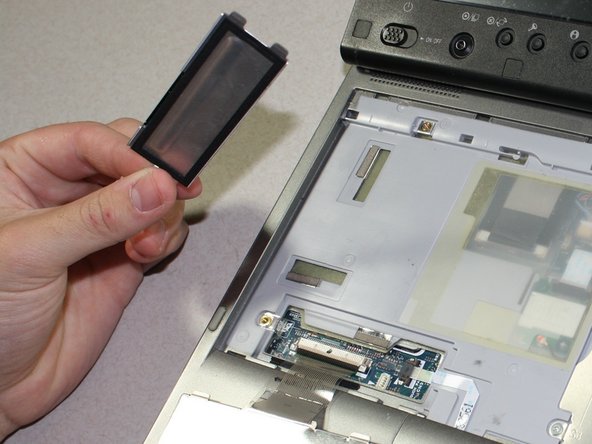
Remove the front face plate with a plastic opening tool.
-
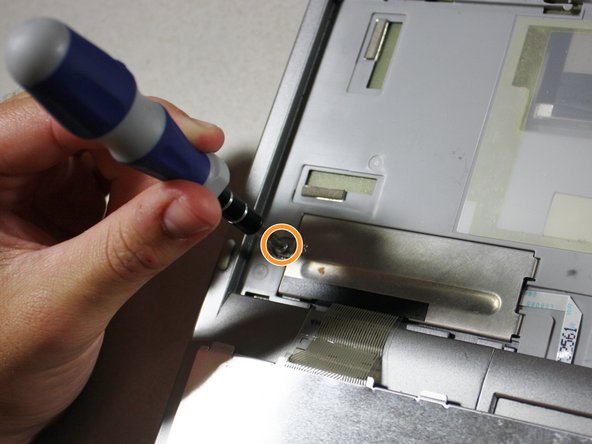
Use a #1 Phillips screwdriver to unscrew and remove the two 3.8mm screws labeled B3.
-
-
-
Use your hands to lift the keyboard toward you starting from the edge closest to the screen.
-
Gently place the keyboard on top of the trackpad with the keys side down.
-
-
-
-
Find the white ribbon connector (where the keyboard is still attached to the rest of the laptop).
-
Remove the screw on the metal plate that keeps the ribbon from sliding out.
-
Gently remove the metal plate and set it aside.
-
-
-
Use the plastic opening tools to dislodge the white ribbon connector from the two clips.
-
Use your fingers to pull out the white ribbon connector.
-


To reassemble your device, follow these instructions in reverse order.
To reassemble your device, follow these instructions in reverse order.
Rückgängig: Ich habe diese Anleitung nicht absolviert.
Ein:e weitere:r Nutzer:in hat diese Anleitung absolviert.
Team

Cal Poly, Team 4-17, Maness Spring 2013 Mitglied von Cal Poly, Team 4-17, Maness Spring 2013
CPSU-MANESS-S13S4G17
3 Mitglieder
12 Anleitungen geschrieben