Diese Version enthält möglicherweise inkorrekte Änderungen. Wechsle zur letzten geprüften Version.
Was du brauchst
-
Dieser Schritt ist noch nicht übersetzt. Hilf mit, ihn zu übersetzen!
-
Remove the front face plate with a plastic opening tool.
-
Unscrew and remove the two 3.8mm screws labeled B3 with the #1 Phillips screwdriver.
-
-
Dieser Schritt ist noch nicht übersetzt. Hilf mit, ihn zu übersetzen!
-
Lift the keyboard toward you starting from the edge closest to the screen.
-
Gently place the keyboard on top of the track pad with the keys upside down.
-
-
-
Dieser Schritt ist noch nicht übersetzt. Hilf mit, ihn zu übersetzen!
-
Find the white ribbon connector (where the keyboard is still attached to the rest of the laptop).
-
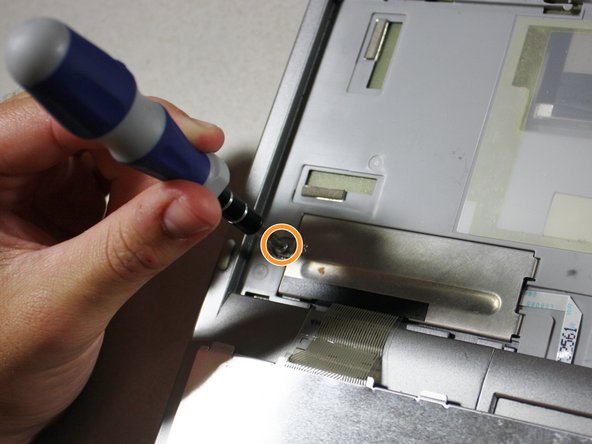
Remove the screw on the metal plate that keeps the ribbon from sliding out.
-
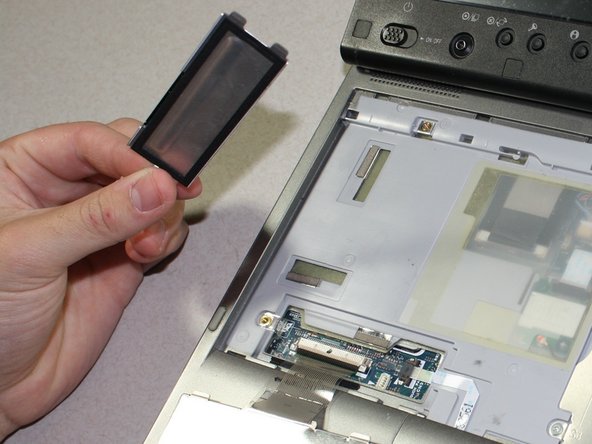
Gently remove the metal plate and set it aside.
-
-
Dieser Schritt ist noch nicht übersetzt. Hilf mit, ihn zu übersetzen!
-
Dislodge the white ribbon connector from the two clips holding it in place using the plastic opening tools.
-
Pull out the white ribbon connector with your fingers.
-
Rückgängig: Ich habe diese Anleitung nicht absolviert.
Ein:e weitere:r Nutzer:in hat diese Anleitung absolviert.


