Einleitung
Replacing the heatsink fan is an uncommon issue however if you laptop is running extremely hot this may be the correct adjustment. Removing the heatsink may seem intimidating, but it is relatively quick taking only about 5-10 minutes to complete.
Was du brauchst
-
-
With the laptop flipped over, unlock the mechanism that is shown in red.
-
Lift and remove the battery out of the device.
-
-
-
Remove the accessory plate by unscrewing the single Phillips #0 screw and lifting up the panel.
-
-
-
-
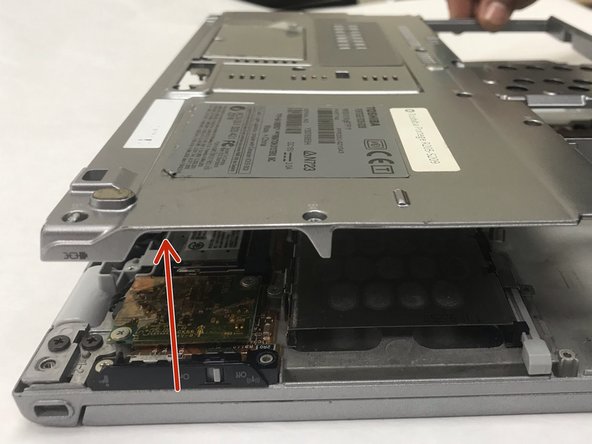
Remove the 18 Phillips #0 screws that keep the bottom plate attached to the outer portion of the laptop.
-
-
-
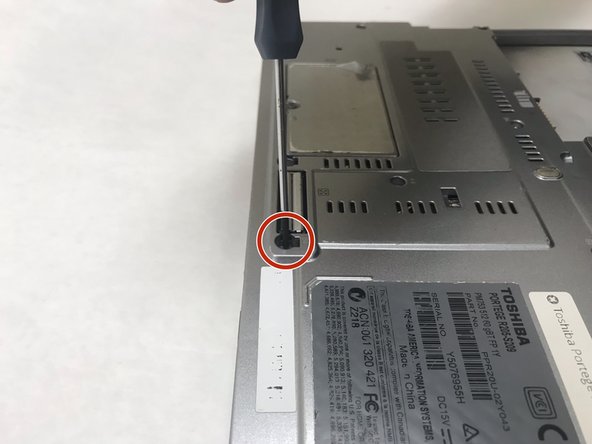
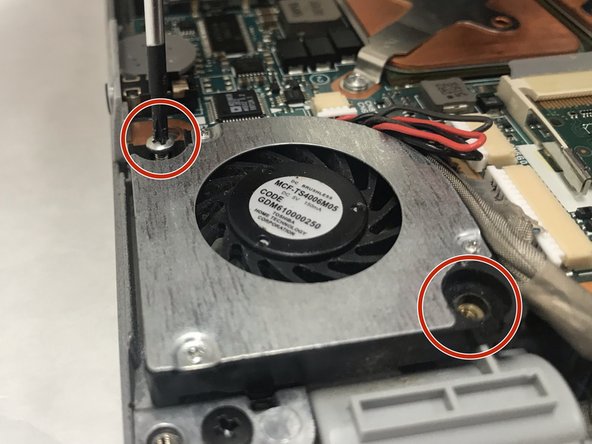
Remove the 2 Phillips #0 screws holding the heat sink in place.
-
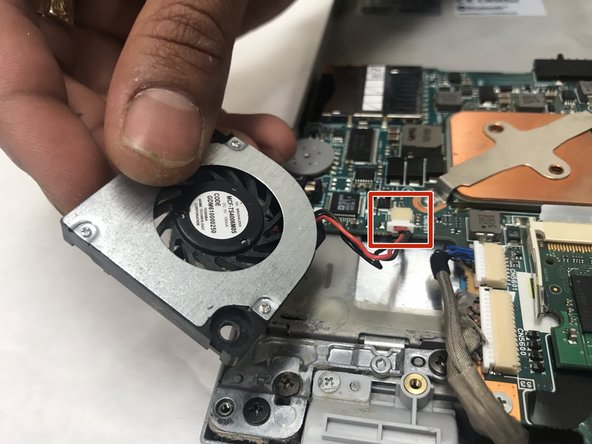
Detach the heatsink fan from the motherboard by removing the clip that connects them together and pulling away from the laptop horizontally.
-


To reassemble your device, follow these instructions in reverse order.
To reassemble your device, follow these instructions in reverse order.
Team

IUPUI, Team S1-G2, Crossman Spring 2019 Mitglied von IUPUI, Team S1-G2, Crossman Spring 2019
IUPUI-CROSSMAN-S19S1G2
3 Mitglieder
6 Anleitungen geschrieben