Diese Version enthält möglicherweise inkorrekte Änderungen. Wechsle zur letzten geprüften Version.
Was du brauchst
-
Dieser Schritt ist noch nicht übersetzt. Hilf mit, ihn zu übersetzen!
-
Turn your laptop upside down, and slide the right release tab outward.
-
Using you left hand, hold the left release tab towards the left side and then pull the battery out.
-
-
Dieser Schritt ist noch nicht übersetzt. Hilf mit, ihn zu übersetzen!
-
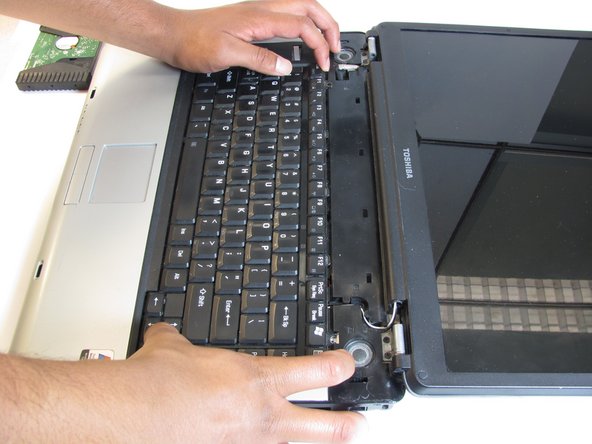
Using the plastic opening tool, pry off the panel above the keyboard, starting near the right front speaker.
-
Use the plastic opening tool to pop off tabs along the length of this panel.
-
-
Dieser Schritt ist noch nicht übersetzt. Hilf mit, ihn zu übersetzen!
-
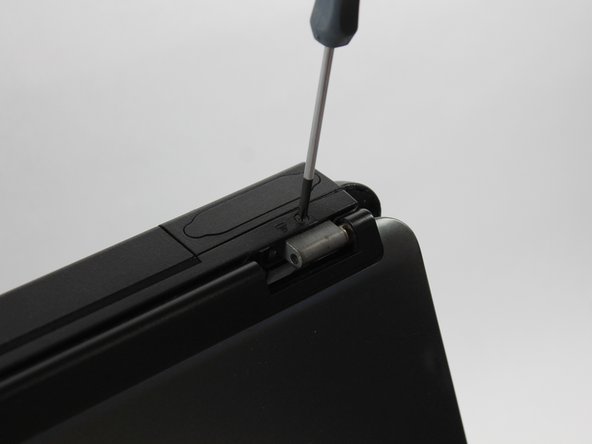
Unscrew the two 4.5 mm screws holding the keyboard on with the Phillips #1 screwdriver.
-
-
-
Dieser Schritt ist noch nicht übersetzt. Hilf mit, ihn zu übersetzen!
-
Lift the keyboard gently from the side closest the screen.
-
Pull out the ribbon connecting the keyboard to the laptop.
-
-
Dieser Schritt ist noch nicht übersetzt. Hilf mit, ihn zu übersetzen!
-
Disconnect wire attaching LCD to motherboard
-
Using the Phillips screwdriver remove the two 4.0mm screws from each hinge above speakers
-
Partially close the lid and remove the last two 4.0mm screws from the back of the laptop.
-
-
Dieser Schritt ist noch nicht übersetzt. Hilf mit, ihn zu übersetzen!
-
Remove the seventeen 4.5mm phillips screws on the bottom of the laptop.
-
Using the pry tool separate the two halves of the laptop base.
-
-
Dieser Schritt ist noch nicht übersetzt. Hilf mit, ihn zu übersetzen!
-
Lift the top half of the case enough to get your hand beneath it, and then remove the two ribbon cables that connect it to the motherboard.
-
-
Dieser Schritt ist noch nicht übersetzt. Hilf mit, ihn zu übersetzen!
-
Remove the lower half of the laptop and lay upper half on its top.
-
-
Dieser Schritt ist noch nicht übersetzt. Hilf mit, ihn zu übersetzen!
-
Using the Phillips screwdriver remove the two 4.0mm screws holding each of the speakers housings to the case.
-
Remove the speakers from the case being careful of the wires.
-
-
Dieser Schritt ist noch nicht übersetzt. Hilf mit, ihn zu übersetzen!
-
The wires for the speakers are color coded.The red and black wires are for the right speaker, and the black and white wires are for the left speaker.
-


Rückgängig: Ich habe diese Anleitung nicht absolviert.
2 weitere Nutzer:innen haben diese Anleitung absolviert.

Team

UMass Dartmouth, Team 1-6, Cichon Spring 2014 Mitglied von UMass Dartmouth, Team 1-6, Cichon Spring 2014
UMASSD-CICHON-S14S1G6
3 Mitglieder
6 Anleitungen geschrieben