Diese Version enthält möglicherweise inkorrekte Änderungen. Wechsle zur letzten geprüften Version.
Was du brauchst
-
Dieser Schritt ist noch nicht übersetzt. Hilf mit, ihn zu übersetzen!
-
Locate the two sliding locks indicated in the photo.
-
Slide the right lock (labeled "1") to the right. It will remain in the unlocked position.
-
Slide the left lock (labeled "2") to the left and hold it in place.
-
-
Dieser Schritt ist noch nicht übersetzt. Hilf mit, ihn zu übersetzen!
-
While holding the left lock, place your finger in the indentation next to the battery and lift the battery out.
-
-
Dieser Schritt ist noch nicht übersetzt. Hilf mit, ihn zu übersetzen!
-
Remove the four screws indicated in the photos using a Phillips 00 Screwdriver. Left to right: 6mm button-head, 3mm flat-head, 6mm button-head, 6mm button-head.
-
-
-
Dieser Schritt ist noch nicht übersetzt. Hilf mit, ihn zu übersetzen!
-
With your hands, grasp the speaker cover on the edge nearest to the screen.
-
Pry the speaker cover upward.
-
-
Dieser Schritt ist noch nicht übersetzt. Hilf mit, ihn zu übersetzen!
-
Remove the speaker cover. Your laptop will look like this photo when the speaker cover has been removed.
-
-
Dieser Schritt ist noch nicht übersetzt. Hilf mit, ihn zu übersetzen!
-
Locate the screws that are shown in the image.
-
Remove the fourteen 6mm button-head screws with a Phillips 00 Screwdriver.
-
-
Dieser Schritt ist noch nicht übersetzt. Hilf mit, ihn zu übersetzen!
-
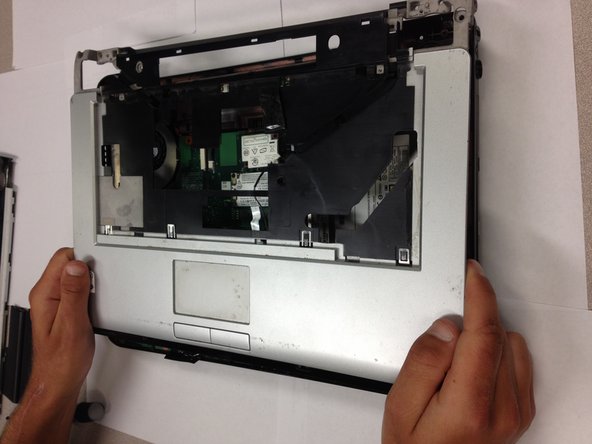
Lift up on the front cover to remove it.
-
-
Dieser Schritt ist noch nicht übersetzt. Hilf mit, ihn zu übersetzen!
-
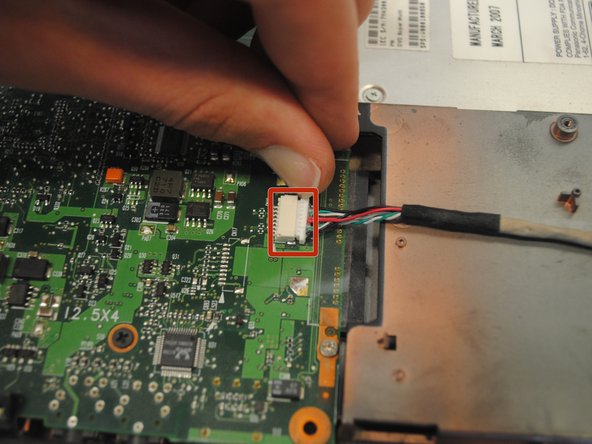
Locate the USB 2.0 cable on the bottom right corner of the laptop.
-
-
Dieser Schritt ist noch nicht übersetzt. Hilf mit, ihn zu übersetzen!
-
Locate the white slot on the left side of the USB 2.0 wire.
-
Carefully detach the wire by pulling the cable to the right of the slot.
-


Team

Cal Poly, Team 17-6, Regan Spring 2013 Mitglied von Cal Poly, Team 17-6, Regan Spring 2013
CPSU-REGAN-S13S17G6
5 Mitglieder
33 Anleitungen geschrieben