Zum Hauptinhalt wechseln

Toshiba Satellite A65-S126 Speaker Replacement

Was du brauchst

  1. Toshiba Satellite A65-S126 Speaker Replacement, Battery: Schritt 1, Bild 1 von 1
    • Flip the laptop over so the bottom is facing up.

    • Slide each of the three tabs on the bottom half of the assembly into the unlocked position.

  2. Toshiba Satellite A65-S126 Speaker Replacement: Schritt 2, Bild 1 von 1
    • Gently lift the battery out of the computer.

  3. Toshiba Satellite A65-S126 Speaker Replacement, Upper Assembly: Schritt 3, Bild 1 von 1
    • Remove the single 3mm Phillips #00 screw that secures the wireless card cover.

  4. Toshiba Satellite A65-S126 Speaker Replacement: Schritt 4, Bild 1 von 1
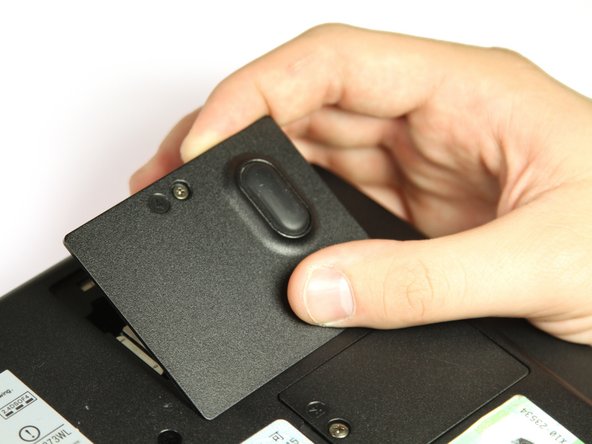
    • Remove the WIFI module cover. It will pull right off.

  5. Toshiba Satellite A65-S126 Speaker Replacement: Schritt 5, Bild 1 von 2 Toshiba Satellite A65-S126 Speaker Replacement: Schritt 5, Bild 2 von 2
    • Unplug the white and black wires from the WiFi module.

  6. Toshiba Satellite A65-S126 Speaker Replacement: Schritt 6, Bild 1 von 1
    • Remove the twelve 8mm button head Phillips #00 B8 screws.

    • Remove the two 14 mm button head Phillips #00 B14 screws.

    • Remove the two 10 mm Phillips #00 battery compartment screws.

    • Remove the two 8 mm Phillips #00 screws.

  7. Toshiba Satellite A65-S126 Speaker Replacement: Schritt 7, Bild 1 von 1
    • Remove the seven 4mm flat Phillips #00 screws.

    • Remove the seven 20mm button head Phillips #00 screws.

  8. Toshiba Satellite A65-S126 Speaker Replacement: Schritt 8, Bild 1 von 1
    • Use the plastic opening tool to pry the two halves apart.

  9. Toshiba Satellite A65-S126 Speaker Replacement, Speaker: Schritt 9, Bild 1 von 2 Toshiba Satellite A65-S126 Speaker Replacement, Speaker: Schritt 9, Bild 2 von 2
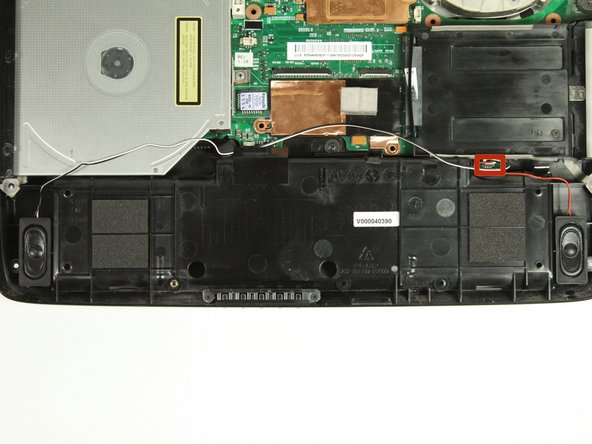
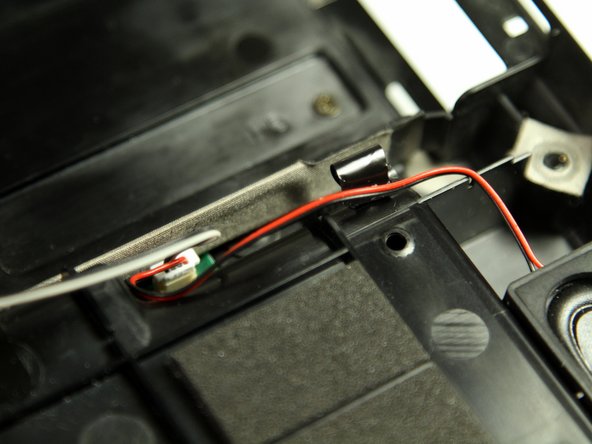
    • Locate the plug for the speaker wires on the bottom of the laptop.

  10. Toshiba Satellite A65-S126 Speaker Replacement: Schritt 10, Bild 1 von 1
    • Unplug the speaker wire connector.

  11. Toshiba Satellite A65-S126 Speaker Replacement: Schritt 11, Bild 1 von 1
    • Remove the speakers by sliding them straight up. They should slide out with ease.

Abschluss

To reassemble your device, follow these instructions in reverse order.

Cole Uhland

Mitglied seit: 09/30/13

216 Reputation

2 Anleitungen geschrieben

Team

Cal Poly, Team 14-8, Forte Fall 2013 Mitglied von Cal Poly, Team 14-8, Forte Fall 2013

CPSU-FORTE-F13S14G8

4 Mitglieder

8 Anleitungen geschrieben

0 Kommentare

Kommentar hinzufügen

Seitenaufrufe:

Letzte 24 Stunden: 0

Letzte 7 Tage: 0

Letzte 30 Tage: 3

Insgesamt: 522