Diese Version enthält möglicherweise inkorrekte Änderungen. Wechsle zur letzten geprüften Version.
Was du brauchst
-
Dieser Schritt ist noch nicht übersetzt. Hilf mit, ihn zu übersetzen!
-
Unscrew the only screw (5 mm) that is holding on the removable back panel and remove the back panel.
-
-
-
Dieser Schritt ist noch nicht übersetzt. Hilf mit, ihn zu übersetzen!
-
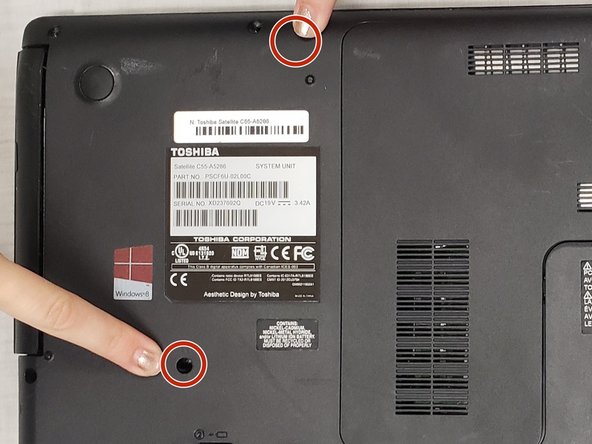
Remove the two 5-mm screws near the disk drive on the back panel. These two screws are above and below the manufacturer’s sticker.
-
-
Dieser Schritt ist noch nicht übersetzt. Hilf mit, ihn zu übersetzen!
-
Under the back panel, remove the 4-mm screw holding the disk drive in place.
-
-
Dieser Schritt ist noch nicht übersetzt. Hilf mit, ihn zu übersetzen!
-
Carefully slide the optical drive out of its place in the laptop.
-


Rückgängig: Ich habe diese Anleitung nicht absolviert.
2 weitere Nutzer:innen haben diese Anleitung absolviert.
Team

IUPUI, Team S1-G5, Hovde Fall 2018 Mitglied von IUPUI, Team S1-G5, Hovde Fall 2018
IUPUI-HOVDE-F18S1G5
2 Mitglieder
9 Anleitungen geschrieben
Ein Kommentar
Not a medium effort at all - very easy.
…although, I did have to use an iFixt It needle-nose tweezer to pull the middle 5mm screw out after it was unscrewed - it would not fall out nor did it cling to the screwdriver.