Zum Hauptinhalt wechseln

Toshiba Satellite L305D-S5895 Hard Drive Replacement

Was du brauchst

  1. Toshiba Satellite L305D-S5895 Hard Drive Replacement, Hard Drive: Schritt 1, Bild 1 von 2 Toshiba Satellite L305D-S5895 Hard Drive Replacement, Hard Drive: Schritt 1, Bild 2 von 2
    • Locate these two screws that you will need to remove.

    • Undo these two screws with the Phillips #0 Screwdriver.

  2. Toshiba Satellite L305D-S5895 Hard Drive Replacement: Schritt 2, Bild 1 von 2 Toshiba Satellite L305D-S5895 Hard Drive Replacement: Schritt 2, Bild 2 von 2
    • Use your finger to lift and remove the cover to the Hard Drive.

  3. Toshiba Satellite L305D-S5895 Hard Drive Replacement: Schritt 3, Bild 1 von 3 Toshiba Satellite L305D-S5895 Hard Drive Replacement: Schritt 3, Bild 2 von 3 Toshiba Satellite L305D-S5895 Hard Drive Replacement: Schritt 3, Bild 3 von 3
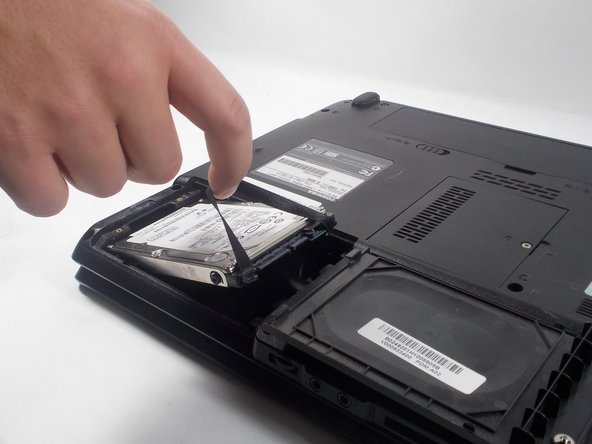
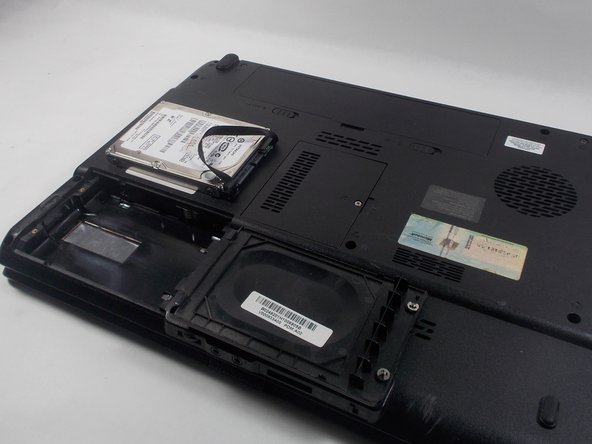
    • Pull the black ribbon back and up to remove the Hard Drive.

  4. Toshiba Satellite L305D-S5895 Hard Drive Replacement: Schritt 4, Bild 1 von 2 Toshiba Satellite L305D-S5895 Hard Drive Replacement: Schritt 4, Bild 2 von 2
    • Remove the cover to reveal the hard drive.

  5. Toshiba Satellite L305D-S5895 Hard Drive Replacement: Schritt 5, Bild 1 von 3 Toshiba Satellite L305D-S5895 Hard Drive Replacement: Schritt 5, Bild 2 von 3 Toshiba Satellite L305D-S5895 Hard Drive Replacement: Schritt 5, Bild 3 von 3
    • Pull out the hard drive using the ribbon attached to it.

Abschluss

To reassemble your device, follow these instructions in reverse order.

Team

UMass Dartmouth, Team 2-8, Isaacson Fall 2016 Mitglied von UMass Dartmouth, Team 2-8, Isaacson Fall 2016

UMASSD-ISAACSON-F16S2G8

3 Mitglieder

10 Anleitungen geschrieben

0 Kommentare

Kommentar hinzufügen

Seitenaufrufe:

Letzte 24 Stunden: 0

Letzte 7 Tage: 0

Letzte 30 Tage: 0

Insgesamt: 286