Zum Hauptinhalt wechseln

Toshiba Satellite L655D-S5095 Chat Camera and Microphone Daughter Board Replacement

Was du brauchst

  1. Toshiba Satellite L655D-S5095 Chat Camera and Microphone Daughter Board Replacement, Chat Camera and Microphone Daughter Board: Schritt 1, Bild 1 von 3 Toshiba Satellite L655D-S5095 Chat Camera and Microphone Daughter Board Replacement, Chat Camera and Microphone Daughter Board: Schritt 1, Bild 2 von 3 Toshiba Satellite L655D-S5095 Chat Camera and Microphone Daughter Board Replacement, Chat Camera and Microphone Daughter Board: Schritt 1, Bild 3 von 3
    • Using a plastic opening tool, remove the four plastic stickers located on the four corners of the LCD screen assembly. These plastic stickers are covering screws.

    • Use a Phillips #1 screwdriver to remove the now uncovered 5.75mm screws and place them to the side.

  2. Toshiba Satellite L655D-S5095 Chat Camera and Microphone Daughter Board Replacement: Schritt 2, Bild 1 von 2 Toshiba Satellite L655D-S5095 Chat Camera and Microphone Daughter Board Replacement: Schritt 2, Bild 2 von 2
    • With a plastic soft pry tool, open up the laptop display assembly by methodically prying from left to right. Be careful to not damage any internal circuitry.

    • Do not attempt to pry apart the bottom, the LCD assembly never gets fully disassembled in this tutorial.

  3. Toshiba Satellite L655D-S5095 Chat Camera and Microphone Daughter Board Replacement: Schritt 3, Bild 1 von 2 Toshiba Satellite L655D-S5095 Chat Camera and Microphone Daughter Board Replacement: Schritt 3, Bild 2 von 2
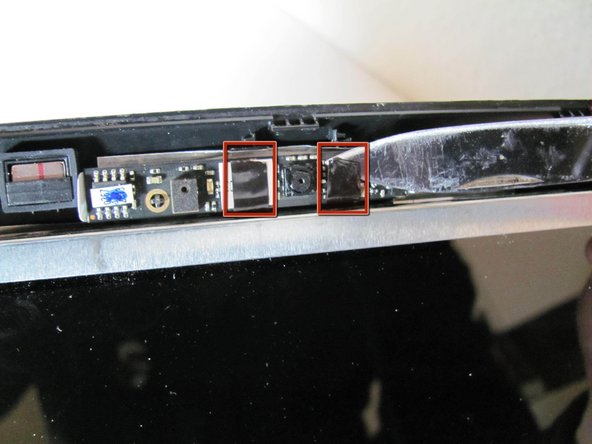
    • Remove the 2 pieces of black tape using a sharp tool to free the camera board, note that the camera board is still connected to a cable.

  4. Toshiba Satellite L655D-S5095 Chat Camera and Microphone Daughter Board Replacement: Schritt 4, Bild 1 von 2 Toshiba Satellite L655D-S5095 Chat Camera and Microphone Daughter Board Replacement: Schritt 4, Bild 2 von 2
    • Carefully disconnect the camera board from the laptop. We used tweezers.

Abschluss

To reassemble your device, follow these instructions in reverse order.

Ein:e weitere:r Nutzer:in hat diese Anleitung absolviert.

Robby

Mitglied seit: 02/04/13

52 Reputation

1 Anleitung geschrieben

Team

Cal Poly, Team 7-7, Maness Winter 2013 Mitglied von Cal Poly, Team 7-7, Maness Winter 2013

CPSU-MANESS-W13S7G7

5 Mitglieder

6 Anleitungen geschrieben

0 Kommentare

Kommentar hinzufügen

Seitenaufrufe:

Letzte 24 Stunden: 0

Letzte 7 Tage: 0

Letzte 30 Tage: 1

Insgesamt: 2,569