Zum Hauptinhalt wechseln

Toshiba Satellite L670 HDD replacement

Was du brauchst

  1. Toshiba Satellite L670 HDD replacement, Turn off the computer: Schritt 1, Bild 1 von 1
    • Turn off the computer and unplug the power from the computer.

  2. Toshiba Satellite L670 HDD replacement, Flip Laptop: Schritt 2, Bild 1 von 1
    • Turn the laptop upside down. Locate the two latches on either side of the battery.

    • Now the battery comes off.

  3. Toshiba Satellite L670 HDD replacement, Remove battery: Schritt 3, Bild 1 von 2 Toshiba Satellite L670 HDD replacement, Remove battery: Schritt 3, Bild 2 von 2
    • Remove the battery

  4. Toshiba Satellite L670 HDD replacement, Remove rear panel: Schritt 4, Bild 1 von 2 Toshiba Satellite L670 HDD replacement, Remove rear panel: Schritt 4, Bild 2 von 2
    • Remove the back plate

  5. Toshiba Satellite L670 HDD replacement, Remove the HDD: Schritt 5, Bild 1 von 2 Toshiba Satellite L670 HDD replacement, Remove the HDD: Schritt 5, Bild 2 von 2
    • Pull the HDD to the left using the silver tab.

    • Pull up on the silver tab and remove the hard drive from the slot.

  6. Toshiba Satellite L670 HDD replacement, Unscrew the HDD cover: Schritt 6, Bild 1 von 2 Toshiba Satellite L670 HDD replacement, Unscrew the HDD cover: Schritt 6, Bild 2 von 2
    • Remove the 4 screws from the hard drive.

  7. Toshiba Satellite L670 HDD replacement, Insert your new SSD in the case: Schritt 7, Bild 1 von 3 Toshiba Satellite L670 HDD replacement, Insert your new SSD in the case: Schritt 7, Bild 2 von 3 Toshiba Satellite L670 HDD replacement, Insert your new SSD in the case: Schritt 7, Bild 3 von 3
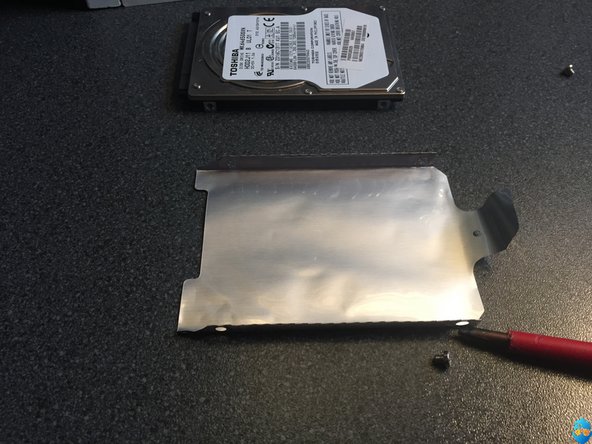
    • Take your new SSD hard drive.

    • Place the SSD in the silver case.

    • Place back the 4 screws you just removed.

  8. Toshiba Satellite L670 HDD replacement, Insert SSD: Schritt 8, Bild 1 von 2 Toshiba Satellite L670 HDD replacement, Insert SSD: Schritt 8, Bild 2 von 2
    • Insert the SSD into the laptop.

    • Slide the SSD to the right into the socket.

  9. Toshiba Satellite L670 HDD replacement, Place back panel + battery: Schritt 9, Bild 1 von 1
    • Replace the back panel and screw it in place.

    • Put the battery back in, you will hear a click once it falls into place.

Abschluss

To reassemble the device, follow these instructions in reverse order.

Besonderer Dank geht an diese Übersetzer:innen:

nl en

100%

Diese Übersetzer:innen helfen uns, die Welt zu reparieren! Wie kann ich mithelfen?
Hier starten ›

levi lenaers

Mitglied seit: 09/24/16

169 Reputation

1 Anleitung geschrieben

0 Kommentare

Kommentar hinzufügen

Seitenaufrufe:

Letzte 24 Stunden: 1

Letzte 7 Tage: 7

Letzte 30 Tage: 44

Insgesamt: 1,127