Diese Anleitung enthält neuere Änderungen. Wechsel zur neuesten unüberprüften Version.
Einleitung
If your keyboard is malfunctioning and you want to replace it, or you need to take it out to get to a part underneath it, then use this guide to learn how to do so.
Was du brauchst
-
-
Flip the laptop over so the bottom is facing upward and the battery is on top.
-
Slide the tab below the battery to the left.
-
-
-
Slide and hold the tab on the right side of the battery to the right.
-
While holding the right tab, slide the battery upward and out its socket.
-
-
-
-
Place the head of a plastic opening tool underneath the plastic strip lining the top of the keyboard, right above the "PGUP" button.
-
Next, pull the strip up using a plastic opening tool with a light force, until it pops off.
-
-
-
Lightly lift from the side that was popped up earlier in order to pop the rest of the strip off of the laptop.
-
-
-
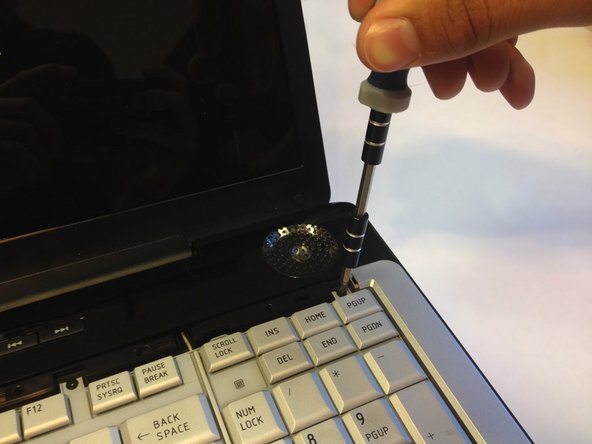
Use a #1 Phillips screwdriver to take out the four 4mm Phillips #1 screws that were underneath the plastic strip.
-
-
-
Lightly lift up on the keyboard from one of its top corners and pull it towards the screen so you can safely remove the ribbon cable.
-
At the base of the ribbon cable, there is a tiny tab that runs across the width of the connector. Flip it up. You can now pull the ribbon cable free with no resistance towards the monitor.
-
With the cable unplugged, the keyboard can be lifted away from the laptop.
-


To reassemble your device, follow these instructions in reverse order.
To reassemble your device, follow these instructions in reverse order.
Team

Cal Poly, Team 2-8, Amido Winter 2014 Mitglied von Cal Poly, Team 2-8, Amido Winter 2014
CPSU-AMIDO-W14S2G8
4 Mitglieder
7 Anleitungen geschrieben