Einleitung
If your Toshiba Satellite S55t-C5225 is experiencing quality errors in the screen or visible damage then the screen might need to be replaced. This replacement guide should be followed if you are experiencing the problems mentioned above.
Was du brauchst
-
-
Carefully remove the battery by wedging a plastic opening tool in-between the battery and back cover.
-
-
-
Remove the eleven 7.0 mm Phillips #0 screws that secure the back cover.
-
-
-
Wedge the tip of a plastic opening tool between the back cover and metal frame.
-
Twist the plastic tool, while wedged, to release the retaining tabs from the frame.
-
Repeat these steps around the laptop to release all retaining tabs.
-
-
-
-
Disconnect the power button strip by flipping up the white plastic clamp that connects it to the motherboard.
-
Pull the ribbon wire out from plastic clamp.
-
-
-
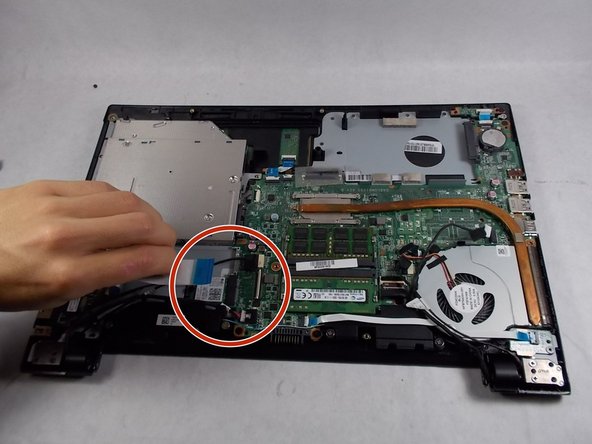
Follow the black wire that connects the speakers to the motherboard.
-
Pull the wire out from its socket to disconnect the speakers from the motherboard.
-
-
-
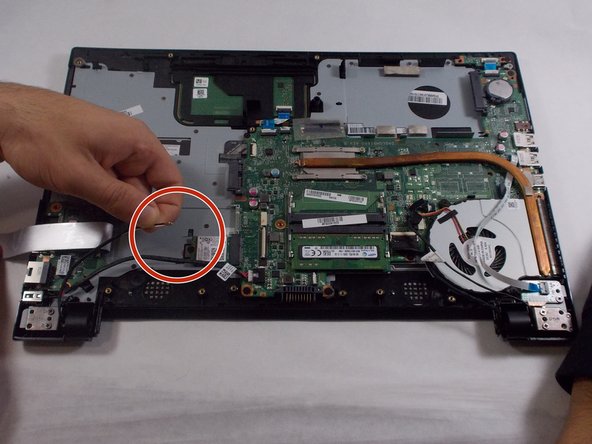
Disconnect LAN from the motherboard power wire. Pop up the white clamp that holds it in place, then pull the wire out.
-
-
-
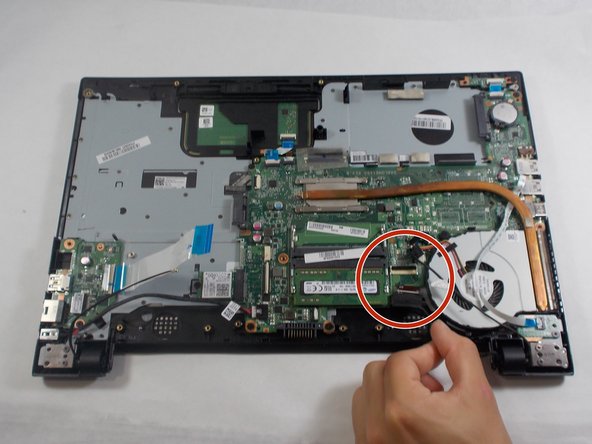
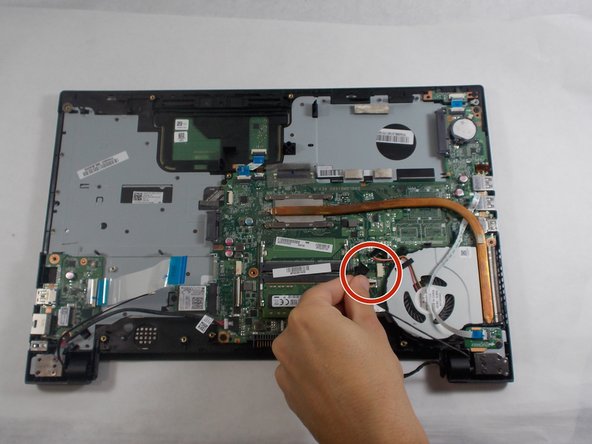
Disconnect all remaining cables that connect the screen assembly to the motherboard.
-
-
-
Disconnect all remaining cables that connect the screen assembly to the motherboard.
-
-
-
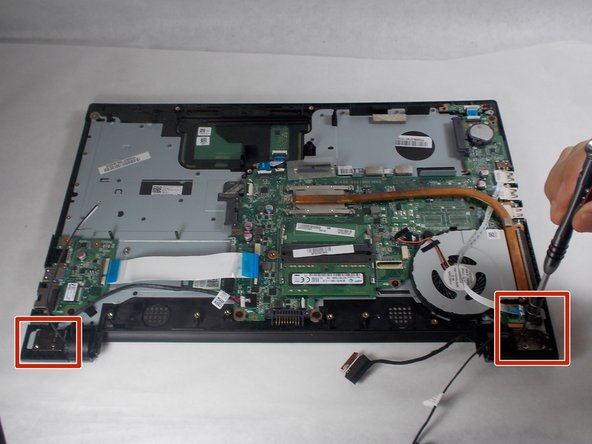
Remove the four 7.0 mm Phillips #0 screws on both ends of the laptop that attach the screen assembly to the laptop.
-
-
-
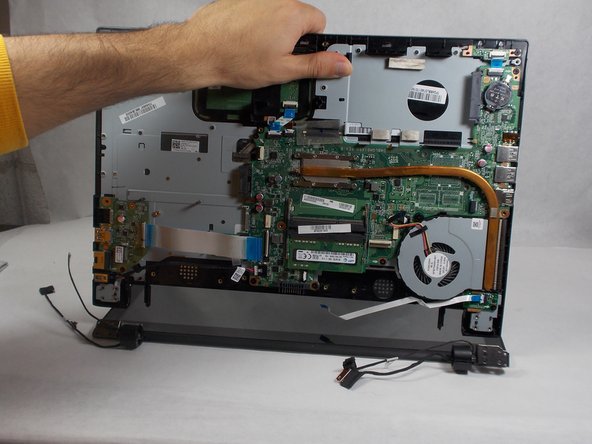
Slowly open laptop while the bottom is facing up. Begin to separate the bottom of laptop from the screen assembly brackets.
-
Remove the screen assembly.
-


To reassemble your device, follow these instructions in reverse order.
To reassemble your device, follow these instructions in reverse order.
Rückgängig: Ich habe diese Anleitung nicht absolviert.
Eine weitere Person hat diese Anleitung absolviert.
Team

UMass Dartmouth, Team S1-G5, Botvin Fall 2019 Mitglied von UMass Dartmouth, Team S1-G5, Botvin Fall 2019
UMASSD-BOTVIN-F19S1G5
3 Mitglieder
15 Anleitungen geschrieben