Diese Version enthält möglicherweise inkorrekte Änderungen. Wechsle zur letzten geprüften Version.
Was du brauchst
-
Dieser Schritt ist noch nicht übersetzt. Hilf mit, ihn zu übersetzen!
-
Facing your bike, straddle your front wheel between your knees.
-
Locate the front brake at the top of the fork. It will more than likely look like the picture on your left.
-
Since the tire is normally wider than the space between the brake pads, you must first release the tension in the brake wire. To do this, run your right hand under both brake calipers and push them inwards towards one another.
-
-
Dieser Schritt ist noch nicht übersetzt. Hilf mit, ihn zu übersetzen!
-
With the brake wire sufficiently loosened, unhook the metal tube that contains the brake wire (called the noodle) from the brake wire holder using your left hand.
-
The brake will now be open wide enough to permit removal of the wheel.
-
-
Dieser Schritt ist noch nicht übersetzt. Hilf mit, ihn zu übersetzen!
-
Find the quick release lever on the outside of the bike's fork on the right hand side. Flip the lever down and turn the lever counter clockwise, loosening the lever until it comes off.
-
-
Dieser Schritt ist noch nicht übersetzt. Hilf mit, ihn zu übersetzen!
-
After the quick release lever is removed, the wheel can be separated from the front fork.
-
-
Dieser Schritt ist noch nicht übersetzt. Hilf mit, ihn zu übersetzen!
-
In reassembling the wheel to the bike, perform the steps in reverse order.
-
With the axle all the way into the fork slots, tighten the quick release lever into the fork end securely. It should take a modest amount of force applied to tighten the axle to the fork.
-
Squeeze the brake calipers together and return the cable noodle back into the holder.
-
Make sure you go back, and check to make sure its snug so that the wheel has no way of coming back off.
-
-
-
Dieser Schritt ist noch nicht übersetzt. Hilf mit, ihn zu übersetzen!
-
Locate the valve stem and remove the valve stem cap if one is present.
-
-
Dieser Schritt ist noch nicht übersetzt. Hilf mit, ihn zu übersetzen!
-
Begin releasing tire air pressure by pressing down on the small rod in the center of the valve stem. A hissing sound will indicated that air is leaving the tire.
-
Continue to release air until the tire becomes soft and flexible. The hissing sound should become quiet or stop altogether.
-
-
Dieser Schritt ist noch nicht übersetzt. Hilf mit, ihn zu übersetzen!
-
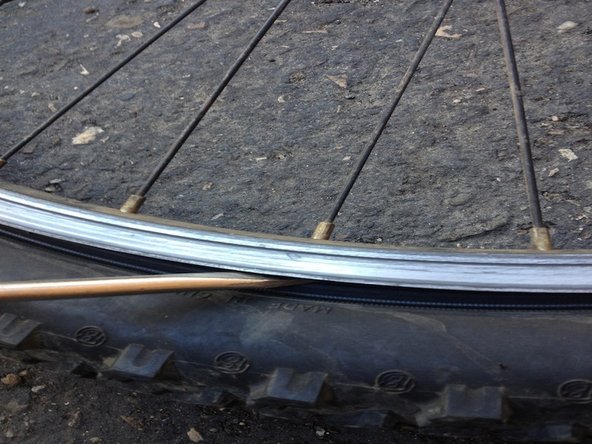
Insert the flathead screwdriver, or another sturdy, long object, between the edge of the tire and the wheel rim.
-
Work the edge of the tire out of the wheel rim using a screwdriver, pulling the edge of the tire away from the center of the wheel and out of the rim.
-
-
Dieser Schritt ist noch nicht übersetzt. Hilf mit, ihn zu übersetzen!
-
Continue around the wheel rim until the whole tire is free from the rim. Now you may separate the tire from the wheel.
-
-
Dieser Schritt ist noch nicht übersetzt. Hilf mit, ihn zu übersetzen!
-
Remove the inner tube from the tire by simply pulling it from the tire carcass.
-
-
Dieser Schritt ist noch nicht übersetzt. Hilf mit, ihn zu übersetzen!
-
Slowly peel back the layer of rubber that covers the 32 screws on the wheel.
-
-
Dieser Schritt ist noch nicht übersetzt. Hilf mit, ihn zu übersetzen!
-
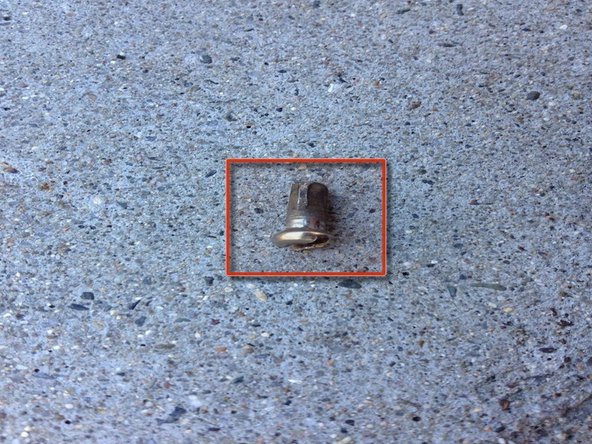
Remove the screw using the flathead screwdriver.
-
-
Dieser Schritt ist noch nicht übersetzt. Hilf mit, ihn zu übersetzen!
-
Once a screw is removed, if that spoke did not fall out, gently remove it from the wheel.
-
Maneuver the spoke so that it is perpendicular to the plane of the wheel, then slide the spoke out.
-
-
Dieser Schritt ist noch nicht übersetzt. Hilf mit, ihn zu übersetzen!
-
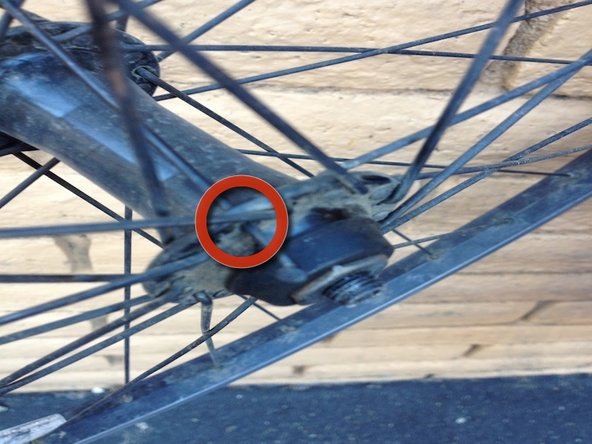
Insert the new spoke into the empty hole on the hub.
-
-
Dieser Schritt ist noch nicht übersetzt. Hilf mit, ihn zu übersetzen!
-
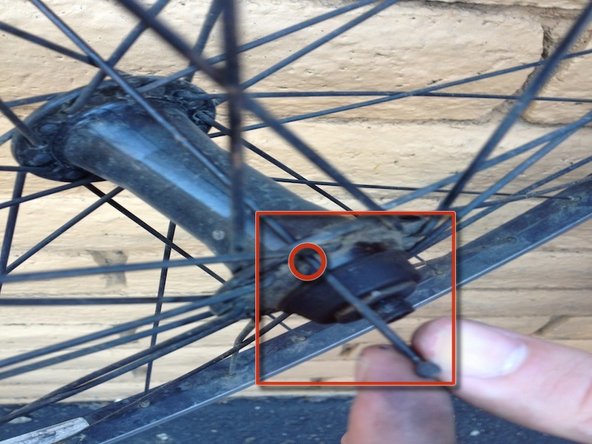
Use the flathead screwdriver with the screw removed in step #12 to attach the spoke to the wheel, securing it in place.
-


Rückgängig: Ich habe diese Anleitung nicht absolviert.
Ein:e weitere:r Nutzer:in hat diese Anleitung absolviert.
Team

Cal Poly, Team 1-1, Propen Fall 2012 Mitglied von Cal Poly, Team 1-1, Propen Fall 2012
CPSU-PROPEN-F12S1G1
5 Mitglieder
9 Anleitungen geschrieben