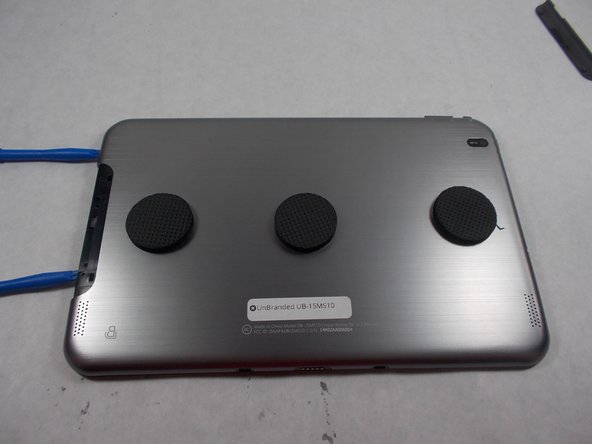
Zum Hauptinhalt wechseln

Unbranded UB-15MS10 Motherboard Replacement

Was du brauchst

  1. Unbranded UB-15MS10 Motherboard Replacement, Motherboard: Schritt 1, Bild 1 von 3 Unbranded UB-15MS10 Motherboard Replacement, Motherboard: Schritt 1, Bild 2 von 3 Unbranded UB-15MS10 Motherboard Replacement, Motherboard: Schritt 1, Bild 3 von 3
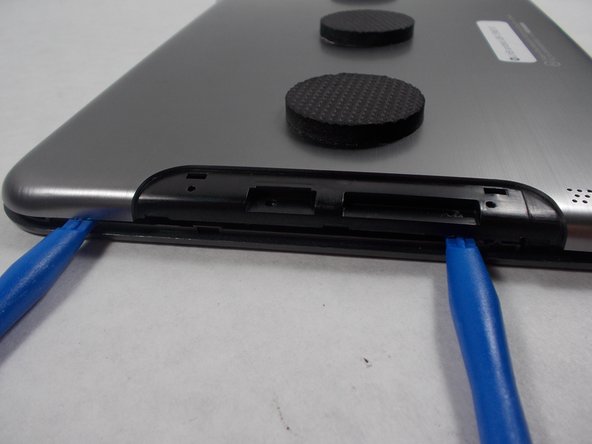
    • Use an opening tool to pry off the memory card door located on the back of the tablet.

  2. Unbranded UB-15MS10 Motherboard Replacement: Schritt 2, Bild 1 von 1
    • Remove the two 1.2mm screws found under the memory card door.

  3. Unbranded UB-15MS10 Motherboard Replacement: Schritt 3, Bild 1 von 3 Unbranded UB-15MS10 Motherboard Replacement: Schritt 3, Bild 2 von 3 Unbranded UB-15MS10 Motherboard Replacement: Schritt 3, Bild 3 von 3
    • Pry around the outside carefully using the black spudger to get in.

    • Putting many opening tools around the edge helps keep it from sealing shut again.

  4. Unbranded UB-15MS10 Motherboard Replacement: Schritt 4, Bild 1 von 2 Unbranded UB-15MS10 Motherboard Replacement: Schritt 4, Bild 2 von 2
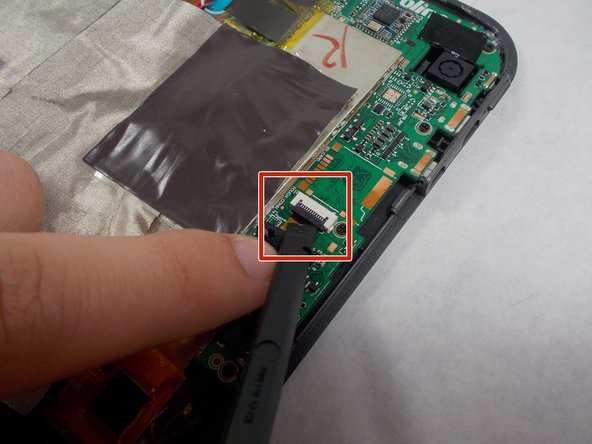
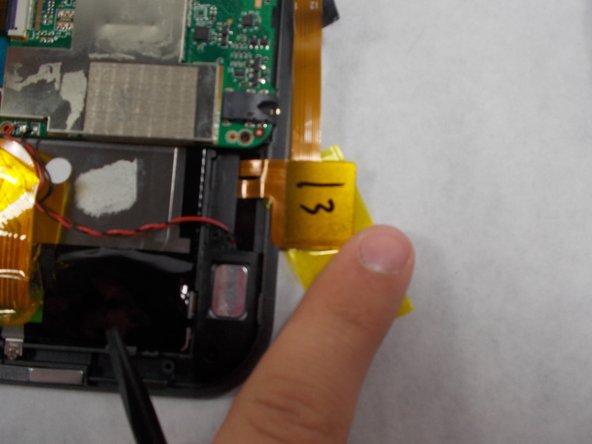
    • Remove the ribbon cable by using the black spudger to release the tab and carefully pull out the ribbon cable.

  5. Unbranded UB-15MS10 Motherboard Replacement: Schritt 5, Bild 1 von 3 Unbranded UB-15MS10 Motherboard Replacement: Schritt 5, Bild 2 von 3 Unbranded UB-15MS10 Motherboard Replacement: Schritt 5, Bild 3 von 3
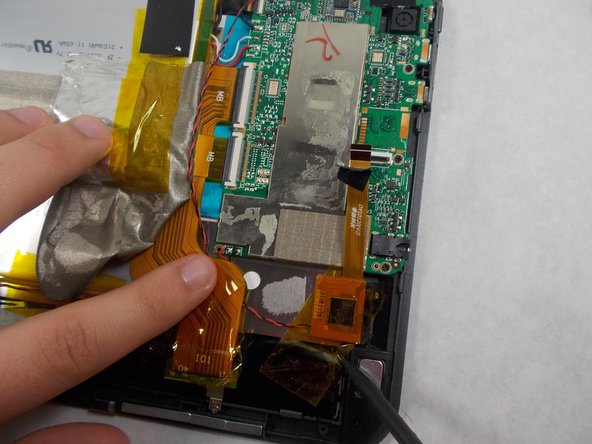
    • Peel up the grey tape so that you can get to the board and untape the ribbon cable that was removed from the motherboard in the previous step.

  6. Unbranded UB-15MS10 Motherboard Replacement: Schritt 6, Bild 1 von 2 Unbranded UB-15MS10 Motherboard Replacement: Schritt 6, Bild 2 von 2
    • Remove the five 1.2mm screws from the board.

  7. Unbranded UB-15MS10 Motherboard Replacement: Schritt 7, Bild 1 von 1
    • Use an opening tool to remove the board from the case.

  8. Unbranded UB-15MS10 Motherboard Replacement: Schritt 8, Bild 1 von 2 Unbranded UB-15MS10 Motherboard Replacement: Schritt 8, Bild 2 von 2
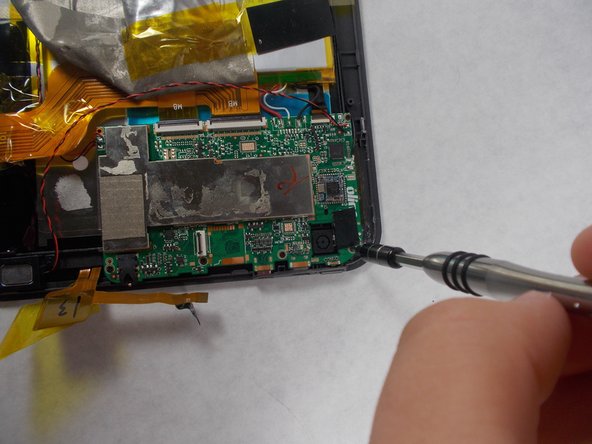
    • Detach the three ribbon cables using a spudger

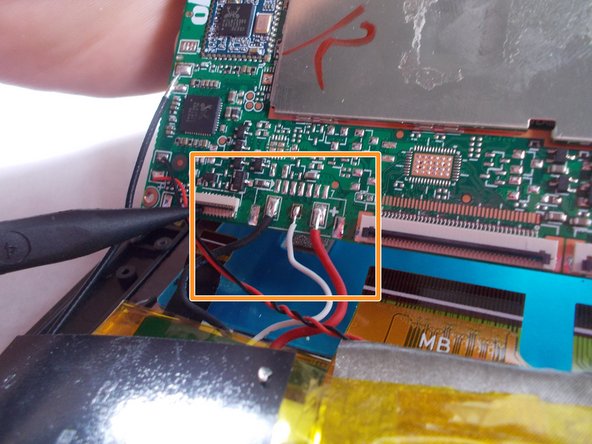
    • Desolder the black, white, and red wires.

  9. Unbranded UB-15MS10 Motherboard Replacement: Schritt 9, Bild 1 von 1
    • Unscrew the two 1.2mm screws from the speaker.

    • These screws are wired to the motherboard.

  10. Unbranded UB-15MS10 Motherboard Replacement: Schritt 10, Bild 1 von 1
    • Unscrew the two 1.2mm screws of the other speaker.

    • These screws are also wired to the motherboard.

  11. Unbranded UB-15MS10 Motherboard Replacement: Schritt 11, Bild 1 von 1
    • Remove the old motherboard from the tablet.

    • Take the new motherboard and solder the black wire of the board to the black wire of the battery.

    • Do the same for the white and red wires.

Abschluss

To reassemble your device, follow steps 1-10 in reverse order.

Ein:e weitere:r Nutzer:in hat diese Anleitung absolviert.

Matthew Sylvia

Mitglied seit: 03/08/17

280 Reputation

2 Anleitungen geschrieben

Team

UMass Dartmouth, Team S5-G5, Botvin Spring 2017 Mitglied von UMass Dartmouth, Team S5-G5, Botvin Spring 2017

UMASSD-BOTVIN-S17S5G5

3 Mitglieder

4 Anleitungen geschrieben

Ein Kommentar

Please where can I get the motherboard or charging IC of UB15MS10

Ayo Olowo - Antwort

Kommentar hinzufügen

Seitenaufrufe:

Letzte 24 Stunden: 1

Letzte 7 Tage: 5

Letzte 30 Tage: 18

Insgesamt: 1,155