Zum Hauptinhalt wechseln

Uniden UTAB71 Screen Replacement

Was du brauchst

  1. Uniden UTAB71 Screen Replacement, Screen: Schritt 1, Bild 1 von 2 Uniden UTAB71 Screen Replacement, Screen: Schritt 1, Bild 2 von 2
    • Use a pry tool to undo the clips that attach the two halves of the tablet.

    • Make sure to be gentle with the pry tool and work your way around the edges of the tablet slowly.

    • Make sure the tablet is powered off before prying open.

    • There are two power ribbons connecting the screen to the back of the tablet. Make sure not to put too much stress on them.

  2. Uniden UTAB71 Screen Replacement: Schritt 2, Bild 1 von 2 Uniden UTAB71 Screen Replacement: Schritt 2, Bild 2 von 2
    • Lift off the black clip connecting the first power ribbon to the motherboard

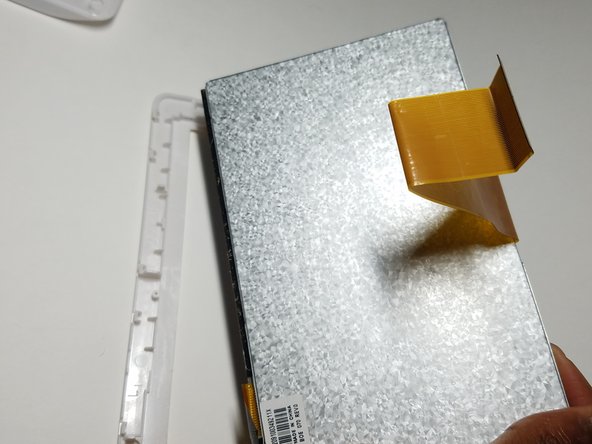
    • Undo the clips off the second power ribbon connecting the screen to the motherboard.

  3. Uniden UTAB71 Screen Replacement: Schritt 3, Bild 1 von 3 Uniden UTAB71 Screen Replacement: Schritt 3, Bild 2 von 3 Uniden UTAB71 Screen Replacement: Schritt 3, Bild 3 von 3
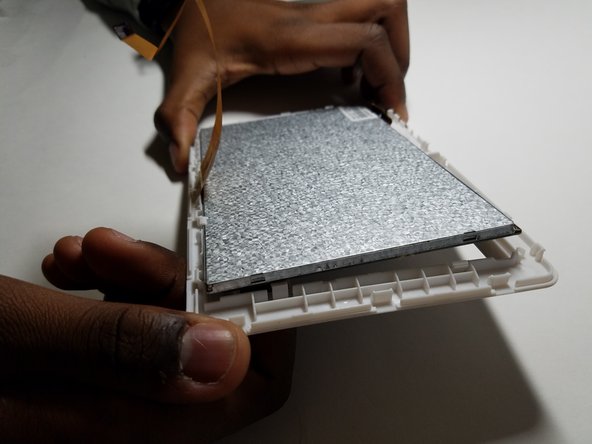
    • Slowly remove the screen component off the tablet by clipping the screen from the tablet outine

    • Do not apply too much pressure on the tablet casing.

Abschluss

To reassemble your device, follow these instructions in reverse order.

Ein:e weitere:r Nutzer:in hat diese Anleitung absolviert.

Ryan Jewell

Mitglied seit: 10/20/16

422 Reputation

4 Anleitungen geschrieben

Team

UMass Dartmouth, Team 5-4, Martin Fall 2016 Mitglied von UMass Dartmouth, Team 5-4, Martin Fall 2016

UMASSD-MARTIN-F16S5G4

3 Mitglieder

8 Anleitungen geschrieben

0 Kommentare

Kommentar hinzufügen

Seitenaufrufe:

Letzte 24 Stunden: 0

Letzte 7 Tage: 0

Letzte 30 Tage: 0

Insgesamt: 333