Zum Hauptinhalt wechseln

Unnecto Drone M Headphone Jack Replacement

Was du brauchst

  1. Unnecto Drone M Headphone Jack Replacement, Unnecto Drone M Disassembly: Schritt 1, Bild 1 von 2 Unnecto Drone M Headphone Jack Replacement, Unnecto Drone M Disassembly: Schritt 1, Bild 2 von 2
    • Place the phone facedown on a cleared work area

    • Remove the back case by applying moderate force to the indentation in the lower left corner of the case.

  2. Unnecto Drone M Headphone Jack Replacement: Schritt 2, Bild 1 von 1
    • Grip the top right corner of the battery.

    • Remove the battery by pulling it outwards.

  3. Unnecto Drone M Headphone Jack Replacement: Schritt 3, Bild 1 von 1
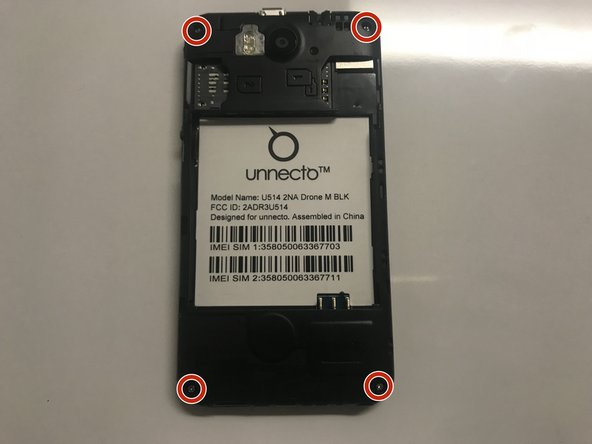
    • Remove the four screws on the back of the phone using a Philips 000 screwdriver

  4. Unnecto Drone M Headphone Jack Replacement: Schritt 4, Bild 1 von 1
    • Separate the frame evenly using a plastic opening tool.

    • Be careful, as the frame is thin and can break easily.

  5. Unnecto Drone M Headphone Jack Replacement: Schritt 5, Bild 1 von 2 Unnecto Drone M Headphone Jack Replacement: Schritt 5, Bild 2 von 2
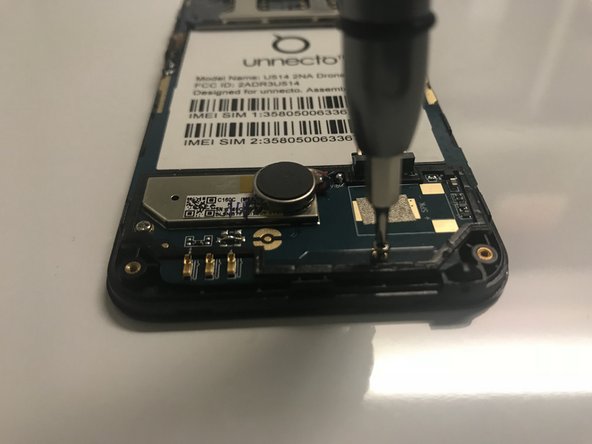
    • Use a Phillips #000 screwdriver to remove the four screws that secure the motherboard.

  6. Unnecto Drone M Headphone Jack Replacement: Schritt 6, Bild 1 von 1
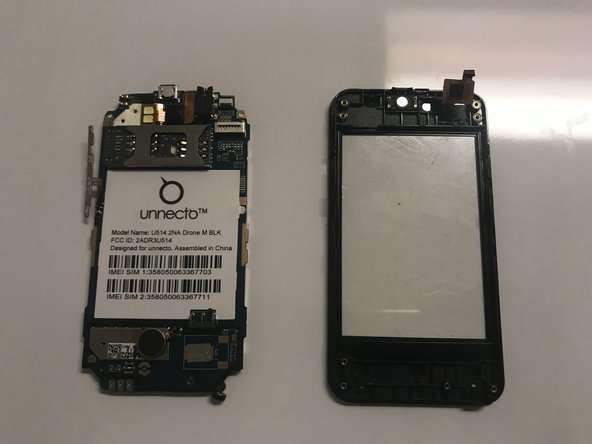
    • Disconnect the ribbon cable from the motherboard using rounded, spade-tipped tweezers.

  7. Unnecto Drone M Headphone Jack Replacement: Schritt 7, Bild 1 von 1
    • Peel the white circuit on left side of the frame by inserting fine-tipped tweezers between it and the frame.

    • The white circuit is flimsy and securely glued to the frame.

  8. Unnecto Drone M Headphone Jack Replacement: Schritt 8, Bild 1 von 2 Unnecto Drone M Headphone Jack Replacement: Schritt 8, Bild 2 von 2
    • Set aside the circuit board from the screen protector.

  9. Unnecto Drone M Headphone Jack Replacement, Headphone Jack: Schritt 9, Bild 1 von 3 Unnecto Drone M Headphone Jack Replacement, Headphone Jack: Schritt 9, Bild 2 von 3 Unnecto Drone M Headphone Jack Replacement, Headphone Jack: Schritt 9, Bild 3 von 3
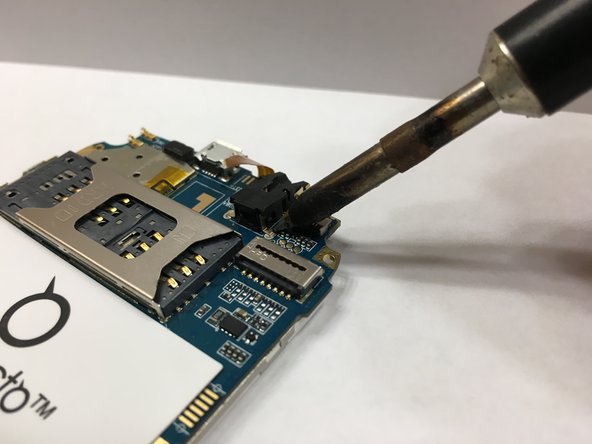
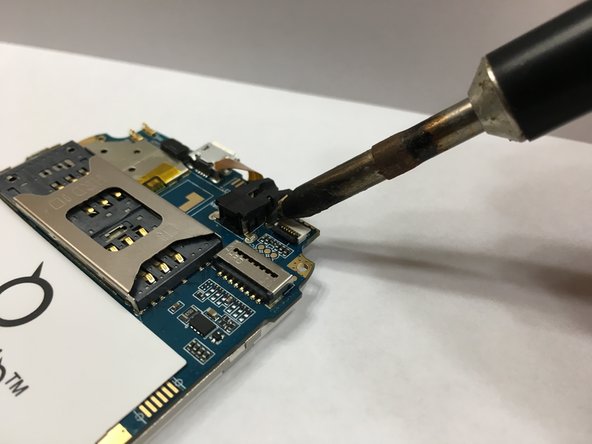
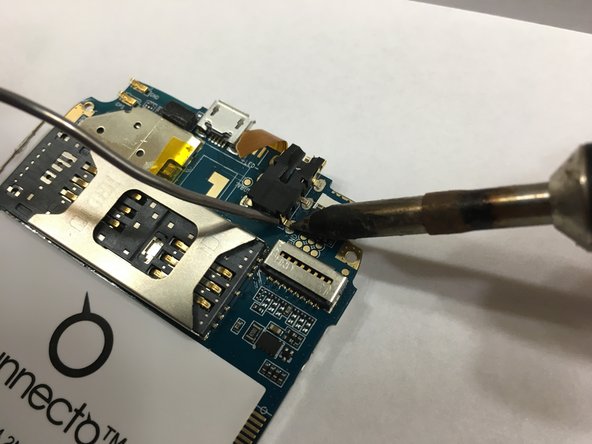
    • Desolder the headphone jack using a soldering iron on each of the 6 points holding it down.

    • Be careful to not damage the circuit board.

  10. Unnecto Drone M Headphone Jack Replacement: Schritt 10, Bild 1 von 2 Unnecto Drone M Headphone Jack Replacement: Schritt 10, Bild 2 von 2
    • Solder on a new headphone jack.

  11. Unnecto Drone M Headphone Jack Replacement: Schritt 11, Bild 1 von 1
    • Make sure the new jack is aligned properly and securely soldered to the circuit board.

Abschluss

To reassemble your device, follow these instructions in reverse order.

0 Kommentare

Kommentar hinzufügen

Seitenaufrufe:

Letzte 24 Stunden: 0

Letzte 7 Tage: 0

Letzte 30 Tage: 0

Insgesamt: 169