Zum Hauptinhalt wechseln

Upgrading the SSD

Archivierte Anleitung
Diese Anleitung wurde ausschließlich für historische Zwecke erhalten. Verwende die aktualisierte Version dieser Anleitung, um deine Reparatur durchzuführen.

Was du brauchst

  1. Upgrading the SSD, Battery: Schritt 1, Bild 1 von 3 Upgrading the SSD, Battery: Schritt 1, Bild 2 von 3 Upgrading the SSD, Battery: Schritt 1, Bild 3 von 3
    • Open the latch on the right side that secures the battery in place.

    • Open the latch on the left side that secures the battery in place.

    • Now remove the battery.

  2. Upgrading the SSD, Main access cover: Schritt 2, Bild 1 von 3 Upgrading the SSD, Main access cover: Schritt 2, Bild 2 von 3 Upgrading the SSD, Main access cover: Schritt 2, Bild 3 von 3
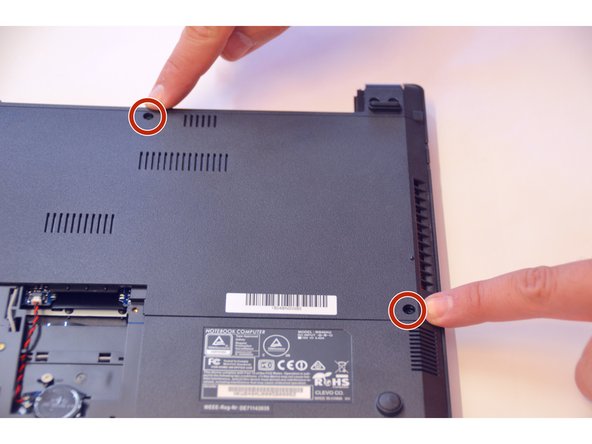
    • Using a Philips-head screwdriver remove highlighted screws.

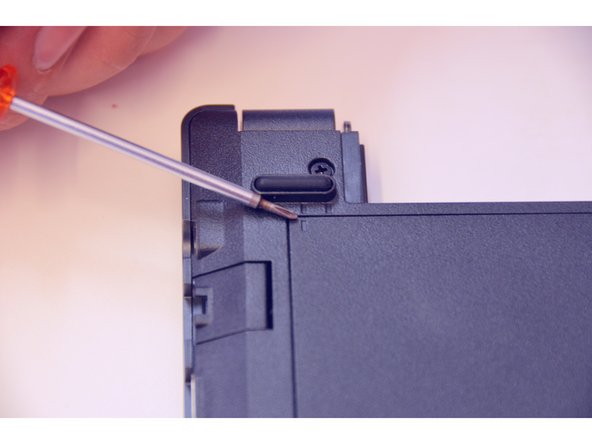
    • Look at the marking to see how to remove the access cover.

    • Remove the access cover as shown by the marker.

  3. Upgrading the SSD: Schritt 3, Bild 1 von 1
    • You now have access to all components of this laptop.

  4. Upgrading the SSD, PCIe SSD: Schritt 4, Bild 1 von 3 Upgrading the SSD, PCIe SSD: Schritt 4, Bild 2 von 3 Upgrading the SSD, PCIe SSD: Schritt 4, Bild 3 von 3
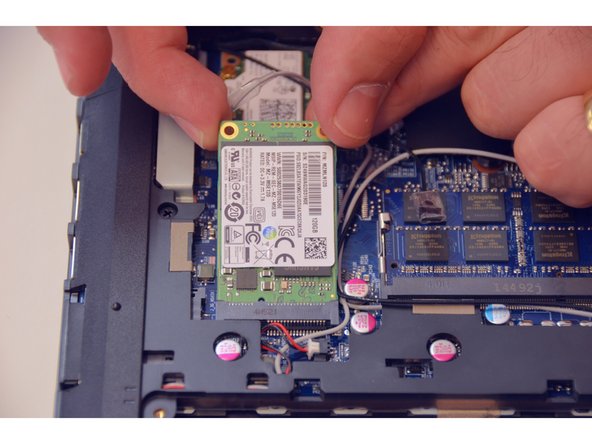
    • This is where you'll find the PCIe SSD.

    • Remove the fastening screw with the Philips-head screwdriver.

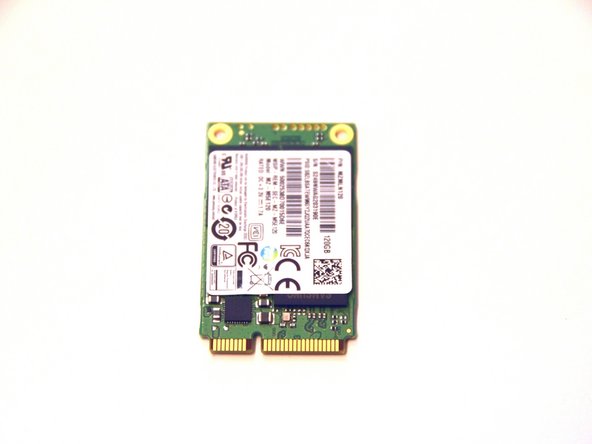
    • Remove the PCIe SSD.

  5. Upgrading the SSD: Schritt 5, Bild 1 von 1
    • This is what the PCIe SSD looks like.

Abschluss

To put the device back together, follow the steps in reverse order.

Besonderer Dank geht an diese Übersetzer:innen:

de en

100%

Alex Niculescu hilft uns, die Welt in Ordnung zu bringen! Wie kann ich mithelfen?
Hier starten ›

Felice Suglia

Mitglied seit: 06/15/13

31.100 Reputation

264 Anleitungen geschrieben

0 Kommentare

Kommentar hinzufügen

Seitenaufrufe:

Letzte 24 Stunden: 0

Letzte 7 Tage: 6

Letzte 30 Tage: 9

Insgesamt: 212