Zum Hauptinhalt wechseln

VENSTAR Taco Microphone Replacement Replacement

Was du brauchst

  1. VENSTAR Taco Microphone Replacement Replacement, VENSTAR Taco Disassembly: Schritt 1, Bild 1 von 3 VENSTAR Taco Microphone Replacement Replacement, VENSTAR Taco Disassembly: Schritt 1, Bild 2 von 3 VENSTAR Taco Microphone Replacement Replacement, VENSTAR Taco Disassembly: Schritt 1, Bild 3 von 3
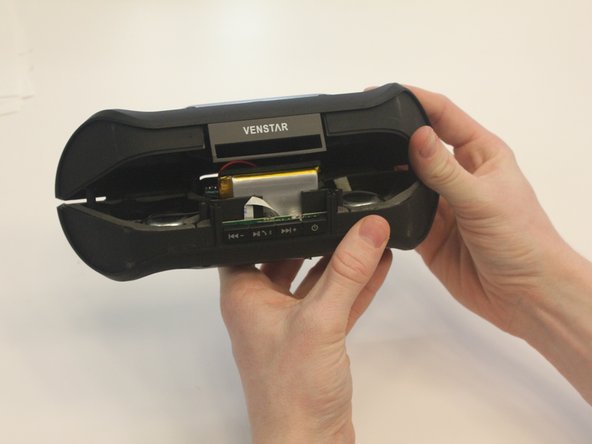
    • Starting with the Taco on its side, use the plastic opening tool to pop off the outer casing near the base.

    • The base labeled "VENSTAR TACO" is glued. Be careful separating the two sides of the device.

  2. VENSTAR Taco Microphone Replacement Replacement: Schritt 2, Bild 1 von 2 VENSTAR Taco Microphone Replacement Replacement: Schritt 2, Bild 2 von 2
    • Repeat the previous step on the opposite side to remove the other outer casing.

  3. VENSTAR Taco Microphone Replacement Replacement: Schritt 3, Bild 1 von 2 VENSTAR Taco Microphone Replacement Replacement: Schritt 3, Bild 2 von 2
    In diesem Schritt verwendetes Werkzeug:
    Phillips #0 Screwdriver
    $5.49
    Kaufen
    • Using a Phillips PH0 3 mm-bit screwdriver, remove the six screws on the inner layer of the Taco.

    • The screws are small and can get stuck. Use tweezers to pull them out if you are having trouble.

  4. VENSTAR Taco Microphone Replacement Replacement: Schritt 4, Bild 1 von 2 VENSTAR Taco Microphone Replacement Replacement: Schritt 4, Bild 2 von 2
    • From the same side you just unscrewed, use a plastic opening tool to unwedge the inner cover on both sides of the base.

  5. VENSTAR Taco Microphone Replacement Replacement: Schritt 5, Bild 1 von 2 VENSTAR Taco Microphone Replacement Replacement: Schritt 5, Bild 2 von 2
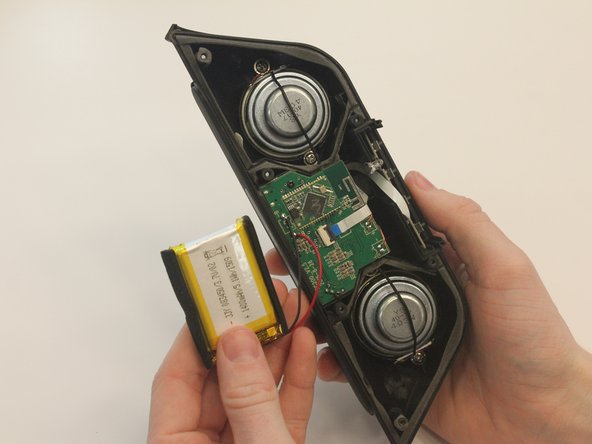
    • Slide off the inner cover. It pulls apart and is held on by a small amount of glue.

  6. VENSTAR Taco Microphone Replacement Replacement, Logic Board Replacement: Schritt 6, Bild 1 von 1
    • Remove the rubber covering from the buttons.

  7. VENSTAR Taco Microphone Replacement Replacement: Schritt 7, Bild 1 von 3 VENSTAR Taco Microphone Replacement Replacement: Schritt 7, Bild 2 von 3 VENSTAR Taco Microphone Replacement Replacement: Schritt 7, Bild 3 von 3
    • Remove the black fabric covering the logic board.

  8. VENSTAR Taco Microphone Replacement Replacement: Schritt 8, Bild 1 von 2 VENSTAR Taco Microphone Replacement Replacement: Schritt 8, Bild 2 von 2
    • Move the battery out of the way of the connector.

  9. VENSTAR Taco Microphone Replacement Replacement: Schritt 9, Bild 1 von 2 VENSTAR Taco Microphone Replacement Replacement: Schritt 9, Bild 2 von 2
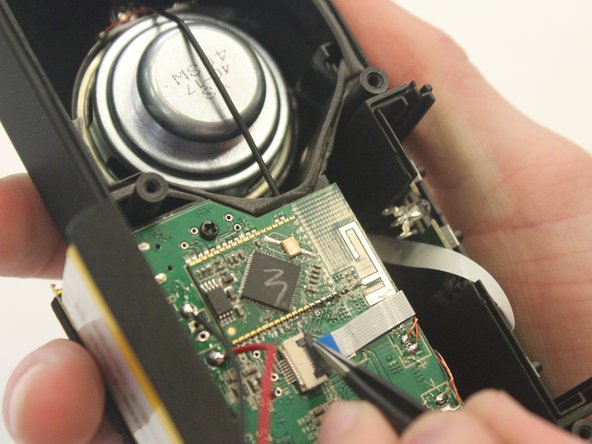
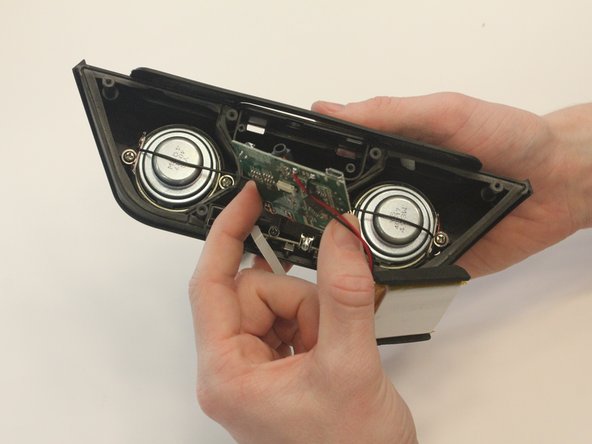
    • Undo the connector of the flat white ribbon between the switches and the logic board.

  10. VENSTAR Taco Microphone Replacement Replacement: Schritt 10, Bild 1 von 1
    • Undo the two black 3mm screws on the logic board using the PH0 screwdriver.

  11. VENSTAR Taco Microphone Replacement Replacement: Schritt 11, Bild 1 von 3 VENSTAR Taco Microphone Replacement Replacement: Schritt 11, Bild 2 von 3 VENSTAR Taco Microphone Replacement Replacement: Schritt 11, Bild 3 von 3
    • Gently pull out the logic board.

    • Note that the battery and the logic board are connected and must be removed together.

  12. VENSTAR Taco Microphone Replacement Replacement, Microphone Replacement: Schritt 12, Bild 1 von 2 VENSTAR Taco Microphone Replacement Replacement, Microphone Replacement: Schritt 12, Bild 2 von 2
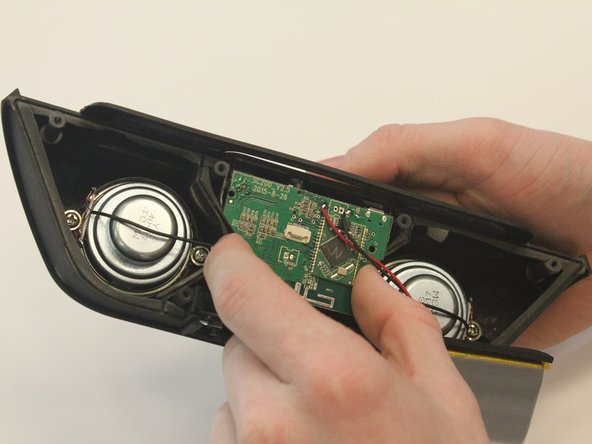
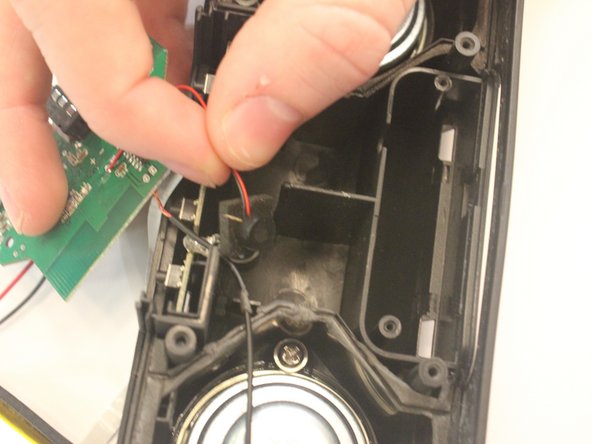
    • Below the logic board, the small black microphone is resting within the case.

Abschluss

To reassemble your device, follow these instructions in reverse order.

Eine weitere Person hat diese Anleitung absolviert.

0 Kommentare

Kommentar hinzufügen

Seitenaufrufe:

Letzte 24 Stunden: 1

Letzte 7 Tage: 1

Letzte 30 Tage: 5

Insgesamt: 202