Diese Version enthält möglicherweise inkorrekte Änderungen. Wechsle zur letzten geprüften Version.
Was du brauchst
-
Dieser Schritt ist noch nicht übersetzt. Hilf mit, ihn zu übersetzen!
-
Flip the device so that the bottom is facing up.
-
-
Dieser Schritt ist noch nicht übersetzt. Hilf mit, ihn zu übersetzen!
-
Insert the plastic-opening tool under the silver labeled casing.
-
Carefully pry at different intervals around the silver labeled casing to separate the silver casing from the top and bottom casing.
-
-
Dieser Schritt ist noch nicht übersetzt. Hilf mit, ihn zu übersetzen!
-
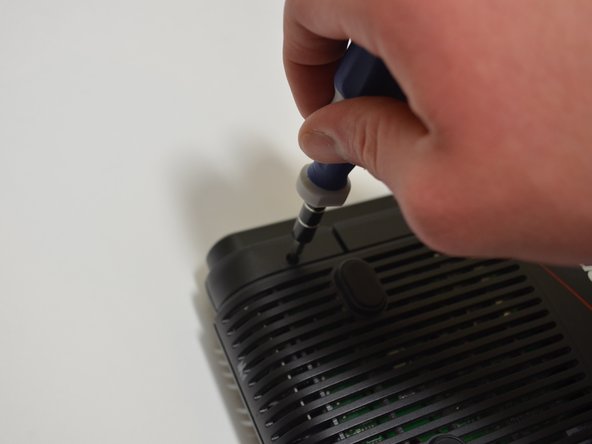
Unscrew the five 10-mm screws on the bottom of the router using a Phillips #0 screwdriver.
-
-
-
Dieser Schritt ist noch nicht übersetzt. Hilf mit, ihn zu übersetzen!
-
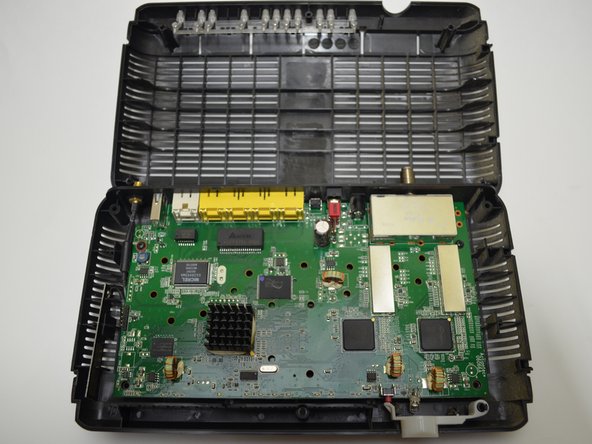
Use a plastic-opening tool and pry the top casing from the bottom casing to expose the circuit board in the bottom half of the device.
-
-
Dieser Schritt ist noch nicht übersetzt. Hilf mit, ihn zu übersetzen!
-
Locate the two 10-mm screws on either side of the circuit board.
-
Unscrew the two 10-mm screws using a Phillips #0 screwdriver.
-
-
Dieser Schritt ist noch nicht übersetzt. Hilf mit, ihn zu übersetzen!
-
Lift the front of the circuit board up from the bottom casing.
-
-
Dieser Schritt ist noch nicht übersetzt. Hilf mit, ihn zu übersetzen!
-
Pull the circuit board towards you until it is separate from the bottom casing.
-


Rückgängig: Ich habe diese Anleitung nicht absolviert.
2 weitere Nutzer:innen haben diese Anleitung absolviert.
Team

University of Kentucky Louisville, Team 1-3, Mathis Fall 2014 Mitglied von University of Kentucky Louisville, Team 1-3, Mathis Fall 2014
LOUISVILLE-MATHIS-F14S1G3
3 Mitglieder
8 Anleitungen geschrieben