Zum Hauptinhalt wechseln

Visioneer OneTouch 7400 USB Scanner Bed Replacement

Was du brauchst

  1. Visioneer OneTouch 7400 USB Scanner Bed Replacement, Outer Case: Schritt 1, Bild 1 von 1
    • On the bottom of the scanner, remove the screw at the top left side.

  2. Visioneer OneTouch 7400 USB Scanner Bed Replacement: Schritt 2, Bild 1 von 2 Visioneer OneTouch 7400 USB Scanner Bed Replacement: Schritt 2, Bild 2 von 2
    • Remove the rubber foot pad opposite the screw hole to expose a second screw hole.

    • Remove the screw beneath the foot-pad.

  3. Visioneer OneTouch 7400 USB Scanner Bed Replacement: Schritt 3, Bild 1 von 3 Visioneer OneTouch 7400 USB Scanner Bed Replacement: Schritt 3, Bild 2 von 3 Visioneer OneTouch 7400 USB Scanner Bed Replacement: Schritt 3, Bild 3 von 3
    • Rotate the scanner so the screw hole is located on the top left hand side.

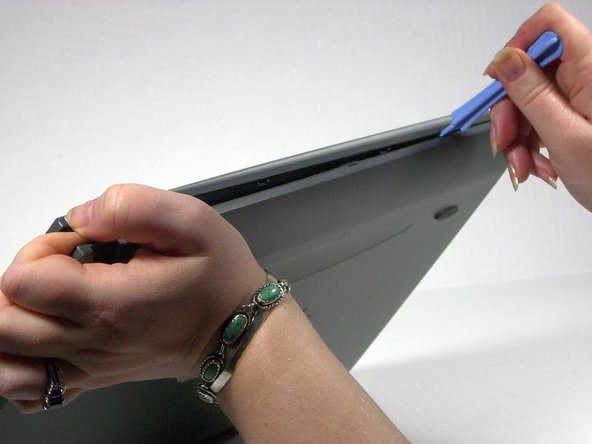
    • Place the plastic opening tool between the top casement and bottom casement of scanner with the hook facing up.

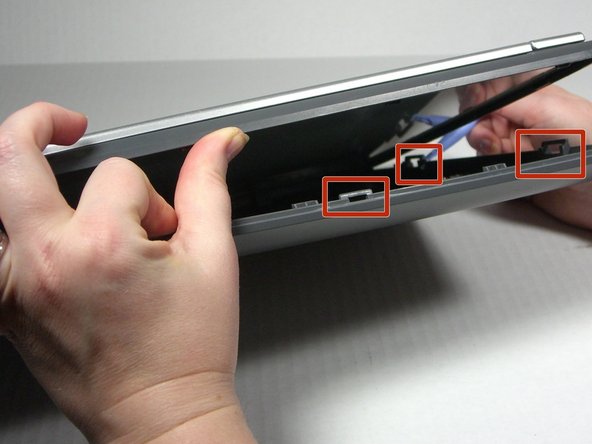
    • Gently pry the two casements apart beginning above the screw hole and working your way around.

    • Note that the top and bottom casings are held together by a series of 6 tabs. There is one tab on each of the long sides of the scanner approximately 6 inches in from the corners. There are two tabs on each of the short sides of the scanner approximately 2.3 inches in from the corners. Use the spudger to unhook the tab from the top casement.

  4. Visioneer OneTouch 7400 USB Scanner Bed Replacement: Schritt 4, Bild 1 von 1
    • Separate the two casement pieces.

  5. Visioneer OneTouch 7400 USB Scanner Bed Replacement, Scanner Bed: Schritt 5, Bild 1 von 1
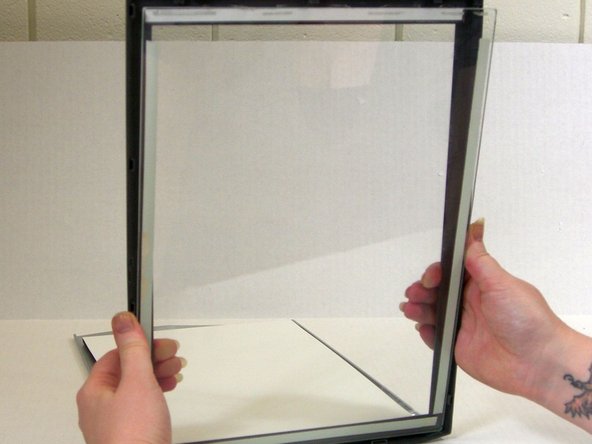
    • Apply even pressure against the back of the glass while securing the plastic frame in place.

  6. Visioneer OneTouch 7400 USB Scanner Bed Replacement: Schritt 6, Bild 1 von 2 Visioneer OneTouch 7400 USB Scanner Bed Replacement: Schritt 6, Bild 2 von 2
    • With consistent pressure on the glass, move your fingers down the sides until the glass is no longer stuck to the double-sided tape.

Abschluss

To reassemble your device, follow these instructions in reverse order.

Ein:e weitere:r Nutzer:in hat diese Anleitung absolviert.

Jena

Mitglied seit: 10/18/13

608 Reputation

6 Anleitungen geschrieben

Team

University of Maine, Team 1-13, Diaz Fall 2013 Mitglied von University of Maine, Team 1-13, Diaz Fall 2013

UMAINE-DIAZ-F13S1G13

3 Mitglieder

14 Anleitungen geschrieben

0 Kommentare

Kommentar hinzufügen

Seitenaufrufe:

Letzte 24 Stunden: 0

Letzte 7 Tage: 0

Letzte 30 Tage: 3

Insgesamt: 267