Zum Hauptinhalt wechseln

Visual Land Prestige 10 Front Facing Camera Replacement

Was du brauchst

  1. Visual Land Prestige 10 Front Facing Camera Replacement, Back Case: Schritt 1, Bild 1 von 3 Visual Land Prestige 10 Front Facing Camera Replacement, Back Case: Schritt 1, Bild 2 von 3 Visual Land Prestige 10 Front Facing Camera Replacement, Back Case: Schritt 1, Bild 3 von 3
    In diesem Schritt verwendetes Werkzeug:
    Magnetic Project Mat
    $19.95
    Kaufen
    • Remove the 3mm screws from bottom of tablet with the precision screwdriver and place on magnetic mat. label where they came from.

    • All screws throughout this guide are the same 3mm size.

  2. Visual Land Prestige 10 Front Facing Camera Replacement: Schritt 2, Bild 1 von 3 Visual Land Prestige 10 Front Facing Camera Replacement: Schritt 2, Bild 2 von 3 Visual Land Prestige 10 Front Facing Camera Replacement: Schritt 2, Bild 3 von 3
    • Using the spudger, create a small opening to be used to open the back case.

    • While holding the case open, insert the plastic opening tool to get a larger opening.

    • Once you have a slight opening, insert the spudger and work around the edges, separating the back plate from the front.

  3. Visual Land Prestige 10 Front Facing Camera Replacement: Schritt 3, Bild 1 von 3 Visual Land Prestige 10 Front Facing Camera Replacement: Schritt 3, Bild 2 von 3 Visual Land Prestige 10 Front Facing Camera Replacement: Schritt 3, Bild 3 von 3
    • now that the case is open, carefully remove the speakers and set aside.

  4. Visual Land Prestige 10 Front Facing Camera Replacement: Schritt 4, Bild 1 von 2 Visual Land Prestige 10 Front Facing Camera Replacement: Schritt 4, Bild 2 von 2
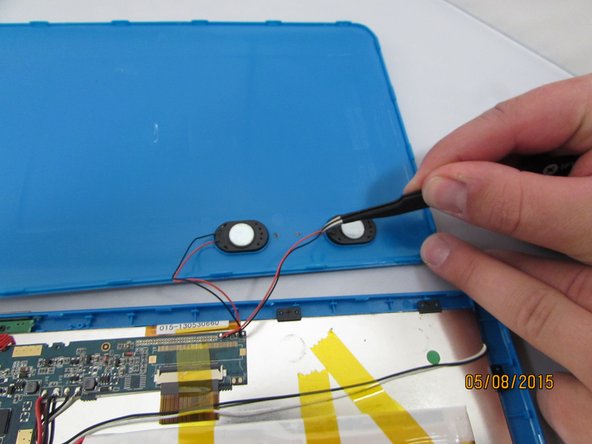
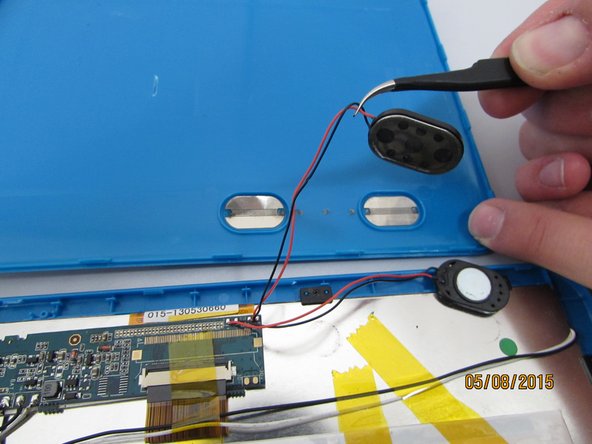
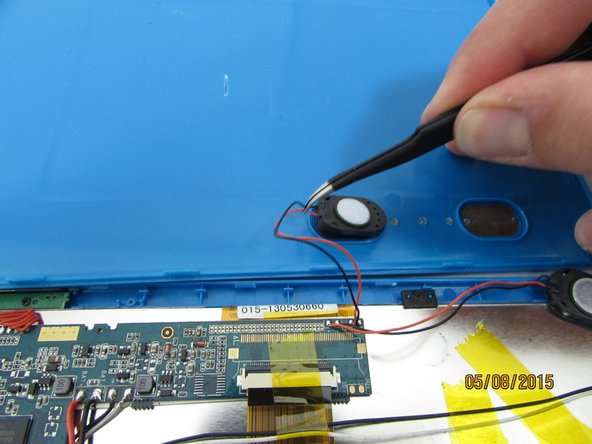
    • Gently remove the speakers from the back case with tweezers and set the case aside.

  5. Visual Land Prestige 10 Front Facing Camera Replacement, Front Facing Camera: Schritt 5, Bild 1 von 3 Visual Land Prestige 10 Front Facing Camera Replacement, Front Facing Camera: Schritt 5, Bild 2 von 3 Visual Land Prestige 10 Front Facing Camera Replacement, Front Facing Camera: Schritt 5, Bild 3 von 3
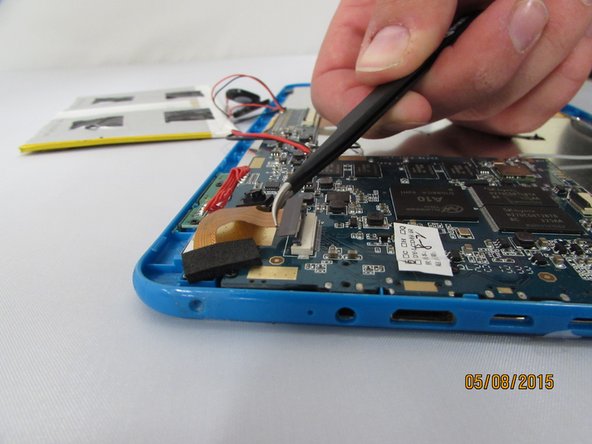
    • Locate the Camera Housing. Gently grip and lift the small black tab until you feel an audible click.

    • Gently remove the connector by pulling straight out, gripping the black connector head or as close as possible.

    • Gently grip and pull up the front camera, covered by protective adhesive foam.

    • Set aside the Camera housing.

Abschluss

To reassemble your device, follow these instructions in reverse order.

0 Kommentare

Kommentar hinzufügen

Seitenaufrufe:

Letzte 24 Stunden: 0

Letzte 7 Tage: 0

Letzte 30 Tage: 0

Insgesamt: 235