Zum Hauptinhalt wechseln

Vivitar Vivicam T027 Lens Replacement

Was du brauchst

  1. Vivitar Vivicam T027 Lens Replacement, Lens: Schritt 1, Bild 1 von 3 Vivitar Vivicam T027 Lens Replacement, Lens: Schritt 1, Bild 2 von 3 Vivitar Vivicam T027 Lens Replacement, Lens: Schritt 1, Bild 3 von 3
    • Use a Phillips #00 screwdriver to remove the 3 mm screws at the sides of the camera.

  2. Vivitar Vivicam T027 Lens Replacement: Schritt 2, Bild 1 von 1
    • Remove sticker on top of camera as it covers a screw.

    • There are 5 screws to remove in total on the sides of the camera.

  3. Vivitar Vivicam T027 Lens Replacement: Schritt 3, Bild 1 von 2 Vivitar Vivicam T027 Lens Replacement: Schritt 3, Bild 2 von 2
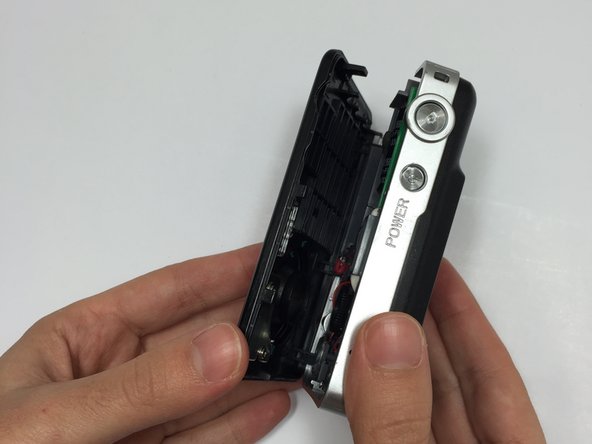
    • Separate the front piece of the camera from the back, revealing the motherboard.

  4. Vivitar Vivicam T027 Lens Replacement: Schritt 4, Bild 1 von 2 Vivitar Vivicam T027 Lens Replacement: Schritt 4, Bild 2 von 2
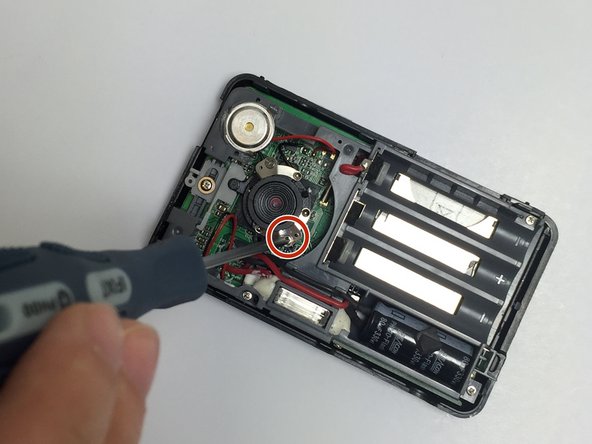
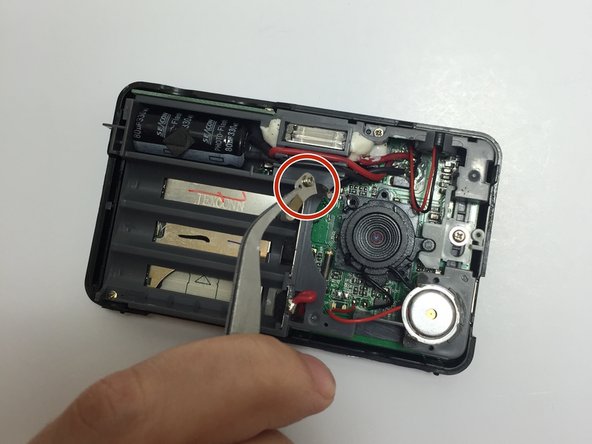
    • Use a Phillips #000 screwdriver to remove the two 2.3 mm screws that surround the lens.

  5. Vivitar Vivicam T027 Lens Replacement: Schritt 5, Bild 1 von 2 Vivitar Vivicam T027 Lens Replacement: Schritt 5, Bild 2 von 2
    • Remove the two silver plates using tweezers.

  6. Vivitar Vivicam T027 Lens Replacement: Schritt 6, Bild 1 von 1
    • Remove the black lens carefully with your fingers.

Abschluss

To reassemble your device, follow these instructions in reverse order.

Team

Marist, Team 15-13, Laflen Spring 2015 Mitglied von Marist, Team 15-13, Laflen Spring 2015

MARS-LAFLEN-S15S15G13

4 Mitglieder

3 Anleitungen geschrieben

0 Kommentare

Kommentar hinzufügen

Seitenaufrufe:

Letzte 24 Stunden: 0

Letzte 7 Tage: 0

Letzte 30 Tage: 0

Insgesamt: 612