Einleitung
If the screen on your Vivitar Vivicam T027 isn’t giving you the full picture because it’s scratched, cracked or otherwise damaged, use this guide to replace the 320 x 240 pixel 2.7” TFT LCD Display screen.
Having a clear, fully functional screen helps you take and view the best pictures possible. Don’t let a damaged screen come between you and great pictures.
Before using this guide, gather the tools you will need for the project and ensure you have a clean, clear work area. This will make it easy to keep track of all the parts and pieces you’ll be working with. Using a small white towel will keep tiny screws from rolling away from you and make them easy to see.
Don’t forget to remove the batteries from the camera before starting!
Was du brauchst
-
-
Remove the 3 mm screws on the sides of the camera, using a Phillips #00 screwdriver.
-
-
-
Remove the sticker on the top of the camera. This sticker covers a screw.
-
Remove five screws on the sides of the camera, including the screw under the sticker.
-
-
-
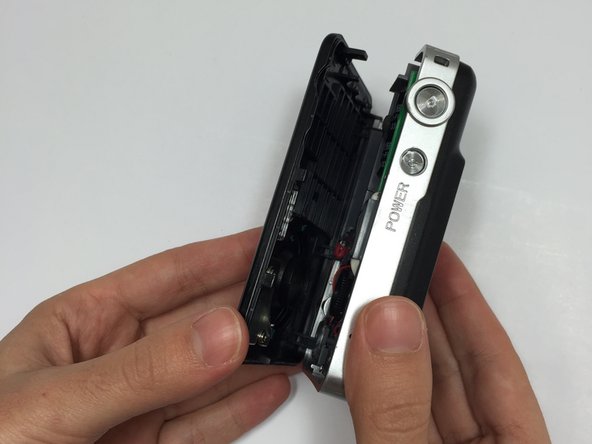
Separate the front piece of the camera from the back to reveal the motherboard.
-
-
-
-
Remove the three 2 mm screws holding in the gray plastic cover, using a Phillips #00 screwdriver.
-
-
-
Carefully remove the gold film from the screen with a plastic opening tool.
-
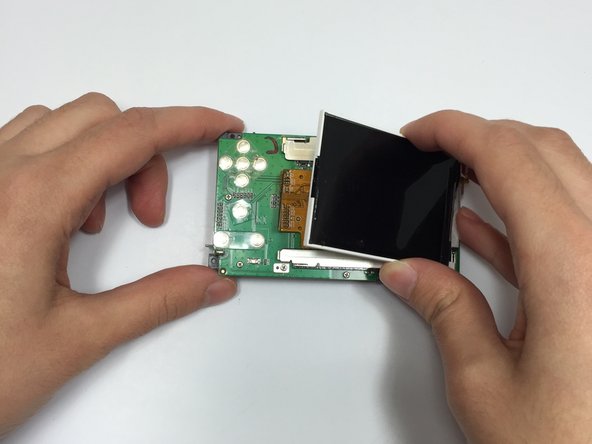
Gently pull the screen off the camera.
-


To reassemble your device, follow these instructions in reverse order.
To reassemble your device, follow these instructions in reverse order.
Rückgängig: Ich habe diese Anleitung nicht absolviert.
Ein:e weitere:r Nutzer:in hat diese Anleitung absolviert.
Team

Marist, Team 15-13, Laflen Spring 2015 Mitglied von Marist, Team 15-13, Laflen Spring 2015
MARS-LAFLEN-S15S15G13
4 Mitglieder
3 Anleitungen geschrieben
2 Kommentare
Any heat required for this? How would I tap into the a/v feed from a digital camera to extend the screen? Data output to the sd card or usb?
How much would a screen replacement for a Vivitar Vivicam s124