Einleitung
Follow this replacement guide to replace your display board. For this guide you will need a 3mm Allen key as well as a Philips screwdriver, size 1. This guide contains a prerequisite repair guide in Step 2 for the replacement of the power board. While there are not too many steps to follow, it is important that you follow the repair guide very carefully to ensure no other parts of the device are damaged.
For more information on replacing the display, please refer to page 39 in the service manual.
Was du brauchst
-
-
Open the device by following these steps:
-
Place the device on a non-slip surface with the top facing downwards
-
Remove the filter cassette from the top part of the housing.
-
Undo and remove the 6 screws (34).
-
Open the bottom of the housing (35) away to the side.
-
Undo the connecting cables for the humidifier (42) and the alarm (43).
-
-
-
Disconnect the following:
-
encoder connector (82).
-
connectors of interfaces (84) and (85) off the control board.
-
-
-
Disconnect the ribbon cable of the display and the fascia film.
-
Pull the latch out until you feel resistance. You can then pull out the ribbon cable.
-
-
-
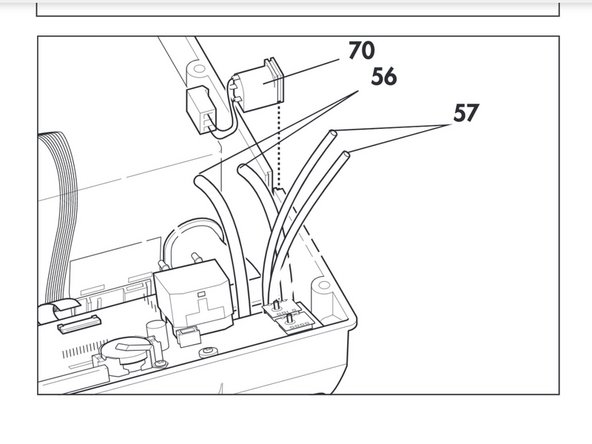
Pull flow measurement hoses (56) off the flow sensor.
-
Pull pressure measurement hoses (57) off the pressure sensors.
-
-
-
Remove spring (54) from the control board and remove battery (52) (see "7.9 Replace battery on control board" on page 42).
-
To reassemble your device, follow these instructions in reverse order.
To reassemble your device, follow these instructions in reverse order.


