Einleitung
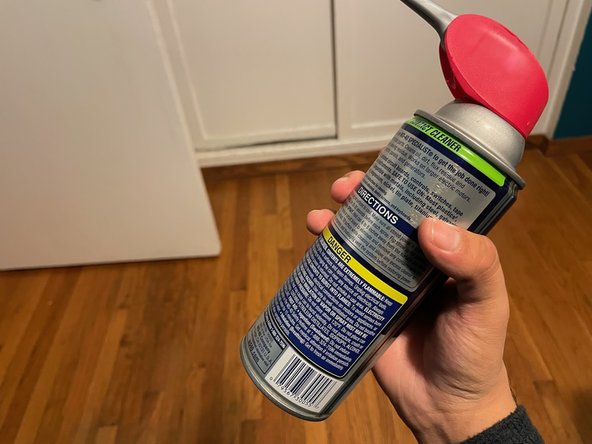
Das häufigste Problem bei der Verwendung der Oculus Quest 2 ist, dass die Controller driften und sich der Joystick des Controllers bei geringem Druck von selbst bewegt. Um die Sicherheit deines Quest 2 Controllers zu gewährleisten, habe ich hier eine Anleitung erstellt, in der erklärt wird, wie du den WD-40 Specialist Kontaktreiniger sicher bei dir zu Hause anwenden kannst.
Was du brauchst
-
-
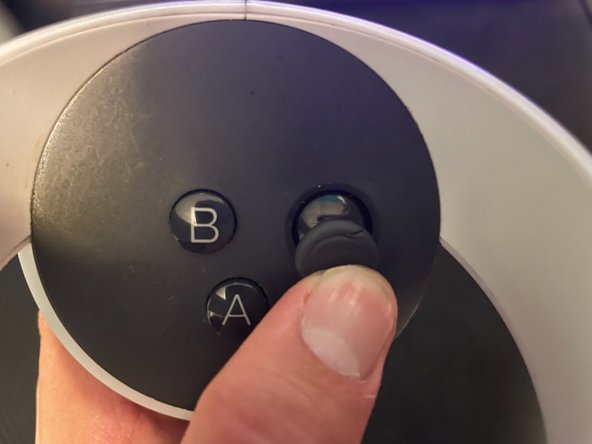
Entferne die Batterieabdeckung vom Controller.
-
Entferne die Batterie.
-
-
-
-
Wackle den Joystick kreisförmig herum, um das Produkt zu verteilen.
-
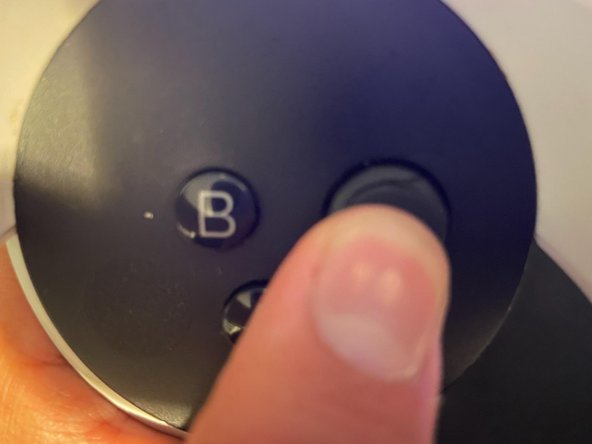
Klicke ein paar Mal auf den Joystick.
-


Rückgängig: Ich habe diese Anleitung nicht absolviert.
8 weitere Nutzer:innen haben diese Anleitung absolviert.
Besonderer Dank geht an diese Übersetzer:innen:
100%

Annika Faelker hilft uns, die Welt in Ordnung zu bringen! Wie kann ich mithelfen?
Hier starten ›

Team

CSU Los Angeles, Team 2-89, Briggs Fall 2022 Mitglied von CSU Los Angeles, Team 2-89, Briggs Fall 2022
CSULA-BRIGGS-F22S2G89
1 Mitglied
6 Anleitungen geschrieben
7 Kommentare
In the article you warn the user:
"It's important to use WD-40 specialist contact cleaner instead of the regular WD-40. It will break the controller if you use the wrong can."
Are you referring to the "WD-40 Specialist ELECTRICAL Contact Cleaner" or just the "WD-40 Specialist Contact Cleaner?"
They're apparently two different products, with the former coming in a black/dark gray can (at twice the price) and the latter coming in the dark blue can that WD-40 has traditionally come in, and I don't want to pick up the wrong product for this.
Thanks for your time!
I feel that it being an electronic that it will use the electronic contact cleaner.
https://www.wd40.com/products/contact-cl... - The page indicates that they changed the appearance of the can, not the formulation. The two products you describe are the same one.
jon42 -
B and Y buttons no longer work after I used this method and fixed the stick drift.
Did not really work, didn’t even break the controller either, I should probably try again or something, also when I used the normal WD-40 it did not break anything but I am still suggesting to use the WD-40 specialist ELECTRICAL contact cleaner, have a nice day mate