Zum Hauptinhalt wechseln

Wintec Filemate Clear 7" Motherboard Replacement

Was du brauchst

  1. Wintec Filemate Clear 7" Motherboard Replacement, Remove the Backplate: Schritt 1, Bild 1 von 1
    • Locate the four corners of the backplate.

  2. Wintec Filemate Clear 7" Motherboard Replacement: Schritt 2, Bild 1 von 2 Wintec Filemate Clear 7" Motherboard Replacement: Schritt 2, Bild 2 von 2
    • Pry off the backplate by inserting a spudger or plastic opening tool into each corner and popping them open.

  3. Wintec Filemate Clear 7" Motherboard Replacement, Remove the Battery: Schritt 3, Bild 1 von 1
    • Un-stick the battery from the motherboard assembly with the plastic opening tool.

  4. Wintec Filemate Clear 7" Motherboard Replacement: Schritt 4, Bild 1 von 1
    • Desolder the battery wires from the motherboard.

    • The tweezers pictured point to the two solder joints.

  5. Wintec Filemate Clear 7" Motherboard Replacement: Schritt 5, Bild 1 von 1
    • Fully remove the battery from the device.

  6. Wintec Filemate Clear 7" Motherboard Replacement, Motherboard: Schritt 6, Bild 1 von 1
    • Locate each of the motherboard's 4 mm screws.

  7. Wintec Filemate Clear 7" Motherboard Replacement, Unscrewing Everything: Schritt 7, Bild 1 von 3 Wintec Filemate Clear 7" Motherboard Replacement, Unscrewing Everything: Schritt 7, Bild 2 von 3 Wintec Filemate Clear 7" Motherboard Replacement, Unscrewing Everything: Schritt 7, Bild 3 von 3
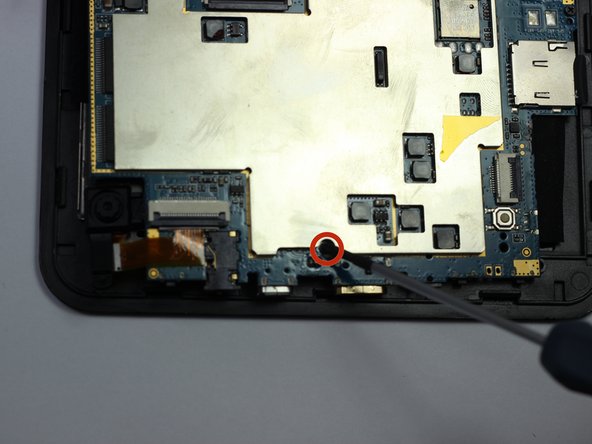
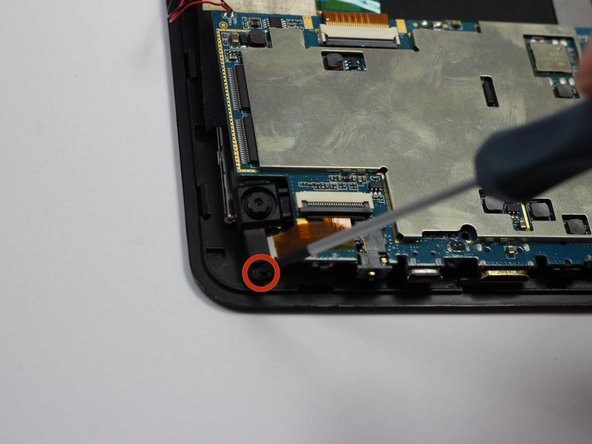
    • Remove each of the four 4 mm screws from the motherboard pictured to the left.

    • Use a Phillips #00 precision screwdriver.

  8. Wintec Filemate Clear 7" Motherboard Replacement, Detach the Motherboard: Schritt 8, Bild 1 von 2 Wintec Filemate Clear 7" Motherboard Replacement, Detach the Motherboard: Schritt 8, Bild 2 von 2
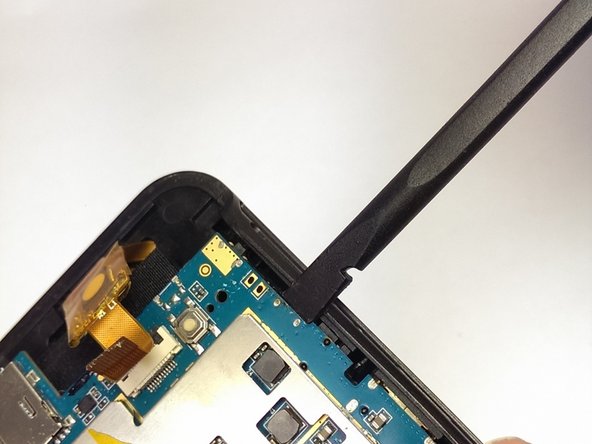
    • Use the spudger to pry the instrument array from its plastic housing.

  9. Wintec Filemate Clear 7" Motherboard Replacement: Schritt 9, Bild 1 von 1
    • Slowly slide the spudger underneath the adhesive tape to un-sitck it.

    • Be careful not to harm the array of wires leading to this tape.

  10. Wintec Filemate Clear 7" Motherboard Replacement: Schritt 10, Bild 1 von 1
    • De-tatch the motherboard output wires from the screen using the tweezers.

Abschluss

To reassemble your device, follow these instructions in reverse order.

Team

USF Tampa, Team 19-6, Blackwell Spring 2014 Mitglied von USF Tampa, Team 19-6, Blackwell Spring 2014

USFT-BLACKWELL-S14S19G6

3 Mitglieder

11 Anleitungen geschrieben

0 Kommentare

Kommentar hinzufügen

Seitenaufrufe:

Letzte 24 Stunden: 0

Letzte 7 Tage: 0

Letzte 30 Tage: 0

Insgesamt: 82