Einleitung
Before proceeding, make sure you have all of the necessary parts and tools for this replacement guide. This guide instructs the reader in how-to replace the battery for the Xtreme Play Generation 2 Tablet. Safety glasses and gloves are not required, but may be used at your own discretion.
The battery should be replaced when the device has been through significant charging cycles such that the battery no longer holds a charge sufficient for use.
Was du brauchst
-
-
Start on the edge of the top corner and use a spudger opening tool to carefully pry the back cover off of the main body.
-
Continue prying around the device, being careful to not dislodge the power button.
-
-
-
-
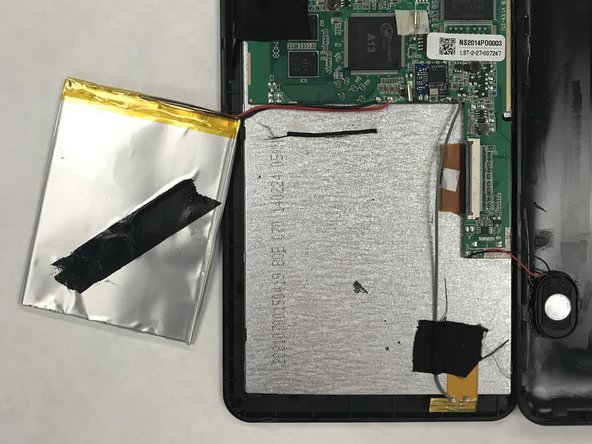
Pull the cloth tape from the battery to free the body of the battery.
-
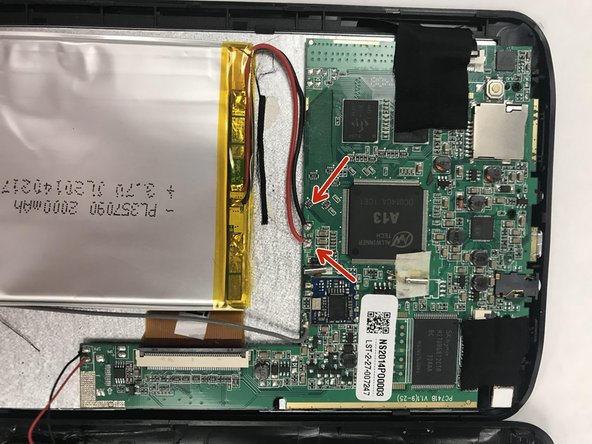
Use a solder vacuum and soldering iron to release the red, and then the black, wire from the motherboard.
-
-
-
Remove the battery from the device.
-
Insert the new 3.7 V Li-Polymer battery into the device.
-
Use the soldering iron to solder the red, and then the black, wire back to motherboard.
-
Check out our How to Solder and Desolder Connections guide for help with soldering best practices.
-
To reassemble your device, follow these instructions in reverse order.
To reassemble your device, follow these instructions in reverse order.
Rückgängig: Ich habe diese Anleitung nicht absolviert.
2 weitere Nutzer:innen haben diese Anleitung absolviert.


