Zum Hauptinhalt wechseln

Xbox Motherboard Replacement

Was du brauchst

  1. Xbox Motherboard Replacement, Hard Drive: Schritt 1, Bild 1 von 1
    • Make sure your Xbox is safely unplugged and is laying on a flat, stable surface.

  2. Xbox Motherboard Replacement: Schritt 2, Bild 1 von 1
    • Turn the Xbox over to reveal the four rubber feet.

    • Use a metal spudger to pry off the four rubber feet.

  3. Xbox Motherboard Replacement: Schritt 3, Bild 1 von 2 Xbox Motherboard Replacement: Schritt 3, Bild 2 von 2
    • There are 2 more screws hidden under the two labels on the bottom of the case.

    • You can either remove the labels or simply feel for the screw holes through the labels and then cut or punch a hole through them.

  4. Xbox Motherboard Replacement: Schritt 4, Bild 1 von 1
    • Remove the six T20 Torx screws securing the top cover to the bottom cover.

  5. Xbox Motherboard Replacement: Schritt 5, Bild 1 von 2 Xbox Motherboard Replacement: Schritt 5, Bild 2 von 2
    • Once the bottom and top shells are no longer attached, carefully turn the Xbox right-side-up, lift and remove the top cover.

  6. Xbox Motherboard Replacement: Schritt 6, Bild 1 von 2 Xbox Motherboard Replacement: Schritt 6, Bild 2 von 2
    • Remove the three 3 mm T10 screws securing the hard drive to the Xbox.

    • There is one screw on the rear left side of the hard drive that is only visible when the IDE ribbon cable is lifted up. The other two are at the front right and left sides of the hard drive.

    • The screw on the lower left corner of the disk drive is not in the hole that it appears to be in, but rather just closer to the corner.

  7. Xbox Motherboard Replacement: Schritt 7, Bild 1 von 2 Xbox Motherboard Replacement: Schritt 7, Bild 2 von 2
    • Free the hard drive power cable from the carrier for sufficient slack to lift the hard drive out.

    • Lift the plastic hard drive carrier out of the Xbox case.

  8. Xbox Motherboard Replacement: Schritt 8, Bild 1 von 3 Xbox Motherboard Replacement: Schritt 8, Bild 2 von 3 Xbox Motherboard Replacement: Schritt 8, Bild 3 von 3
    • Remove the four 3.4 mm T15 Torx screws from the plastic hard drive carrier (two screws per side).

    • Carefully remove the hard drive from the plastic carrier. Gentle rocking will see the hard drive come out quite easily.

  9. Xbox Motherboard Replacement: Schritt 9, Bild 1 von 2 Xbox Motherboard Replacement: Schritt 9, Bild 2 von 2
    • Pull both the hard drive data ribbon cable and the power cable straight up from the hard drive.

    • They may be firmly seated, so be careful trying to remove them. DO NOT pull the wires as you may damage the cable assembly.

  10. Xbox Motherboard Replacement, Disc Drive: Schritt 10, Bild 1 von 3 Xbox Motherboard Replacement, Disc Drive: Schritt 10, Bild 2 von 3 Xbox Motherboard Replacement, Disc Drive: Schritt 10, Bild 3 von 3
    • Remove the disk drive. It should come right out.

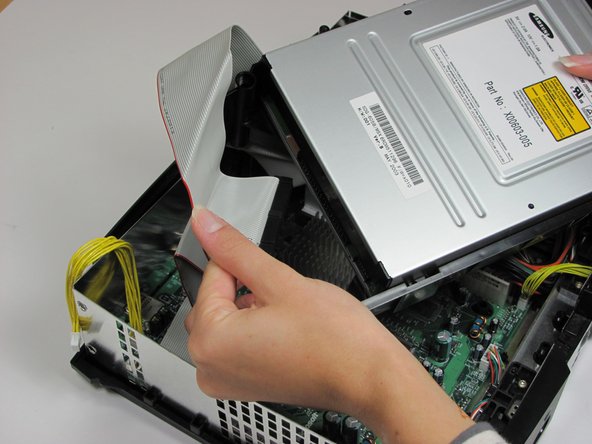
    • Unplug the ribbon cable and yellow cables from back of disk drive.

  11. Xbox Motherboard Replacement: Schritt 11, Bild 1 von 1
    • Pry back the black plastic tabs around the disk drive in order to remove it from its housing. Once removed, set the drive aside.

    • ONLY REMOVE IF DEAD!

  12. Xbox Motherboard Replacement, Power Board: Schritt 12, Bild 1 von 1
    • Unplug the multi-colored power cord from the motherboard. It is in there pretty tightly, so it may take some effort.

  13. Xbox Motherboard Replacement: Schritt 13, Bild 1 von 2 Xbox Motherboard Replacement: Schritt 13, Bild 2 von 2
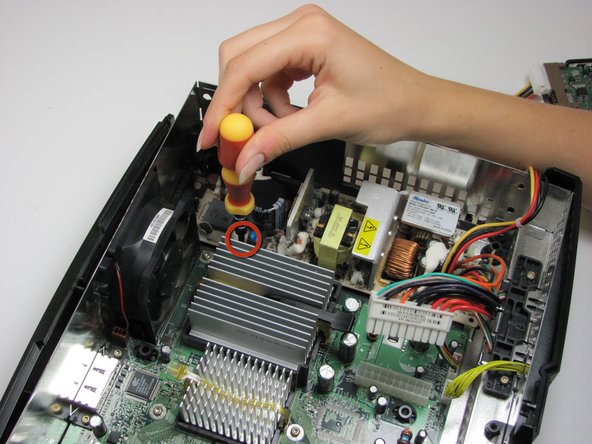
    • Using T10 Torx screwdriver, remove two 3mm screws from the tan power supply board.

    • Be very careful not to touch the copper coil or capacitors on the power supply.

  14. Xbox Motherboard Replacement: Schritt 14, Bild 1 von 1
    • Remove the power supply and set it aside. It should lift right out.

    • Be very careful not to touch the copper coil or capacitors on the power supply. They may shock you.

  15. Xbox Motherboard Replacement, Motherboard: Schritt 15, Bild 1 von 2 Xbox Motherboard Replacement, Motherboard: Schritt 15, Bild 2 von 2
    • Unplug the bundle of yellow cables as well as the rainbow cord from the motherboard.

  16. Xbox Motherboard Replacement: Schritt 16, Bild 1 von 2 Xbox Motherboard Replacement: Schritt 16, Bild 2 von 2
    • Remove eleven 3mm screws from motherboard, using a T10 Torx screwdriver. Refer to the picture to find all eleven.

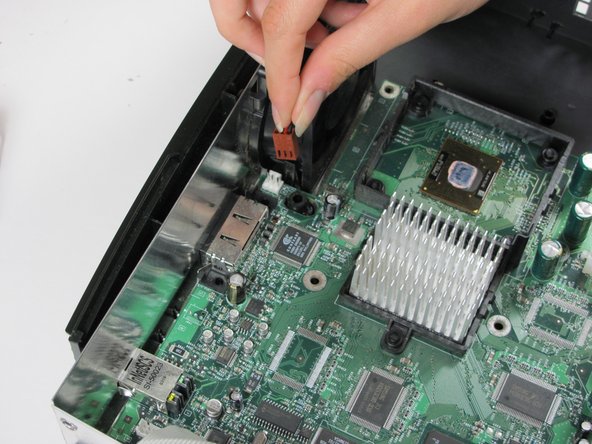
    • Unplug the power cable attached to the fan.

  17. Xbox Motherboard Replacement: Schritt 17, Bild 1 von 1
    • Remove the motherboard from the Xbox. As long as all of the screws are out and the fan is disconnected, it will lift out easily.

Abschluss

To reassemble your device, follow these instructions in reverse order.

39 weitere Nutzer:innen haben diese Anleitung absolviert.

rmarstel

Mitglied seit: 10/29/09

5.608 Reputation

5 Anleitungen geschrieben

Team

Cal Poly, Team 18-2, Maness Fall 2009 Mitglied von Cal Poly, Team 18-2, Maness Fall 2009

CPSU-MANESS-F09S18G2

3 Mitglieder

24 Anleitungen geschrieben

5 Kommentare

http://www.ebay.com/gds/How-To-Determine...

Utilize the information on this website to determine what Xbox version you have so you know what replacement parts to look for.

Navy Vet 2015 - Antwort

What about the key lock between the HDD and original motherboard? Wouldn't you get an error message installing a new motherboard?

chris - Antwort

Yes, this would result in an error. An exception exists where the owner has modified the console and taken a backup of the EEPROM key.

James J -

If I need a new motherboard where can I find one

nite gang - Antwort

Do you still need a motherboard?

Comanche -

Kommentar hinzufügen

Seitenaufrufe:

Letzte 24 Stunden: 10

Letzte 7 Tage: 64

Letzte 30 Tage: 289

Insgesamt: 47,350