Einleitung
This guide explains how to remove the Seagate hard drive of the Xbox One X. And it is for both Xbox One X and Xbox One X Project Scorpio Edition.
Was du brauchst
-
-
Use a T9 Torx screwdriver to remove the 13mm screw which is under and to the left of the power input.
-
-
-
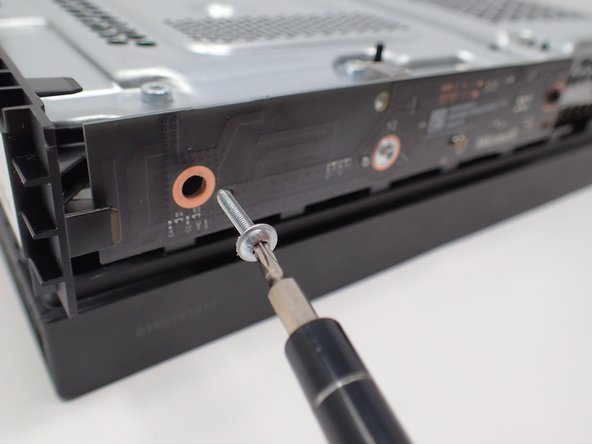
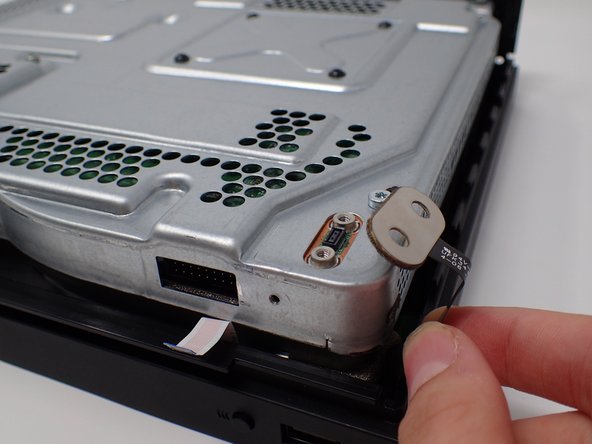
Using precision tweezers, remove the screw tab located on opposite side of the box.
-
Use a T9 Torx screwdriver to remove the 13mm screw revealed underneath the tab.
-
-
-
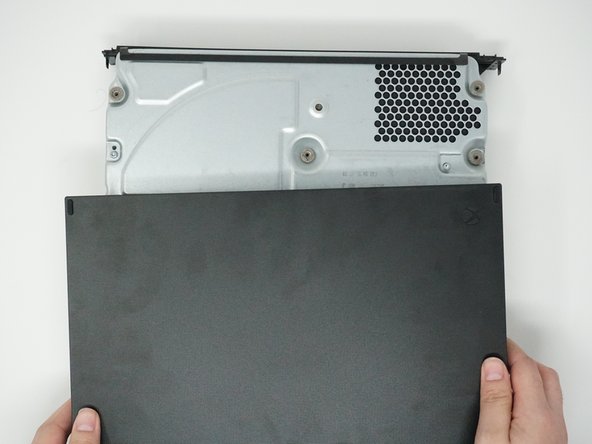
Orient the case so that the front of the Xbox (the side with the power button) is facing you.
-
Remove the top of the case by sliding the case towards you.
-
-
-
Using a T9 Torx screwdriver, remove the two 15mm silver screws that are holding a circuit board/panel to the side of the interior metal casing.
-
Using the same screwdriver, remove the 9mm black screw located farther to the right on the same circuit board/panel.
-
-
-
Remove the unscrewed panel from the side of the device by pulling it toward you.
-
-
-
Pull the upper edge of the white clip down, and then remove the white connector from the dislocated panel using precision tweezers.
-
-
-
-
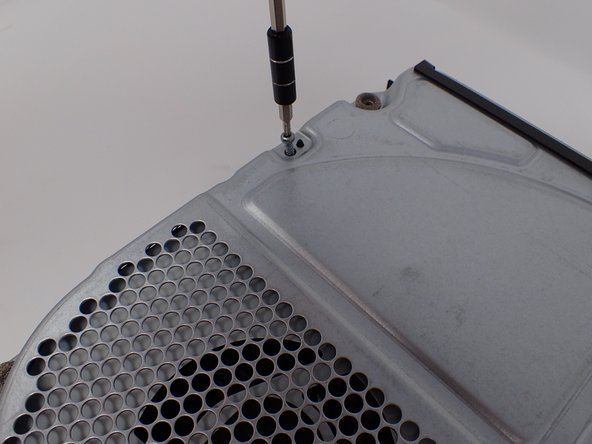
On the top of the device in the corner directly above the white connector, there is an oval plate held in place by two screws.
-
Remove both of these 7mm screws with a Torx T9 screwdriver.
-
Lift the detached plate off to the side.
-
-
-
Use a Torx T9 screwdriver to remove the six 47mm long screws, which attach the bottom side of the outer case.
-
-
-
Turn the Xbox over, so that the bottom of the case is on top.
-
Lift the bottom of the case off of the Xbox by pulling it up and toward you.
-
-
-
Flip over the device again, so that the top is facing upwards.
-
Remove the 4 smaller 11mm screws in the lower left corner on the metal casing using a Torx T9 screwdriver.
-
-
-
Flip over the device again, so that the bottom is facing upwards.
-
Using a Torx T10 screwdriver, remove the two screws located on opposite sides of the metal casing. One is near the fan vent, and the other is near the power supply vent.
-
-
-
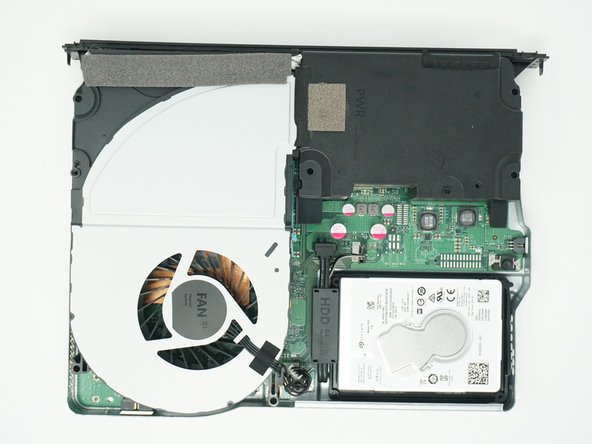
Remove the metal casing by pulling it upward, revealing the interior components of the device.
-
-
-
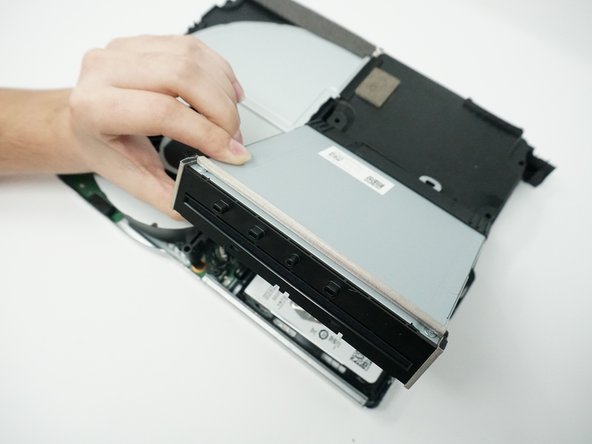
Lift and rotate the BD drive to reveal the wires that connect it to the motherboard.
-
-
-
Using your fingers, gently unplug the two sets of wires connecting the drive to the motherboard.
-
Alternatively, you can disconnect the wires from the drive-side sockets. This is much easier if you have not removed the power supply.
-
The BD drive should now be completely detached from the rest of the device, and it can be set aside.
-
-
-
Detach the two connection headers located to the right of the hard drive.
-


To reassemble your device, follow these instructions in reverse order.
To reassemble your device, follow these instructions in reverse order.
Rückgängig: Ich habe diese Anleitung nicht absolviert.
100 weitere Nutzer:innen haben diese Anleitung absolviert.
Team

Cal Poly, Team S2-G6, Livingston Winter 2018 Mitglied von Cal Poly, Team S2-G6, Livingston Winter 2018
CPSU-LIVINGSTON-W18S2G6
4 Mitglieder
23 Anleitungen geschrieben
20 Kommentare
If I buy a new hard drive off of amazon, how do I install the Xbox OS back on? The offline usb?
The only way I found was to clone the disc sector-by-sector. I read online that you can expand it by making the “user content” partition larger.
Do an offline update for xbox one x. I posted a link in another comment.
Check out this video. It has a great step by step for putting the console into troubleshooting mode and downloading the correct software.
metric -
I read a post somewhere saying that if Microsoft detect non-standard hardware in your system you could be banned. Has anyone had any experience with this?