Einleitung
INFORMATION ABOUT THE COAXIAL WIRE:
- The wire that connects the Wi-Fi antenna to the motherboard is a coaxial wire.
- The coaxial wire consists of a wire insulator (plastic), wire braid shield (middle layer), and center conductor (inner layer) surrounded by an insulator.
The connecting points of the coaxial wire to the motherboard are very small and may require a magnifying glass to see clearly.
Was du brauchst
-
-
Remove the two 3 mm retaining screws from the side of the tablet with a Phillips #0 screwdriver.
-
-
-
Insert the plastic opening tool in between the shelf halves and lift the top shelf half to detach the securing tabs.
-
-
-
-
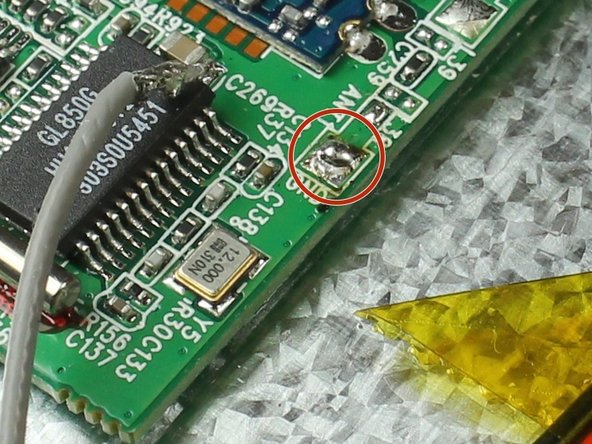
Desolder the connection on the motherboard.
-
Use a soldering vacuum to remove any excess solder.
-
-
-
Use wire strippers to strip off at least 2 mm of wire insulation from each wire.
-


To reassemble your device, follow these instructions in reverse order.
To reassemble your device, follow these instructions in reverse order.
Team

Colorado Springs, Team 4-2, Panko Spring 2015 Mitglied von Colorado Springs, Team 4-2, Panko Spring 2015
UCCS-PANKO-S15S4G2
3 Mitglieder
12 Anleitungen geschrieben