Einleitung
This guide will require both opening the Xiaomi Mi 4 and detaching the motherboard. The back cover and battery in the device must be removed first before getting to the cameras on the motherboard so you will need to tackle those first.
Was du brauchst
-
-
Use a pin or paper clip to insert in the hole on the side of the phone next to the micro SIM cardholder to remove the tray.
-
Remove the SIM card tray from the Xiaomi Mi 4 and store it somewhere safe.
-
-
-
Using the flat metal spudger and curved metal spudger, make a wedge between the plastic back cover and the inner frame
-
Using the second spudger, slowly work your way around the perimeter of the device
-
As the back cover is almost completely removed, use the suction-cup tool to remove the plastic cover without damaging the back
-
-
-
Use a 000 phillips head screwdriver to remove the 10 1.2mm phillips head screws in the plastic frame that hold the motherboard and battery.
-
Use a 000 phillips head screwdriver to remove the 3 0.5mm phillips head screws in the plastic frame that hold the motherboard and battery.
-
Use the small plastic opening tool and place it in the slot on the bottom right corner of the inner frame and carefully pry it off.
-
-
-
-
Use tweezers to gently disconnect the connections that run across the battery and are connected to the motherboard.
-
Proceed to gently remove the tape like connector from the battery until it is completely off.
-
Use tweezer to disconnect battery’s wire from the motherboard.
-
-
-
Use the plastic opening tool to gently pry the battery out of its casing for removal.
-
-
-
With the battery removed locate the left-hand cable connected to the motherboard. With the tweezers, firmly grasp the wires of the connector and gently disconnect the cable from the motherboard.
-
Find the other cable connecting the motherboard to the device at the top right-hand side of the phone, and carefully use the tweezers to remove that as well.
-
-
-
Wedge the plastic opening tool, between the motherboard and the inner region of the phone in the slot atop the motherboard.
-
-
-
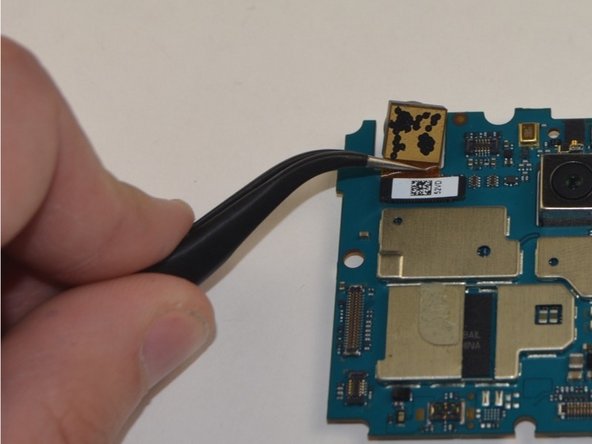
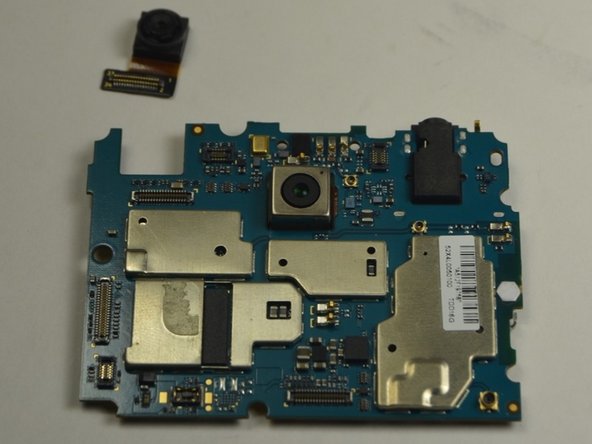
With the motherboard detached from the phone, locate the front camera in the upper left-hand corner.
-
Use a pair of tweezers to disconnect the front-facing camera by popping the cable off of the motherboard connector.
-


To reassemble your device, follow these instructions in reverse order.
To reassemble your device, follow these instructions in reverse order.
Rückgängig: Ich habe diese Anleitung nicht absolviert.
10 weitere Personen haben diese Anleitung absolviert.
Team

USF Tampa, Team 15-6, Blackwell Fall 2015 Mitglied von USF Tampa, Team 15-6, Blackwell Fall 2015
USFT-BLACKWELL-F15S15G6
2 Mitglieder
10 Anleitungen geschrieben