Zum Hauptinhalt wechseln

ZTE Awe Screen Replacement

Was du brauchst

  1. ZTE Awe Screen Replacement, Detach the mid frame: Schritt 1, Bild 1 von 1
    • Use the Phillips Head 00 screw driver to unscrew the seven 0.1mm screws from the phone's mid frame.

  2. ZTE Awe Screen Replacement, Separate the mid frame and the digitizer: Schritt 2, Bild 1 von 3 ZTE Awe Screen Replacement, Separate the mid frame and the digitizer: Schritt 2, Bild 2 von 3 ZTE Awe Screen Replacement, Separate the mid frame and the digitizer: Schritt 2, Bild 3 von 3
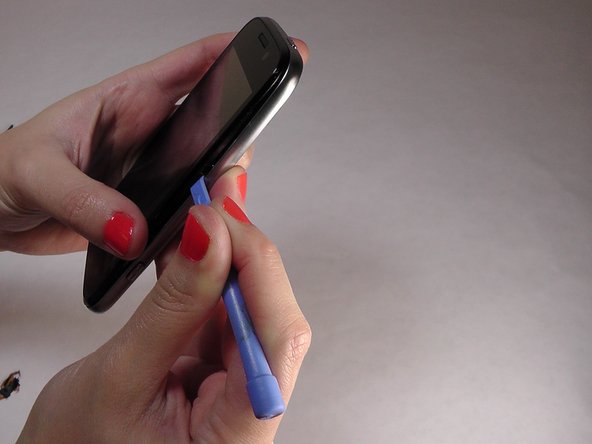
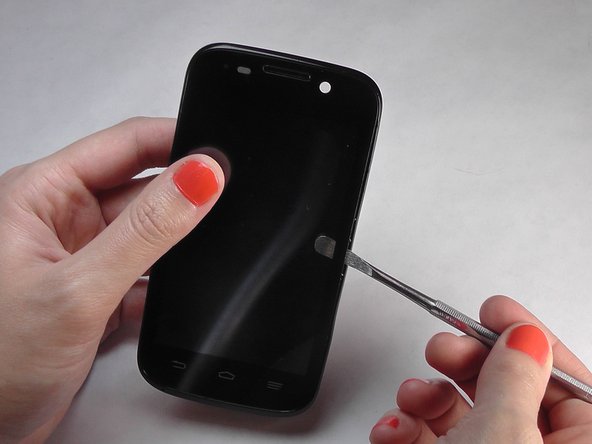
    • Wedge the flat end of the spudger between the mid frame and the digitizer.

  3. ZTE Awe Screen Replacement, Expose the motherboard: Schritt 3, Bild 1 von 2 ZTE Awe Screen Replacement, Expose the motherboard: Schritt 3, Bild 2 von 2
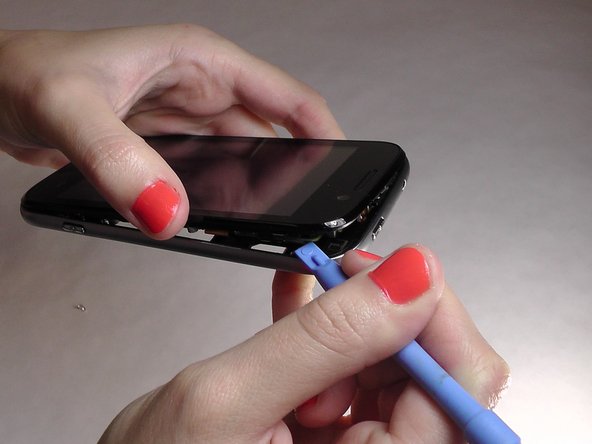
    • Gently pry the mid frame away from the rest of the phone to expose the motherboard.

  4. ZTE Awe Screen Replacement, Remove the ribbon wires: Schritt 4, Bild 1 von 3 ZTE Awe Screen Replacement, Remove the ribbon wires: Schritt 4, Bild 2 von 3 ZTE Awe Screen Replacement, Remove the ribbon wires: Schritt 4, Bild 3 von 3
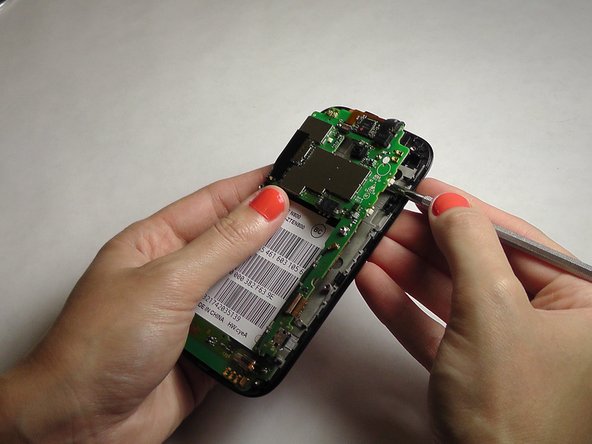
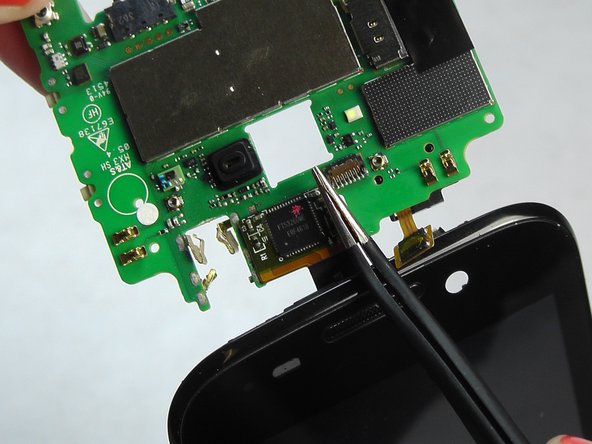
    • Use the tweezers to remove the four ribbon wires on the sides of the device.

  5. ZTE Awe Screen Replacement, Orient the motherboard: Schritt 5, Bild 1 von 1
    • Orient the motherboard to expose the mid frame.

  6. ZTE Awe Screen Replacement, Remove the connector: Schritt 6, Bild 1 von 3 ZTE Awe Screen Replacement, Remove the connector: Schritt 6, Bild 2 von 3 ZTE Awe Screen Replacement, Remove the connector: Schritt 6, Bild 3 von 3
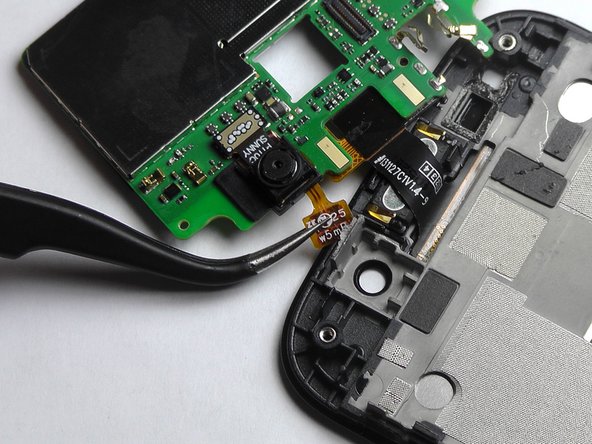
    • Remove the connector to free the motherboard from the screen.

  7. ZTE Awe Screen Replacement, Remove the cover: Schritt 7, Bild 1 von 1
    • Remove the back cover from the phone.

  8. ZTE Awe Screen Replacement, Remove battery: Schritt 8, Bild 1 von 1
    • Pry the battery up and out of the phone.

  9. ZTE Awe Screen Replacement: Schritt 9, Bild 1 von 3 ZTE Awe Screen Replacement: Schritt 9, Bild 2 von 3 ZTE Awe Screen Replacement: Schritt 9, Bild 3 von 3
    • Gently wedge the spudger in between the glass screen and the mid frame.

  10. ZTE Awe Screen Replacement, Separate the motherboard from the screen: Schritt 10, Bild 1 von 2 ZTE Awe Screen Replacement, Separate the motherboard from the screen: Schritt 10, Bild 2 von 2
    • Carefully pry the screen away from the motherboard.

  11. ZTE Awe Screen Replacement, Remove the ribbons: Schritt 11, Bild 1 von 3 ZTE Awe Screen Replacement, Remove the ribbons: Schritt 11, Bild 2 von 3 ZTE Awe Screen Replacement, Remove the ribbons: Schritt 11, Bild 3 von 3
    • Be careful when removing the ribbon wires. They are delicate.

  12. ZTE Awe Screen Replacement, Remove the remaining ribbons: Schritt 12, Bild 1 von 3 ZTE Awe Screen Replacement, Remove the remaining ribbons: Schritt 12, Bild 2 von 3 ZTE Awe Screen Replacement, Remove the remaining ribbons: Schritt 12, Bild 3 von 3
    • Remove the remaining two ribbon wires from their connectors.

  13. ZTE Awe Screen Replacement, Expose the digitizer: Schritt 13, Bild 1 von 3 ZTE Awe Screen Replacement, Expose the digitizer: Schritt 13, Bild 2 von 3 ZTE Awe Screen Replacement, Expose the digitizer: Schritt 13, Bild 3 von 3
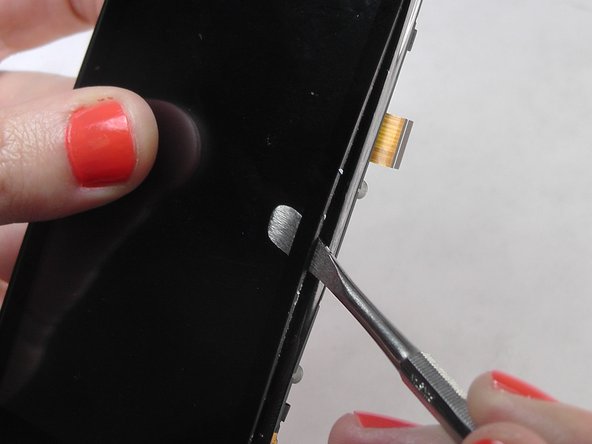
    • Wedge the plastic spudger between the screen and the digitizer.

    • Gently pry apart the screen from the digitizer.

    Wrong instructions wound up breaking the frame thanks sooooooo much you don't need to remove the ribbons if you do you wind up breaking them and from there on I have no idea what the !&&* is going on

    Samuel Jager - Antwort

    I just replaced the screen on my AWE with this guide. There are 3 ribbon cables to remove,

    you have to open a flap to remove cable ( google it , if your not sure )

    The reason you remove motherboard is for the ribbon cable on the screen , it passes under

    neath.

    Pry the screen as shown all around the phone, its glued on. Be careful you dont go too far

    under ( I scratched the digitizer underneath )

    Not that hard, just go slow. Fixed for 10 dollars vs 60 for new one.

    allen alfreds -

    I don't understand how does that replace the broken screen?

    Heather Binkley - Antwort

Abschluss

To reassemble your device, follow these instructions in reverse order.

12 weitere Nutzer:innen haben diese Anleitung absolviert.

Jennifer DeMeo

Mitglied seit: 10/07/14

1.035 Reputation

5 Anleitungen geschrieben

Team

USF Tampa, Team 1-2, Leahy Fall 2014 Mitglied von USF Tampa, Team 1-2, Leahy Fall 2014

USFT-LEAHY-F14S1G2

4 Mitglieder

10 Anleitungen geschrieben

0 Kommentare

Kommentar hinzufügen

Seitenaufrufe:

Letzte 24 Stunden: 0

Letzte 7 Tage: 0

Letzte 30 Tage: 5

Insgesamt: 14,169