Diese Version enthält möglicherweise inkorrekte Änderungen. Wechsle zur letzten geprüften Version.
Was du brauchst
-
Dieser Schritt ist noch nicht übersetzt. Hilf mit, ihn zu übersetzen!
-
Remove the back cover using a plastic opening tool. Insert it into each corner starting at the upper left of the back cover and pushing out.
-
-
Dieser Schritt ist noch nicht übersetzt. Hilf mit, ihn zu übersetzen!
-
Using a plastic opening tool, push out the battery by inserting it into the small groove at the top left corner of the battery and pushing out.
-
The battery snaps out of place and you can remove it using your fingers.
-
-
Dieser Schritt ist noch nicht übersetzt. Hilf mit, ihn zu übersetzen!
-
Remove the back cover using a plastic opening tool. Insert it into each corner starting at the upper left of the back cover and pushing out.
-
-
Dieser Schritt ist noch nicht übersetzt. Hilf mit, ihn zu übersetzen!
-
Using your a plastic opening tool, push out the battery by inserting it into the small groove at the top left corner of the battery and pushing out.
-
The battery snaps out of place and you can remove it using your fingers.
-
-
-
Dieser Schritt ist noch nicht übersetzt. Hilf mit, ihn zu übersetzen!
-
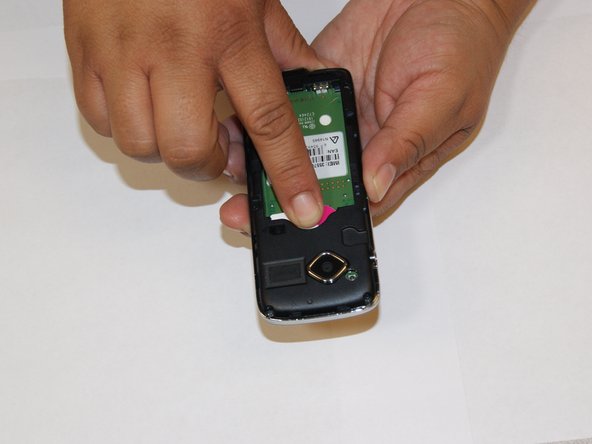
Remove the SIM card by placing your index finger over it and sliding it out.
-
-
Dieser Schritt ist noch nicht übersetzt. Hilf mit, ihn zu übersetzen!
-
Unscrew the phone casing using a small screw driver. Remove the four screws on each corner on the back of the phone.
-
-
Dieser Schritt ist noch nicht übersetzt. Hilf mit, ihn zu übersetzen!
-
Remove front casing by sliding a plastic opening tool between the chrome layer and the top cover.
-
-
Dieser Schritt ist noch nicht übersetzt. Hilf mit, ihn zu übersetzen!
-
The buttons should come off with the front casing but sometimes they don't. If that is the case simply remove them using your fingers and place them with the front cover.
-
-
Dieser Schritt ist noch nicht übersetzt. Hilf mit, ihn zu übersetzen!
-
The back casing is removed by taking the motherboard and back casing and pulling them apart.
-
-
Dieser Schritt ist noch nicht übersetzt. Hilf mit, ihn zu übersetzen!
-
The charging port is a square piece at the bottom center of the phone that is sticking out.
-
If it is is loose simply remove it.
-
If it is still attached you must remove the charging port using the heat pen on your soldering station on top of the charging port until it becomes loose.
-
Gently remove the charging port using tweezers.
-


Rückgängig: Ich habe diese Anleitung nicht absolviert.
2 weitere Nutzer:innen haben diese Anleitung absolviert.
Team

Gateway, Team 1-1, Johnson Fall 2014 Mitglied von Gateway, Team 1-1, Johnson Fall 2014
GCC-JOHNSON-F14S1G1
3 Mitglieder
12 Anleitungen geschrieben