Diese Version enthält möglicherweise inkorrekte Änderungen. Wechsle zur letzten geprüften Version.
Was du brauchst
-
Dieser Schritt ist noch nicht übersetzt. Hilf mit, ihn zu übersetzen!
-
Use a plastic opening tool to pry open the back case.
-
Use a Phillips #0 screwdriver to remove the eight 5mm screws.
-
Use a plastic opening tool to remove the midframe.
-
-
Dieser Schritt ist noch nicht übersetzt. Hilf mit, ihn zu übersetzen!
-
Use a plastic opening tool to lift the press-fit connector up and disconnect the battery ribbon cable.
-
Lift the battery up and remove it from the phone.
-
-
-
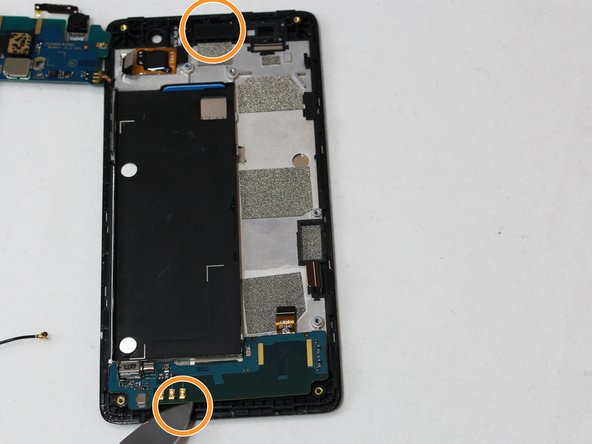
Dieser Schritt ist noch nicht übersetzt. Hilf mit, ihn zu übersetzen!
-
Use the plastic opening tool to unplug the three connectors.
-
-
Dieser Schritt ist noch nicht übersetzt. Hilf mit, ihn zu übersetzen!
-
Use the plastic opening tool to push up on the wire to remove it completely.
-
-
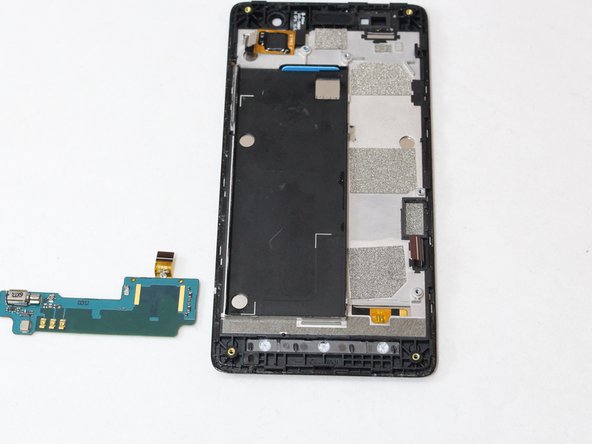
Dieser Schritt ist noch nicht übersetzt. Hilf mit, ihn zu übersetzen!
-
Insert and slide the plastic opening tool alongside the seam, gently wiggling the opening tool to open and remove the motherboard.
-
-
Dieser Schritt ist noch nicht übersetzt. Hilf mit, ihn zu übersetzen!
-
Use the metal spudger to push up to remove the volume control.
-
Use the tweezers to remove the front speaker and bottom controller.
-


Rückgängig: Ich habe diese Anleitung nicht absolviert.
2 weitere Nutzer:innen haben diese Anleitung absolviert.
Team

Eastern Washington University, Team S2-G3, Munoz Fall 2018 Mitglied von Eastern Washington University, Team S2-G3, Munoz Fall 2018
EWU-MUNOZ-F18S2G3
4 Mitglieder
12 Anleitungen geschrieben