Zum Hauptinhalt wechseln

Zebra GK420d Printhead Replacement

Was du brauchst

  1. Zebra GK420d Printhead Replacement, Open The Lid: Schritt 1, Bild 1 von 2 Zebra GK420d Printhead Replacement, Open The Lid: Schritt 1, Bild 2 von 2
    • Release Side Tabs.

    • Remove any media

    • Note: You can turn the light blue gear to force the spindle arms to remain apart, that way you don't have to hold them.

  2. Zebra GK420d Printhead Replacement, Remove the plastic guard.: Schritt 2, Bild 1 von 3 Zebra GK420d Printhead Replacement, Remove the plastic guard.: Schritt 2, Bild 2 von 3 Zebra GK420d Printhead Replacement, Remove the plastic guard.: Schritt 2, Bild 3 von 3
    • Loosen the captured phillips screw to release the guard.

    • Close the lid and slide the guard toward the back of the printer to free it.

  3. Zebra GK420d Printhead Replacement, Remove the top cover of the lid.: Schritt 3, Bild 1 von 3 Zebra GK420d Printhead Replacement, Remove the top cover of the lid.: Schritt 3, Bild 2 von 3 Zebra GK420d Printhead Replacement, Remove the top cover of the lid.: Schritt 3, Bild 3 von 3
    • Remove the 5 Phillips Screws.

    • Remove the recessed Phillips Screw. It may not be possible to use a driver to remove this screw.

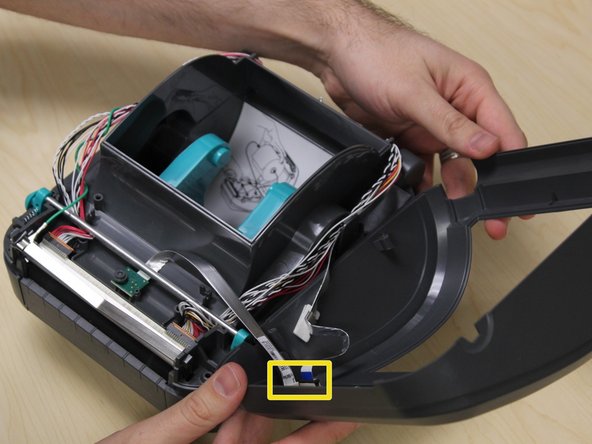
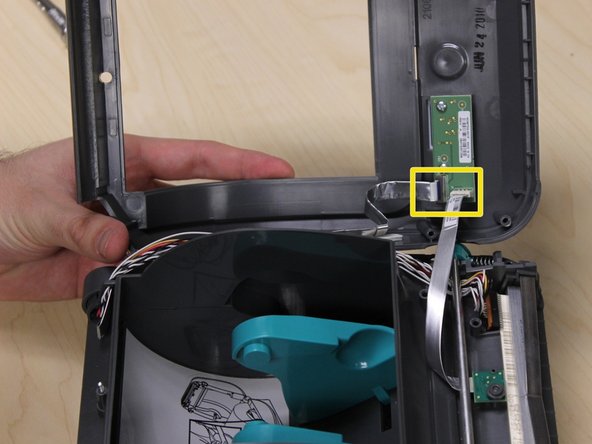
    • Gently unplug the two ribbon cables attached to the underside of the lid cover.

    • Note which direction the contacts on the ribbon cables are facing for reassembly.

    • If there is enough slack on the ribbon cable traveling down the side of the printer, it is not necessary to unplug it. The lid may rest next to the printer.

  4. Zebra GK420d Printhead Replacement, Remove the grounding cable: Schritt 4, Bild 1 von 2 Zebra GK420d Printhead Replacement, Remove the grounding cable: Schritt 4, Bild 2 von 2
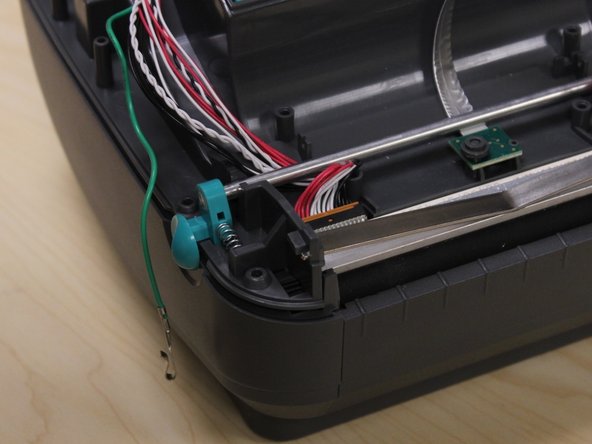
    • Slide the grounding cable hook toward the front of the printer to release it from the retaining spring.

    • Thread the grounding cable away from the printhead and the lid latches.

  5. Zebra GK420d Printhead Replacement, Release the retaining spring.: Schritt 5, Bild 1 von 3 Zebra GK420d Printhead Replacement, Release the retaining spring.: Schritt 5, Bild 2 von 3 Zebra GK420d Printhead Replacement, Release the retaining spring.: Schritt 5, Bild 3 von 3
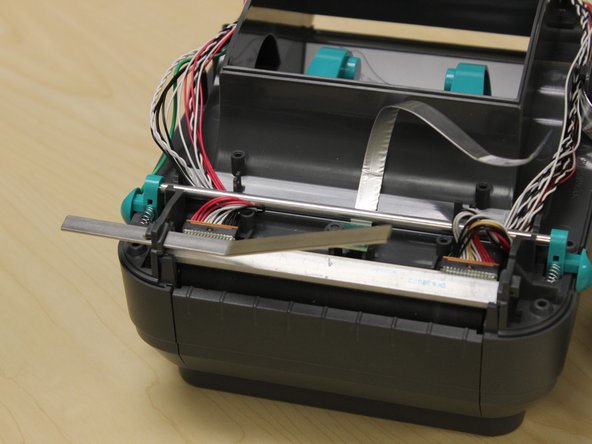
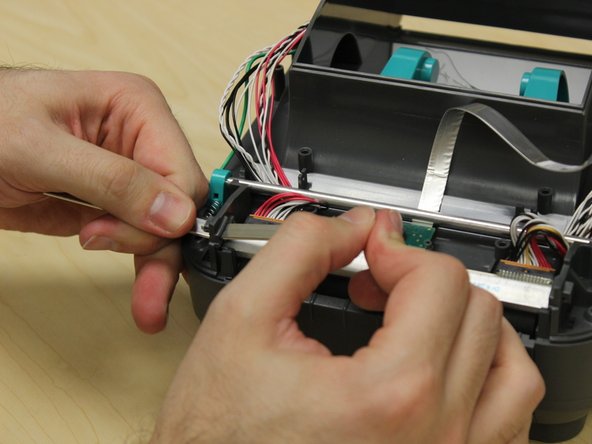
    • Apply downward pressure on the retaining spring.

    • Use a spudger to release the plastic tab holding in the retaining spring.

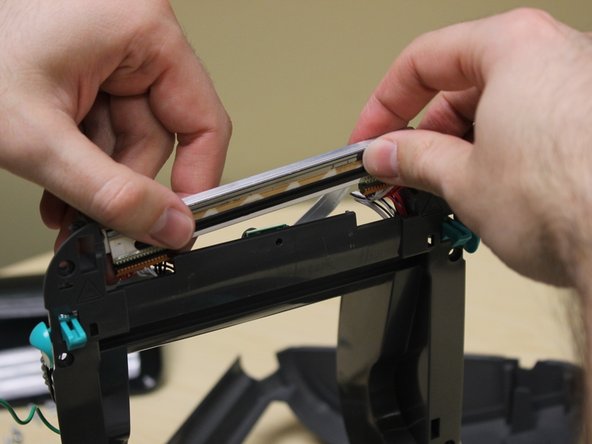
    • Once the edge of the retaining spring has cleared the plastic tab, you can slide the retaining spring out of the printer.

    • The retaining spring can only be removed out of one side of the printer.

    • Clearing the plastic tab holding the retaining spring in place requires a fair bit of force and coordination. It is possible to damage the plastic tab.

  6. Zebra GK420d Printhead Replacement, Loosen the printhead: Schritt 6, Bild 1 von 3 Zebra GK420d Printhead Replacement, Loosen the printhead: Schritt 6, Bild 2 von 3 Zebra GK420d Printhead Replacement, Loosen the printhead: Schritt 6, Bild 3 von 3
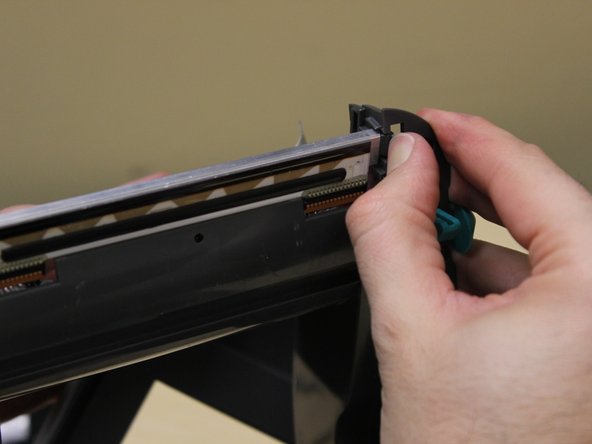
    • Press the plastic tab holding the printhead in place.

    • Once the edge of the printhead is clear of the plastic tab, you can pull it away from the lid to give yourself more room.

  7. Zebra GK420d Printhead Replacement, Unplug the printhead.: Schritt 7, Bild 1 von 3 Zebra GK420d Printhead Replacement, Unplug the printhead.: Schritt 7, Bild 2 von 3 Zebra GK420d Printhead Replacement, Unplug the printhead.: Schritt 7, Bild 3 von 3
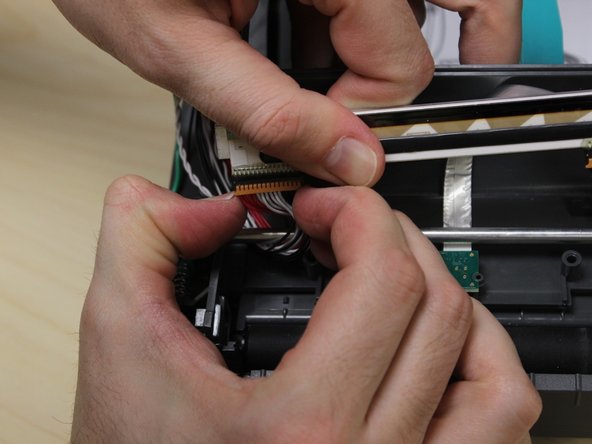
    • Gently remove the two cables on each end of the printhead.

    • It may be helpful to have the lid closed and latched during this step.

Abschluss

To reassemble your device, follow these instructions in reverse order.

4 weitere Nutzer:innen haben diese Anleitung absolviert.

Miles Carmany

Mitglied seit: 01/11/12

149 Reputation

1 Anleitung geschrieben

6 Kommentare

Why would you take the unit apart to replace the printhead? I do not understand. All you need to do is press the plastic tab, slide the printhead off, disconnect the two harnesses, then connect the harness to the new printhead, then slide the printhead in. You do not need to take the unit apart and/or unscrew anything. I can change a printhead on this unit in less then 60 seconds.

dangallagher23 - Antwort

I’ve not had experience with these before, so I just documented my process as I went trying to make sure I didn’t break anything. I took a closer look based on what I think I understand from your comment and it was very easy.

This is awesome! Thanks for the tip. I will post this easier alternative as soon as I can take decent pictures.

Miles Carmany -

So how now ?

TengSern TAN -

Agree, there is no need to remove the top cover. Too many chances to screw up other things.

Joe Phillips - Antwort

So the guide is overkill ?

TengSern TAN - Antwort

Kommentar hinzufügen

Seitenaufrufe:

Letzte 24 Stunden: 4

Letzte 7 Tage: 18

Letzte 30 Tage: 104

Insgesamt: 8,011