Einleitung
This camera replacement guide should only be done once the prerequisite steps have been fully completed. Skipping any steps can lead to damage to your device.
Was du brauchst
-
-
Remove the two screws on the bottom using a Phillips #00 screwdriver.
-
-
-
Using a spudger, start prying the case apart by working around the edge slowly.
-
-
-
Peel back the touch interface chip (which is on the top right of the motherboard, covered in yellow tape.)
-
-
-
-
Using a Phillips #00 screwdriver, remove the screws highlighted with the orange rings as shown in the picture.
-
-
-
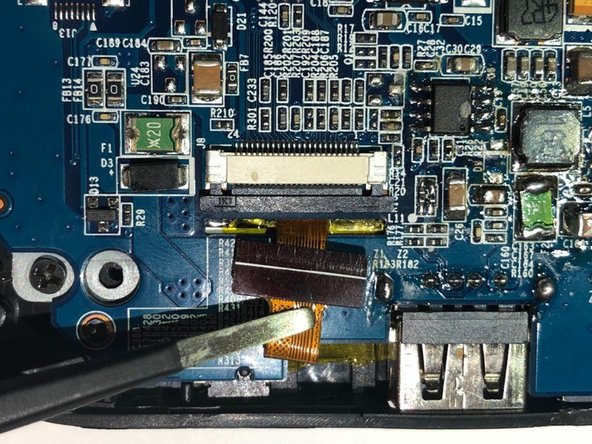
Slide back the plastic latch for the main display cable.
-
Carefully unplug the cable with tweezers.
-
-
-
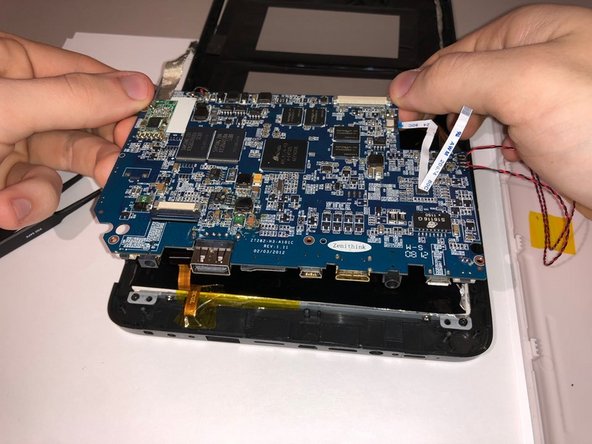
Slide back the plastic latch for the camera cable.
-
Carefully unplug the cable with tweezers.
-
-
-
Peel back the adhesive tape holding the camera in place.
-
Remove the camera from the device.
-


To reassemble your device, follow these instructions in reverse order.
To reassemble your device, follow these instructions in reverse order.
Rückgängig: Ich habe diese Anleitung nicht absolviert.
Ein:e weitere:r Nutzer:in hat diese Anleitung absolviert.
Team

University of North Texas, Team S6-G1, Thompson Fall 2018 Mitglied von University of North Texas, Team S6-G1, Thompson Fall 2018
UNT-THOMPSON-F18S6G1
3 Mitglieder
5 Anleitungen geschrieben