Zum Hauptinhalt wechseln

bObsweep PetHair Plus WPP56002 Touch Sensor Replacement

Was du brauchst

  1. bObsweep PetHair Plus WPP56002 Touch Sensor Replacement, Cover: Schritt 1, Bild 1 von 1
    • Depress the tab on the side of the dustbin to disengage its latch. It is spring loaded and will partially pop out. Remove it from its housing.

  2. bObsweep PetHair Plus WPP56002 Touch Sensor Replacement: Schritt 2, Bild 1 von 3 bObsweep PetHair Plus WPP56002 Touch Sensor Replacement: Schritt 2, Bild 2 von 3 bObsweep PetHair Plus WPP56002 Touch Sensor Replacement: Schritt 2, Bild 3 von 3
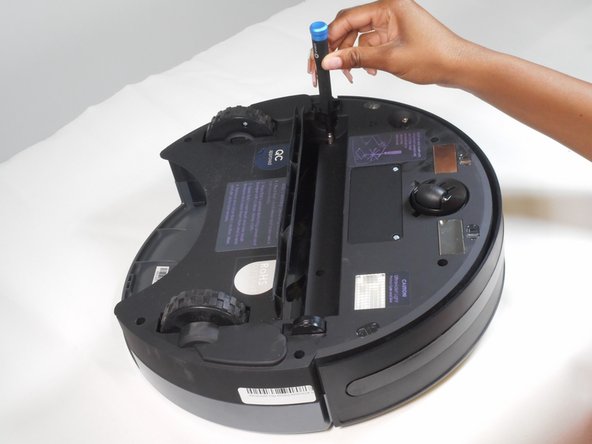
    • Flip the bObsweep over and remove the main brush’s screw (13.7mm Flat) with a flathead screwdriver.

    • Lift and remove the main brush and its plastic bearing end cap.

  3. bObsweep PetHair Plus WPP56002 Touch Sensor Replacement: Schritt 3, Bild 1 von 2 bObsweep PetHair Plus WPP56002 Touch Sensor Replacement: Schritt 3, Bild 2 von 2
    • Remove the two screws (9.9mm Phillips #1) next to the rotating front wheel.

    • Remove the two screws (9.9mm Phillips #1) below the wheels on either side of the dustbin compartment.

    • Remove the screw (9.9mm Phillips #1) to the side of the brush motor.

    • Remove the screw (9.9mm Phillips #1) inside the brush compartment.

  4. bObsweep PetHair Plus WPP56002 Touch Sensor Replacement: Schritt 4, Bild 1 von 2 bObsweep PetHair Plus WPP56002 Touch Sensor Replacement: Schritt 4, Bild 2 von 2
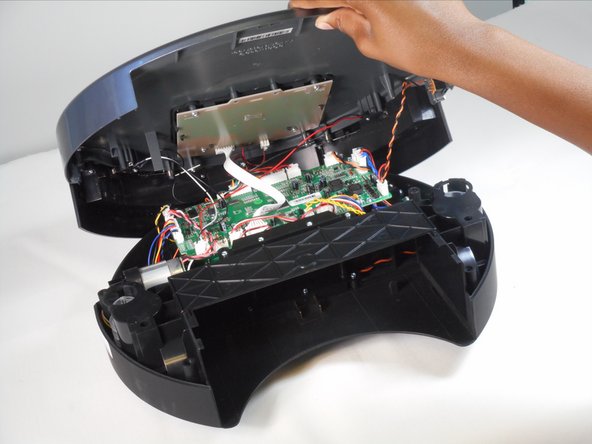
    • Carefully hold the top and bottom halves together and flip the bObsweep upright.

    • Lift the cover to reveal the mainboard.

  5. bObsweep PetHair Plus WPP56002 Touch Sensor Replacement: Schritt 5, Bild 1 von 3 bObsweep PetHair Plus WPP56002 Touch Sensor Replacement: Schritt 5, Bild 2 von 3 bObsweep PetHair Plus WPP56002 Touch Sensor Replacement: Schritt 5, Bild 3 von 3
    • Slide the power inlet down.

    • Tuck it aside to protect it from damage.

  6. bObsweep PetHair Plus WPP56002 Touch Sensor Replacement: Schritt 6, Bild 1 von 3 bObsweep PetHair Plus WPP56002 Touch Sensor Replacement: Schritt 6, Bild 2 von 3 bObsweep PetHair Plus WPP56002 Touch Sensor Replacement: Schritt 6, Bild 3 von 3
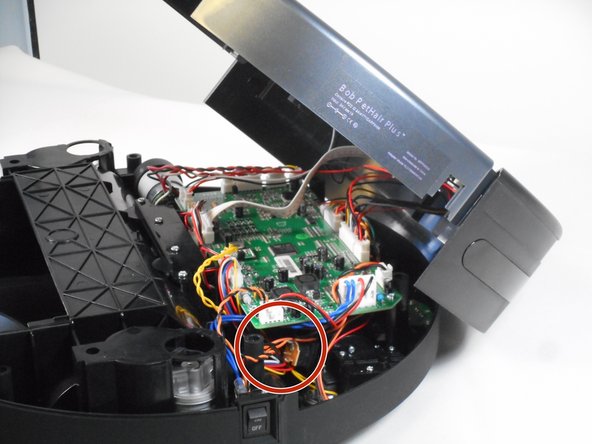
    • Depress the tabs on the circuit plugs and lift them directly upward to remove:

    • The multicolored nine-wire circuit plug at the top edge of the board.

    • The red and black wire circuit plug directly next to it.

    • The seven white wire circuit plug on the bottom edge of the board.

    • The red, white, and black wire circuit plug on the bottom left corner of the board.

  7. bObsweep PetHair Plus WPP56002 Touch Sensor Replacement, Touch Sensor: Schritt 7, Bild 1 von 2 bObsweep PetHair Plus WPP56002 Touch Sensor Replacement, Touch Sensor: Schritt 7, Bild 2 von 2
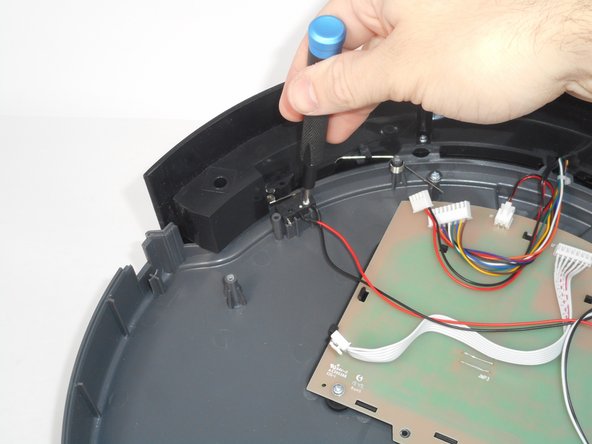
    • Remove and set aside the screw (10.8 mm Phillips #1) on each sensor.

  8. bObsweep PetHair Plus WPP56002 Touch Sensor Replacement: Schritt 8, Bild 1 von 1
    • Lift the sensors to extract them.

  9. bObsweep PetHair Plus WPP56002 Touch Sensor Replacement: Schritt 9, Bild 1 von 1
    • Install the new sensors.

    • Ensure the red-wired sensor is on the left side and the black-wired sensor is on the right.

Abschluss

To reassemble your device, follow these instructions in reverse order.

Saylor Price

Mitglied seit: 09/07/23

957 Reputation

7 Anleitungen geschrieben

Team

University of Memphis, Team 1-3, Sneed Fall 2023 Mitglied von University of Memphis, Team 1-3, Sneed Fall 2023

UM-SNEED-F23S1G3

4 Mitglieder

7 Anleitungen geschrieben

0 Kommentare

Kommentar hinzufügen

Seitenaufrufe:

Letzte 24 Stunden: 0

Letzte 7 Tage: 1

Letzte 30 Tage: 1

Insgesamt: 39