Einleitung
This guide shows the steps in removing the part of Bob which holds the main brush and adjusts up and down for flooring transitions.
Was du brauchst
-
-
Flip Bob over and remove the 7 screws around which hold the cover together.
-
Remove the main brush. Unscrew the holder, and lift the brush out. Reminder: Keep this screw separate from the others so you can use it later to reinstall.
-
-
-
There are two screw holes inside the brush compartment: one in the centre, one on the left end. Remove both and keep aside for reassembly.
-
There are five more screws around bObsweep's edges. Two are installed at the top and bottom, and one on the right end of the main brush.
-
-
-
Flip bOb back over so you can see the screen. Lift the cover up to reveal bObsweep’s main board.
-
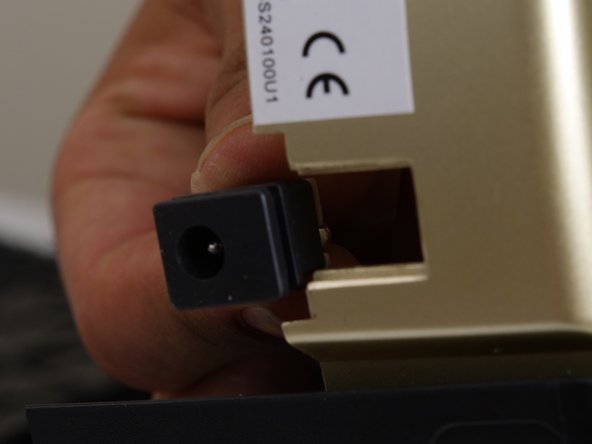
Detach the power inlet from the cover. Grip and slide it out.
-
-
-
-
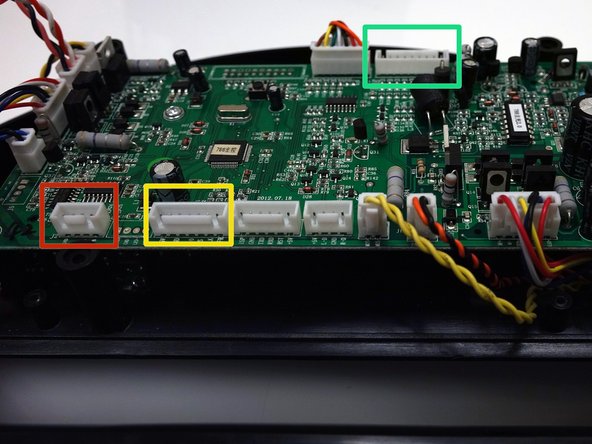
Remove three circuit plugs from the motherboard. Pinch the small white tab on the side of each circuit plug and pull straight up to release each from the motherboard.
-
1. On the bottom left corner: a small connector with red, black and white wires.
-
2. One thick white wire that attaches on the right side of the previous connector.
-
3. On the top edge of bOb’s motherboard: a wide multicoloured connector.
-
Place the cover aside and begin your repair.
-
-
-
The clutch end of the main brush, where the pin sits, is held inside Bob with one screw. It is found beside the power switch.
-
Use one hand to push the clutch up, then uninstall the screw and keep it aside for later.
-
-
-
Lift bOb up, and two pieces will fall out: the clutch and a spring on top of it.
-
Place your new parts underneath bOb. Hold the spring on top of the clutch piece while putting it back in its space, then reinstall the screw.
-
-
-
Make sure to hold the clutch piece underneath bOb while installing the screw, so you can see the screw post protruding inside bObsweep.
-
When you’re finished, reattach the cover and install the main brush. Follow instructions in the Closing bObsweep's cover after repair
-


To close bObsweep after this repair, follow instructions in the Closing bObsweep's cover after repair
To close bObsweep after this repair, follow instructions in the Closing bObsweep's cover after repair