Zum Hauptinhalt wechseln

d.light Solar Lantern S2 Circuit Board Replacement

Was du brauchst

  1. d.light Solar Lantern S2 Circuit Board Replacement, Circuit Board: Schritt 1, Bild 1 von 2 d.light Solar Lantern S2 Circuit Board Replacement, Circuit Board: Schritt 1, Bild 2 von 2
    • To remove the lens, three T15 x 12.5mm screws must be removed by a T15 head screwdriver.

    • The location of the other two screws are marked in red.

  2. d.light Solar Lantern S2 Circuit Board Replacement: Schritt 2, Bild 1 von 3 d.light Solar Lantern S2 Circuit Board Replacement: Schritt 2, Bild 2 von 3 d.light Solar Lantern S2 Circuit Board Replacement: Schritt 2, Bild 3 von 3
    • After the lens has been removed the back cover needs to be removed. There are no snaps or screws holding it in place.

  3. d.light Solar Lantern S2 Circuit Board Replacement: Schritt 3, Bild 1 von 1
    • Remove battery by unplugging it from the circuit board.

  4. d.light Solar Lantern S2 Circuit Board Replacement: Schritt 4, Bild 1 von 2 d.light Solar Lantern S2 Circuit Board Replacement: Schritt 4, Bild 2 von 2
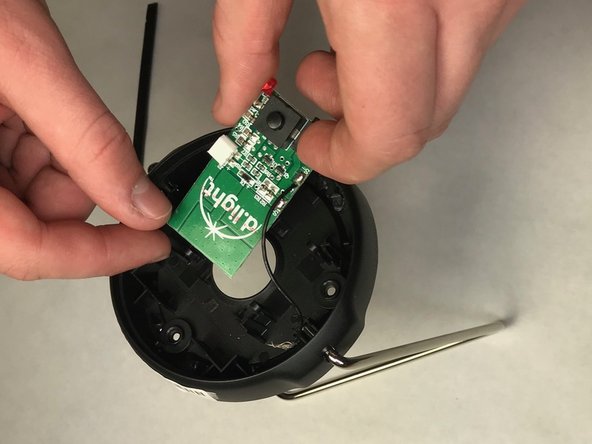
    • Remove the circuit board by pressing on the mounting clips (shown in red circles) using the spudger.

  5. d.light Solar Lantern S2 Circuit Board Replacement: Schritt 5, Bild 1 von 1
    • Desolder the wires to free the circuit board.

Abschluss

To reassemble your device, follow these instructions in reverse order.

2 weitere Nutzer:innen haben diese Anleitung absolviert.

Team

IUPUI, Team S2-G3, Harley Fall 2017 Mitglied von IUPUI, Team S2-G3, Harley Fall 2017

IUPUI-HARLEY-F17S2G3

3 Mitglieder

3 Anleitungen geschrieben

0 Kommentare

Kommentar hinzufügen

Seitenaufrufe:

Letzte 24 Stunden: 2

Letzte 7 Tage: 9

Letzte 30 Tage: 20

Insgesamt: 1,165