Einleitung
The hard drive in the eMac is pretty tough to get to, and requires disassembling most of the computer.
Was du brauchst
-
-
It should be noted that these guides are written based on a late-model eMac (2005, 1.42GHz, DDR). They will differ slightly from the older model eMacs that use PC-133 RAM.
-
Lay the eMac screen-down on a flat surface. I've found it convenient to use a carpeted floor because the computer is so heavy.
-
Remove the single phillips #2 screw on the RAM door, and remove the door
-
The screw is captive in the door, so don't worry about losing it.
-
-
-
You can read more about CRT safety procedures here. If you aren't experienced with working on devices featuring a CRT, it's recommended that you don't proceed any further.
-
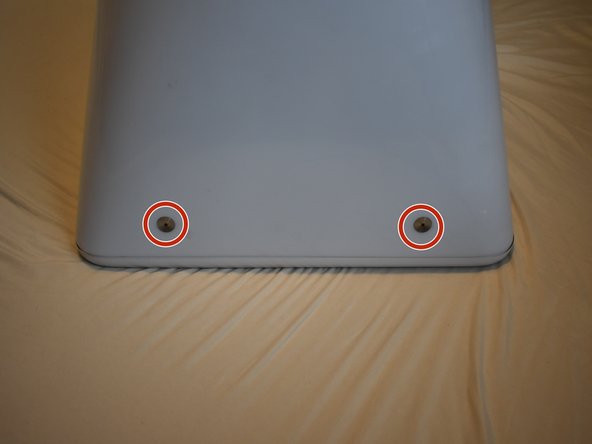
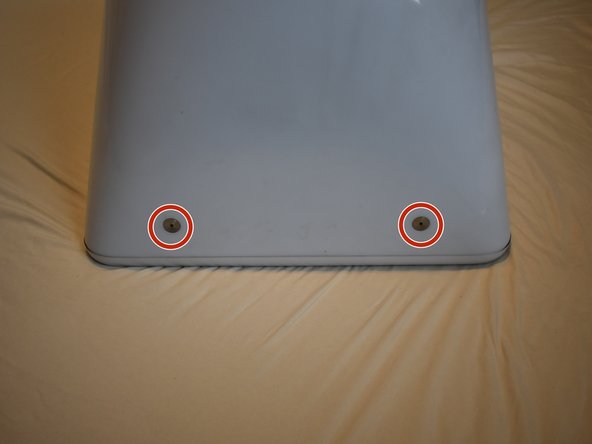
On the bottom side of the eMac, remove the following screws:
-
A single 2.5mm hex screw
-
Two #2 phillips screws
-
-
-
Remove two 2.5mm hex screws from each of the other sides of the computer.
-
-
-
Now, the shell can almost be separated from the computer.
-
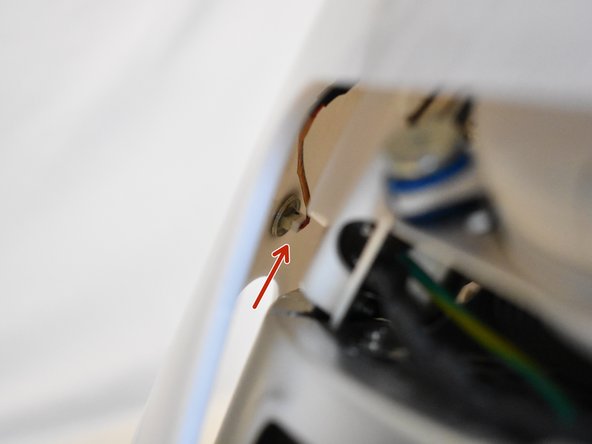
Lift the housing enough to allow you to fit your hand through the access door, and disconnect the cable at the power button.
-
-
-
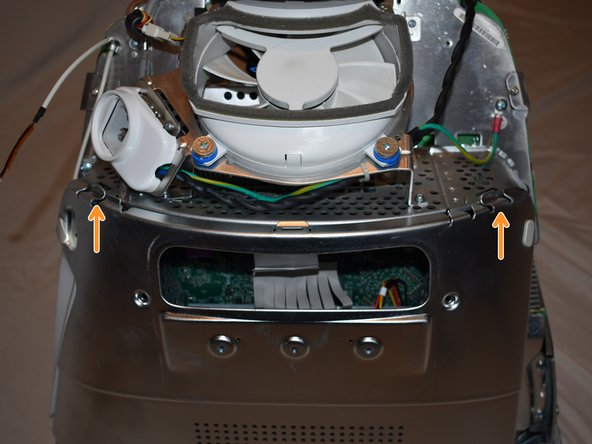
The motherboard access panel is held on by 4 phillips #2 screws.
-
Remove the screws, then use your fingers to pull on the top tabs to separate the panel from the computer frame.
-
-
-
To remove the fan assembly, several cables must be disconnected first:
-
3-pin fan cable
-
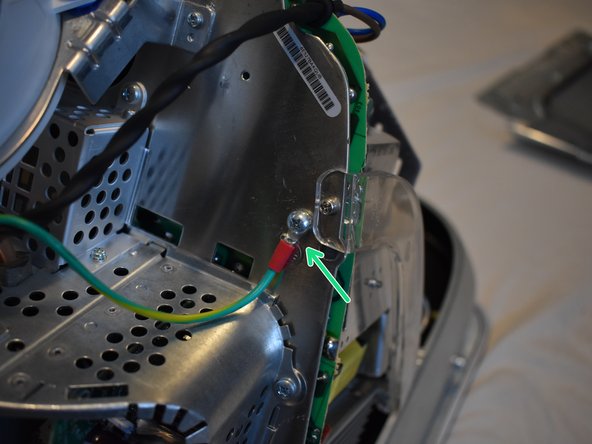
Ground wire, requires phillips #2 screwdriver
-
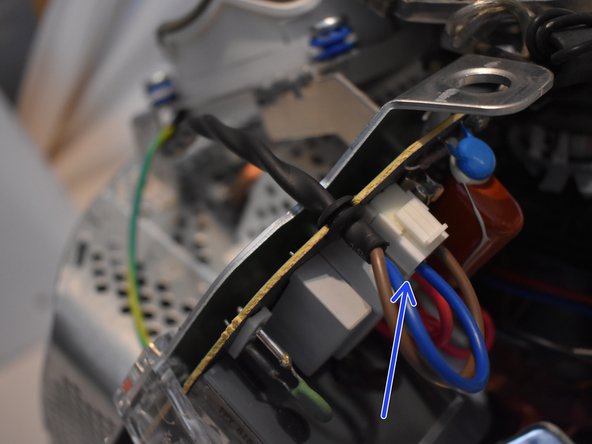
2-pin AC cable to power supply
-
-
-
-
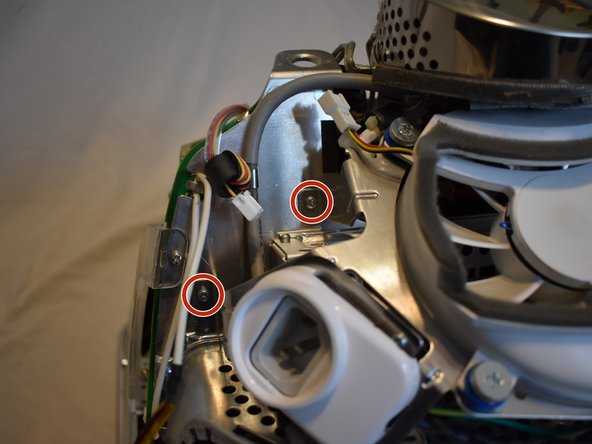
Now remove the following screws securing the fan assembly:
-
3x coarse thread phillips #2
-
1x machine thread phillips #2
-
-
-
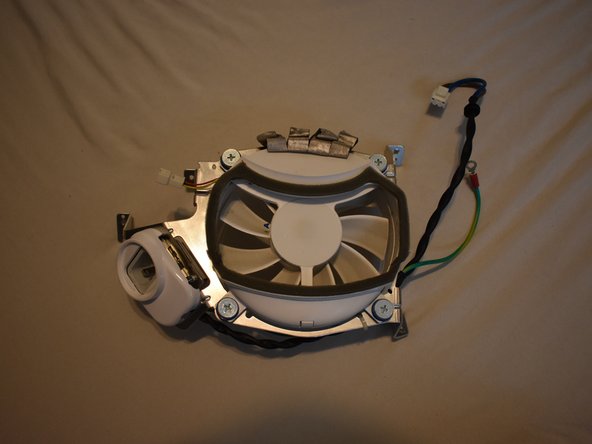
There may be a zip tie holding another cable to the fan assembly, cut it to remove the fan assembly.
-
-
-
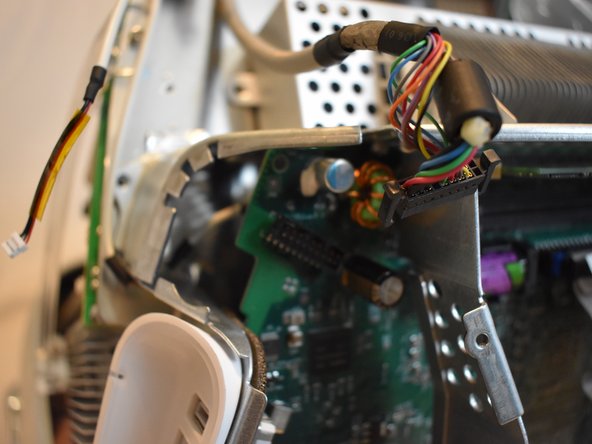
There are four connectors at the bottom of the motherboard that must be removed.
-
-
-
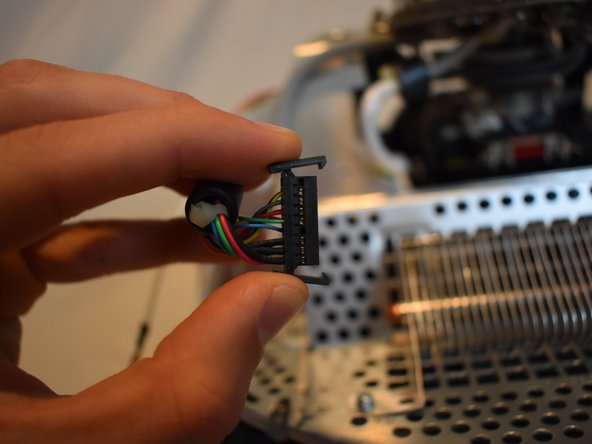
There is a large display connector that must be removed. This can be done by squeezing the tabs and pulling.
-
-
-
The power button cable may be tucked in the casing, you will need to un-tuck it.
-
-
-
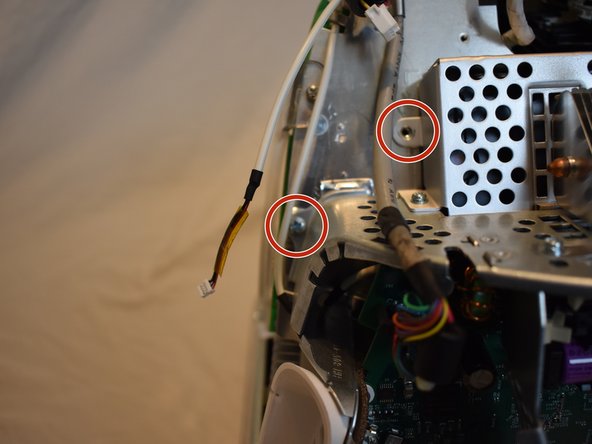
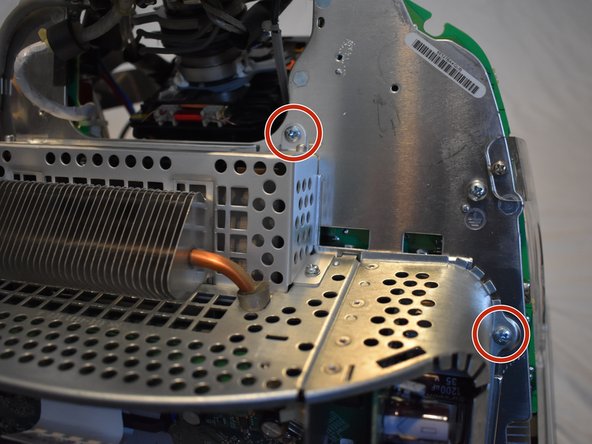
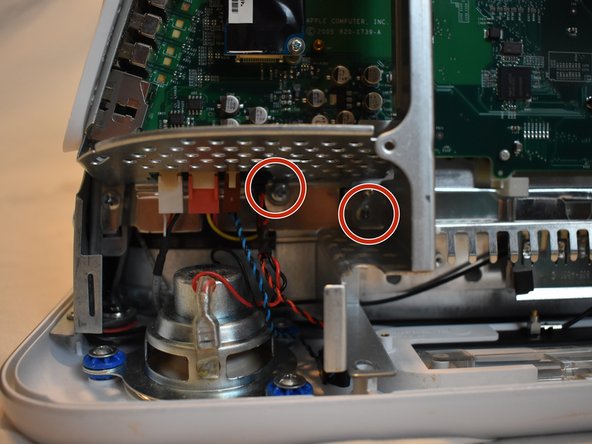
There are several phillips #2 screws that hold the eMac motherboard assembly to the rest of the computer. They will all need to be removed.
-
2 large ones near the drive bay door.
-
7 smaller ones scattered around
-
-
-
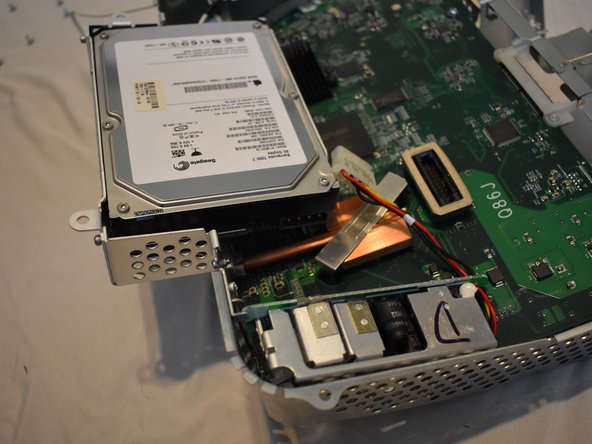
The hard drive is fastened to a caddy. In order to remove it, the caddy must be removed first.
-
It is secured to the motherboard assembly with two phillips #2 screws. Remove them, but don't pull the drive out yet.
-
-
-
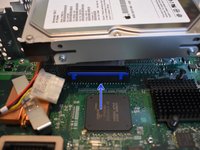
The drive is still connected with an IDE cable, which is folded under the caddy.
-
Disconnect the IDE cable from the motherboard, and lift the drive caddy out.
-
-
-
The hard drive is held in the caddy with four phillips screws. Remove them.
-
Also disconnect the IDE cable from the drive. It can now be removed from the caddy.
-


To reassemble your device, follow these instructions in reverse order.
To reassemble your device, follow these instructions in reverse order.
Rückgängig: Ich habe diese Anleitung nicht absolviert.
30 weitere Personen haben diese Anleitung absolviert.

Team

5 Kommentare
I love you.
Maybe I’m being premature, but this gives me hope that I might be able to release the drive that’s been trapped inside my eMac for 20 years, after which I will for sure love you. My first obstacle is stripped hex screws, but my second was not knowing what the !&&* to do if I DID manage to open it! I’m determined to find a way past those jerks and then get through the next 19 steps. Thanks in advance!
I'm really surprised you're not including the directions to discharge the CRT. The eMacs in particular have a hard neck to avoid touching and the risk is being hit by 25,000+ volts. We were always taught to discharge these as soon as removing the back panel.
Top of step two, Rebecca.
good enough to make me curious
Thank you, thank you, thank you. My eMac never worked properly. I bought it in early 2003. Less than 2 months later it stopped being able to receive emails. It weighs as much as a Buick and I live on the 4th floor of a walk-up, so I had to just deal with its flaws. A few years later a big, strong new neighbor carried it to the Genius Bar for me. After they repaired it it worked until 2010. Then it died a slow, painful, ugly death. Apple wouldn't touch it. Neither would any of the computer repair places here in NYC. It's been sitting in my apartment for 15 years, waiting for its hard drive to be pulled. I was so happy when I found this website. I bought the hex key tool using your link. I just finished pulling the hard drive. It took about an hour and forty-five minutes because of the tight space I had to work it. But it's done. Yay!!! I'm extremely grateful for the fantastic step-by-step instructions and the photos. I definitely would not have been able to do it without ifixit.