Zum Hauptinhalt wechseln

hp spectre 13-3010dx Track Pad Replacement

Was du brauchst

  1. hp spectre 13-3010dx Track Pad Replacement, Removal of the Back Case: Schritt 1, Bild 1 von 2 hp spectre 13-3010dx Track Pad Replacement, Removal of the Back Case: Schritt 1, Bild 2 von 2
    In diesem Schritt verwendetes Werkzeug:
    Anti-Static Wrist Strap
    $7.95
    Kaufen
    • Put on Anti Static Wrist Strap.

    • It is always a good idea to ground yourself when working with electronics to prevent static buildup. You wear this strap to protect you and your device from accidental electrostatic discharge (ESD) damage during repairs.]

    • Flip Computer Upside down.

    • Unscrew the eight 3.3mm black screws on the back casing with the T4 Torx Screwdriver.

  2. hp spectre 13-3010dx Track Pad Replacement: Schritt 2, Bild 1 von 2 hp spectre 13-3010dx Track Pad Replacement: Schritt 2, Bild 2 von 2
    • Use the plastic opening tool to lift the back case off.

    • Use the plastic opening tools first; metal spudgers can damage your device.

  3. hp spectre 13-3010dx Track Pad Replacement, Battery: Schritt 3, Bild 1 von 1
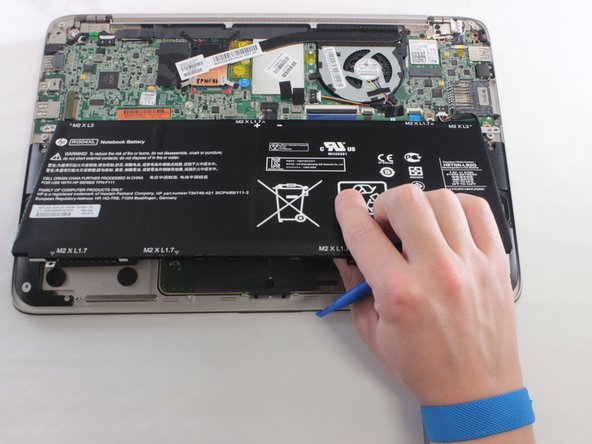
    • Remove the six 2.0mm silver screws and the two 3.2 mm black screws using the PH00 Phillips Screw Head.

  4. hp spectre 13-3010dx Track Pad Replacement: Schritt 4, Bild 1 von 1
    • Gently unplug from CONO851 plug, using the plastic opening tool.

  5. hp spectre 13-3010dx Track Pad Replacement: Schritt 5, Bild 1 von 2 hp spectre 13-3010dx Track Pad Replacement: Schritt 5, Bild 2 von 2
    • Gently lift up the battery and remove using the plastic opening tools.

  6. hp spectre 13-3010dx Track Pad Replacement, Track Pad: Schritt 6, Bild 1 von 1
    • Unscrew the five 2.3 mm screws using the PH000 screw head.

  7. hp spectre 13-3010dx Track Pad Replacement: Schritt 7, Bild 1 von 1
    • Lift up the latch using the nylon spudger.

  8. hp spectre 13-3010dx Track Pad Replacement: Schritt 8, Bild 1 von 1
    • Disconnect the ribbon.

  9. hp spectre 13-3010dx Track Pad Replacement: Schritt 9, Bild 1 von 1
    • Lift out the track pad.

Abschluss

To reassemble your device, follow these instructions in reverse order.

Ein:e weitere:r Nutzer:in hat diese Anleitung absolviert.

0 Kommentare

Kommentar hinzufügen

Seitenaufrufe:

Letzte 24 Stunden: 0

Letzte 7 Tage: 1

Letzte 30 Tage: 7

Insgesamt: 1,363