Zum Hauptinhalt wechseln

iBook G3 14" LCD Cover Replacement

Grundständige Anleitung
Dies ist eine grundständige Anleitung, die nur als Teil einer anderen Anleitung verwendet werden sollte.

Was du brauchst

  1. iBook G3 14" LCD Cover Replacement, LCD Cover: Schritt 1, Bild 1 von 2 iBook G3 14" LCD Cover Replacement, LCD Cover: Schritt 1, Bild 2 von 2
    • Remove the pieces of readily removable tape from around the perimeter of the display.

    • Carefully remove the aluminum tape covering the display data cable connection.

  2. iBook G3 14" LCD Cover Replacement: Schritt 2, Bild 1 von 2 iBook G3 14" LCD Cover Replacement: Schritt 2, Bild 2 von 2
    • Remove the single screw inserted through the piece of EMI tape near the bottom edge of the display.

    • Use the tip of a spudger to remove the small washer under the screw you just removed.

  3. iBook G3 14" LCD Cover Replacement: Schritt 3, Bild 1 von 1
    • Peel the aluminum/EMI tape off the cast aluminum frame of the clutch hinges.

    • It is not necessary to peel the tape off the thin steel LCD cover.

  4. iBook G3 14" LCD Cover Replacement: Schritt 4, Bild 1 von 2 iBook G3 14" LCD Cover Replacement: Schritt 4, Bild 2 von 2
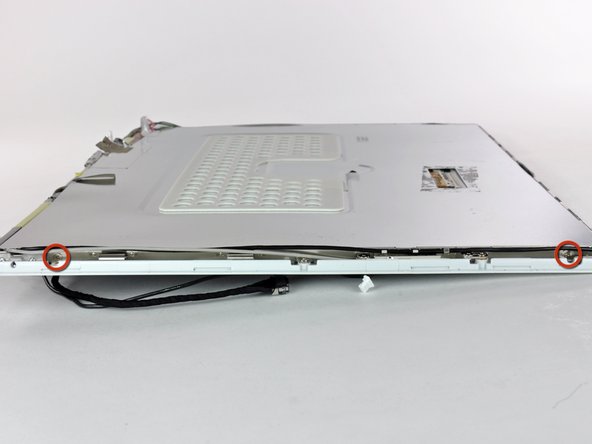
    • Remove the two Phillips screws securing each side of the LCD to the clutch hinge frame (four screws total).

  5. iBook G3 14" LCD Cover Replacement: Schritt 5, Bild 1 von 1
    • Lift the thin steel LCD cover off the LCD.

Abschluss

To reassemble your device, follow these instructions in reverse order.

Ein:e weitere:r Nutzer:in hat diese Anleitung absolviert.

0 Kommentare

Kommentar hinzufügen

Seitenaufrufe:

Letzte 24 Stunden: 0

Letzte 7 Tage: 0

Letzte 30 Tage: 0

Insgesamt: 42