Einleitung
For this repair guide, the rear facing camera on the iDea USA CT 1020 will be addressed. The camera can easily become damaged or cracked if the tablet is mishandled by the user, or the camera can simply stop working. Once the backing plate is removed from the tablet and the rear camera is located on the motherboard, the removal process is simple. The electrical ribbon running from the camera goes to an electrical connector, and once the connector is unsnapped, the camera is free to be removed.
Was du brauchst
-
-
Place the tablet on a clean surface with the screen down
-
-
-
Remove the back plastic casing of the tablet by releasing the plastic clips with a plastic opening tool or a spudger.
-
-
-
-
Use a plastic opening tool or spudger to lift and release the camera assembly ZIF tab.
-
Gently pull the ribbon cable free.
-
-
-
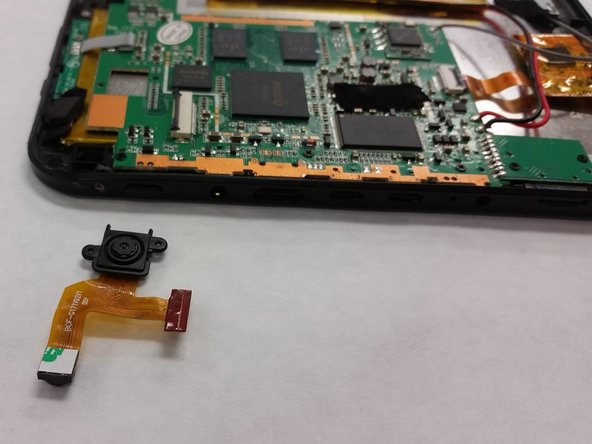
The camera is held in place by adhesive material on the back of the camera
-
To complete removal, peel the camera off the mother board
-


To reassemble your device, follow these instructions in reverse order.
To reassemble your device, follow these instructions in reverse order.
Rückgängig: Ich habe diese Anleitung nicht absolviert.
Ein:e weitere:r Nutzer:in hat diese Anleitung absolviert.
Team

IUPUI, Team S1-G3, Freund Spring 2018 Mitglied von IUPUI, Team S1-G3, Freund Spring 2018
IUPUI-FREUND-S18S1G3
3 Mitglieder
4 Anleitungen geschrieben