Zum Hauptinhalt wechseln

iDea USA CT702 Digitizer Glass Replacement

Was du brauchst

  1. iDea USA CT702 Digitizer Glass Replacement, Digitizer Glass: Schritt 1, Bild 1 von 1
    • Place tablet on the table with screen facing upright.

    • Starting from the portholes, use plastic opening tool to pry in between the front panel and back cover.

    • Follow the opening along the corners and sides until all latches are unclipped.

    • Remove back cover completely and place it outside of the work area.

  2. iDea USA CT702 Digitizer Glass Replacement: Schritt 2, Bild 1 von 2 iDea USA CT702 Digitizer Glass Replacement: Schritt 2, Bild 2 von 2
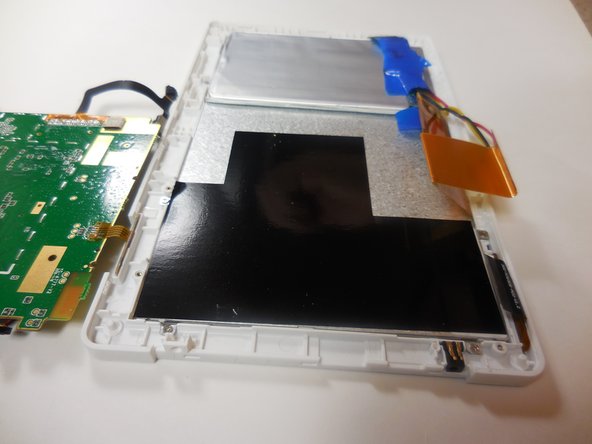
    • Place tablet facing down.

    • Locate the 4mm screws along the perimeter of the motherboard.

    • There should be 4 screws.

    • Use Philips screw driver to unscrew each one, and carefully place screws in a safe place.

  3. iDea USA CT702 Digitizer Glass Replacement: Schritt 3, Bild 1 von 3 iDea USA CT702 Digitizer Glass Replacement: Schritt 3, Bild 2 von 3 iDea USA CT702 Digitizer Glass Replacement: Schritt 3, Bild 3 von 3
    In diesem Schritt verwendetes Werkzeug:
    Tweezers
    $4.99
    Kaufen
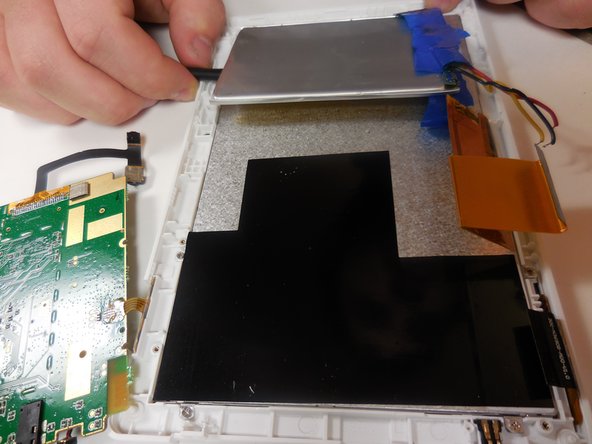
    • After screws are removed, gently pull up on the ribbon wire connection to release all 3 wires from the motherboard.

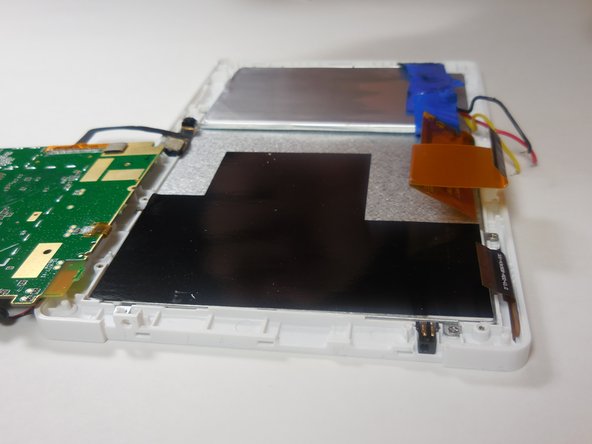
    • Safely remove mother board and battery from tablet by using tweezers.

    • Make sure the small ribbon wires are not damaged when removing larger members.

  4. iDea USA CT702 Digitizer Glass Replacement: Schritt 4, Bild 1 von 1
    • Remove tape from battery pack, and dispose.

    • Be careful not to touch the wire/battery connection correctly, as it could result in injury.

  5. iDea USA CT702 Digitizer Glass Replacement: Schritt 5, Bild 1 von 3 iDea USA CT702 Digitizer Glass Replacement: Schritt 5, Bild 2 von 3 iDea USA CT702 Digitizer Glass Replacement: Schritt 5, Bild 3 von 3
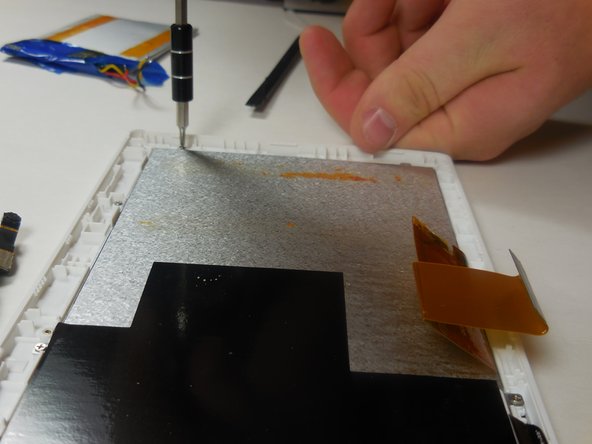
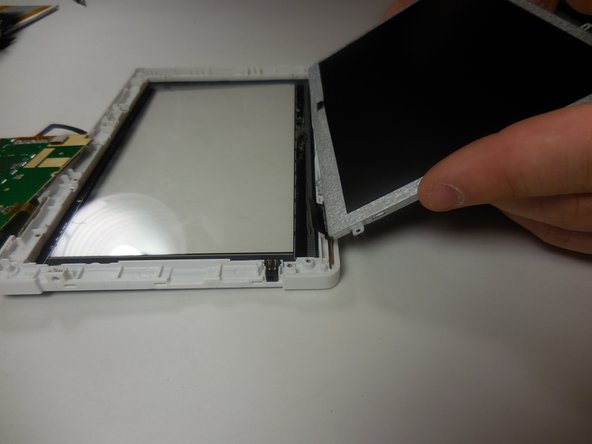
    • After removing the battery pack and motherboard, the touch sensor unit should be visible.

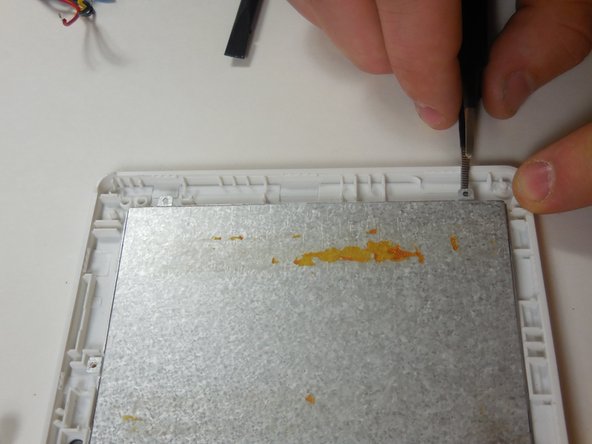
    • Use small Philips screw driver to unscrew all 6 of the 2mm screws.

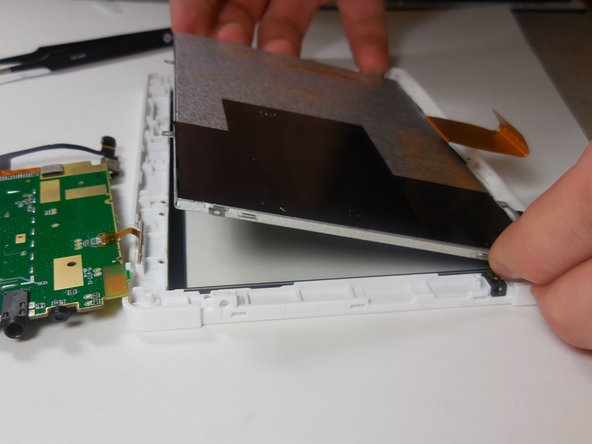
    • Use fingers and prying tool to remove the touch sensor unit from frame.

  6. iDea USA CT702 Digitizer Glass Replacement: Schritt 6, Bild 1 von 3 iDea USA CT702 Digitizer Glass Replacement: Schritt 6, Bild 2 von 3 iDea USA CT702 Digitizer Glass Replacement: Schritt 6, Bild 3 von 3
    • After the touch sensor is detached, only the plastic screen should remain.

    • Insert new touch sensor plate into the same position, aligning all screw inputs.

    • Insert all six of the 2mm. screws to connect the new touch sensor to the screen frame.

  7. iDea USA CT702 Digitizer Glass Replacement: Schritt 7, Bild 1 von 1
    • To continue reassembling the tablet, follow the steps in reverse.

    • Be careful when reconnecting battery, use safety goggles and gloves.

  8. iDea USA CT702 Digitizer Glass Replacement: Schritt 8, Bild 1 von 3 iDea USA CT702 Digitizer Glass Replacement: Schritt 8, Bild 2 von 3 iDea USA CT702 Digitizer Glass Replacement: Schritt 8, Bild 3 von 3
    • To reassemble tablet, follow these steps in reverse order.

Abschluss

To reassemble your device, follow these instructions in reverse order.

David Kambich

Mitglied seit: 03/11/15

110 Reputation

1 Anleitung geschrieben

Team

Colorado Springs, Team 4-7, Panko Spring 2015 Mitglied von Colorado Springs, Team 4-7, Panko Spring 2015

UCCS-PANKO-S15S4G7

3 Mitglieder

10 Anleitungen geschrieben

0 Kommentare

Kommentar hinzufügen

Seitenaufrufe:

Letzte 24 Stunden: 3

Letzte 7 Tage: 4

Letzte 30 Tage: 8

Insgesamt: 331