Einleitung
This guide provides step-by-step instructions for replacing the main motherboard of the iHome iBT230. The main motherboard is responsible for allowing communication between the crucial electronic components of the iBT230, such as the central processing unit (CPU) , memory, also providing the connectors for other peripherals.
Was du brauchst
-
-
Remove the four 5.5 mm Phillips Head #00 screws from the bottom palate of the iBT230.
-
-
-
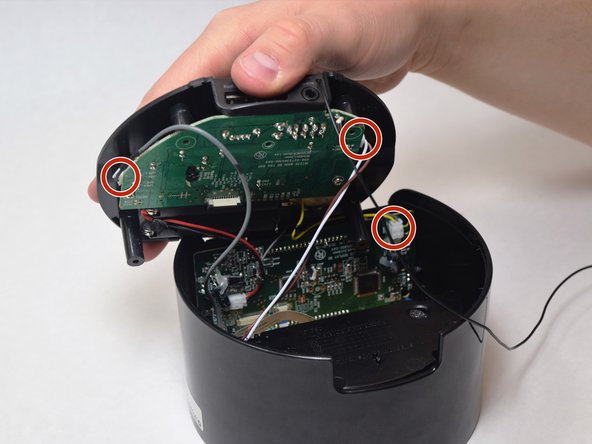
Grip the top of the iBT230 by placing your thumb on the back portion, where the USB port is located. Pull up, and you should notice various different colored wires, connected to the Main Motherboard.
-
-
-
-
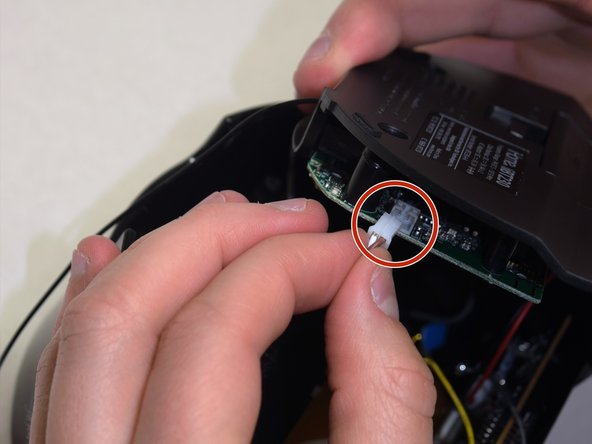
Unplug the connectors from all sides of the iBT230, and unplug the wire connected to the screen.
-
-
-
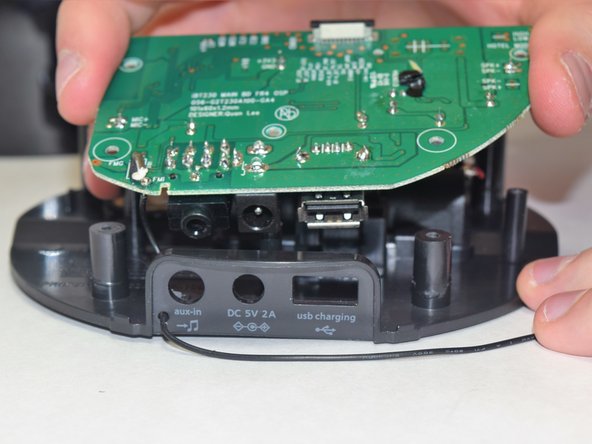
On the bottom component where the green Main Motherboard is located, remove the two 5.5 mm Phillips #00 screws.
-
The old Motherboard will come free from the bottom of the iBT230.
-


To reassemble your device, follow these instructions in reverse order.
To reassemble your device, follow these instructions in reverse order.
Rückgängig: Ich habe diese Anleitung nicht absolviert.
2 weitere Personen haben diese Anleitung absolviert.
Team

UW Tacoma, Team S3-G6, Liner Spring 2017 Mitglied von UW Tacoma, Team S3-G6, Liner Spring 2017
UWT-LINER-S17S3G6
4 Mitglieder
3 Anleitungen geschrieben