Einleitung
This is a guide to replacing a broken screen or logic board connected to the screen.
Was du brauchst
-
-
Flip iHome iH5 over so bottom is facing up.
-
Remove all eight of the screws with a #2 Phillips screwdriver.
-
The eight screws are 5/16 inch screws.
-
-
-
Pull cover back to access the inside.
-
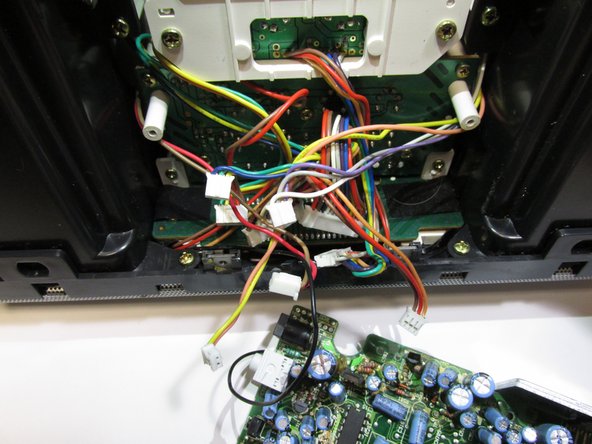
Use tweezers (or pliers if wires are tight) to unplug the three wires.
-
-
-
Remove the five screws holding the circuit board down with a #2 Phillips screwdriver.
-
The five screws are 5/16 inch screws.
-
-
-
-
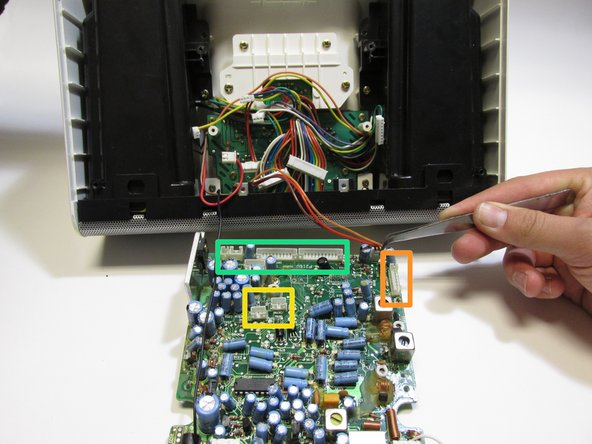
Flip the circuit board over so back is facing out.
-
Remove the eight wires from the circuit board with tweezers. If the wires are tight 8" needle nose pliers might work better.
-
There is one wire to be removed in the orange box.
-
There are two wires to be removed in the the yellow box.
-
In the green box there are five wires to be removed.
-
-
-
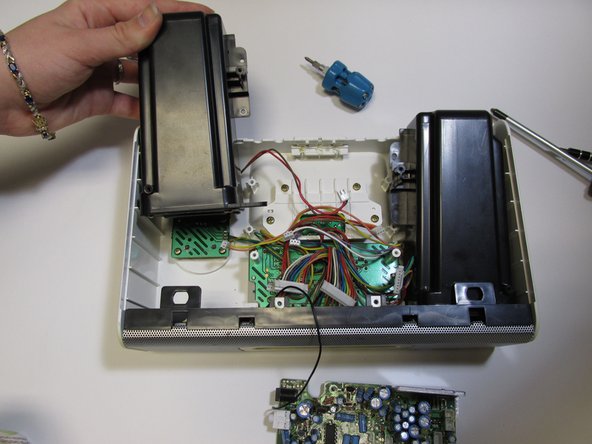
Remove the two 5/16 inch screws from the speakers and the bottom of the device with a #2 Phillips screwdriver.
-
Remove the two 5/16 inch screws from the speakers and the front of the device with a #2 Phillips screwdriver.
-
Gently pull the back of the speaker up (like the speaker on the right side of the picture. Then pull it straight back (as shown with the speaker on the left side of the picture).
-
-
-
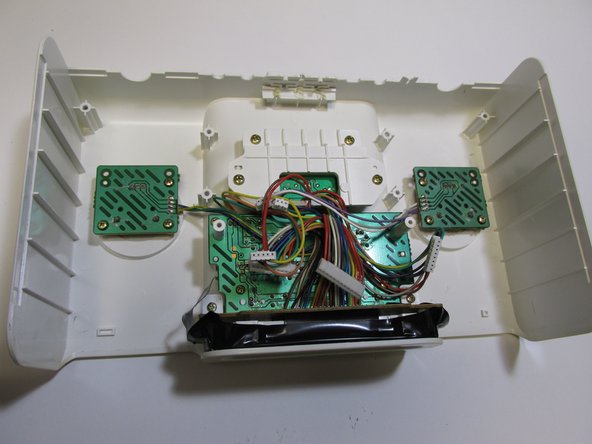
Remove the black and sliver front piece of the device.
-
Pull it up until it hits plastic pieces sticking out from the screen display. Then pull it away from the device.
-
-
-
Pull back the electron tape covering the two screws on the screen display and remove the 1/4 screws with #0 Phillips screwdriver
-
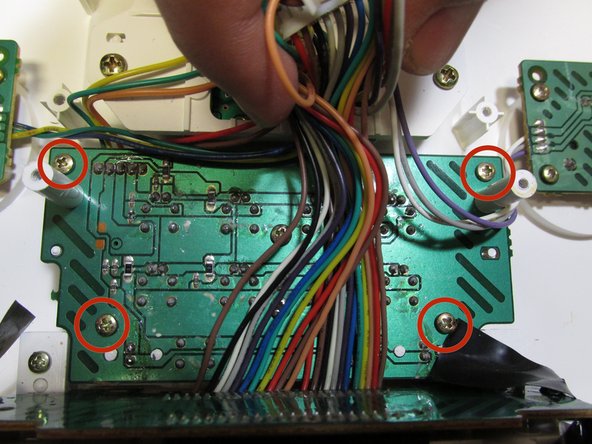
Remove the six 3/8 inch screws from the circuit board with a #2 Phillips screwdriver.
-
There are fours screws in the corners.
-
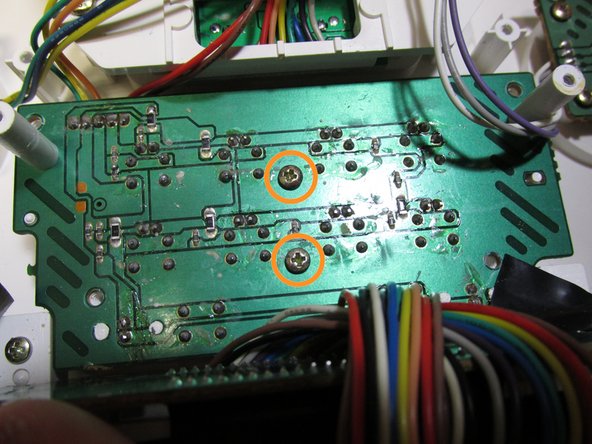
There are two screws in the middle (the wires have to be moved to see them).
-
-
-
Remove the circuit board by gently pulling it back and up out of the device.
-
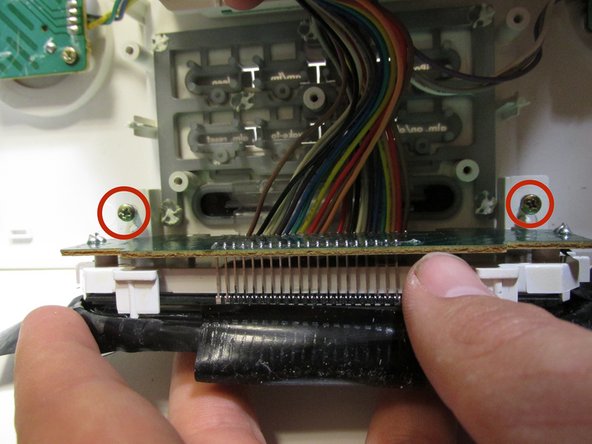
Peel back the electrical tape and move the wires out of the way.
-
Remove the two 5/16 inch screws that are now exposed with a #2 Phillips screwdriver.
-
-
-
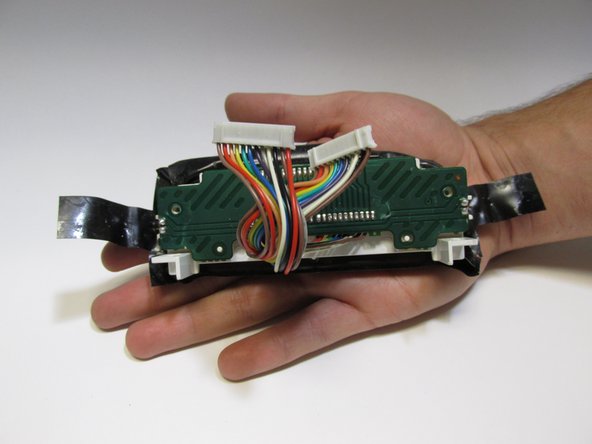
Remove the screen display by placing on hand on the white framing and grabbing the screen and pulling in straight back.
-
Replace the piece.
-


To reassemble your device, follow these instructions in reverse order.
To reassemble your device, follow these instructions in reverse order.
Team

New Mexico State, Team 1-6, Easley Spring 2014 Mitglied von New Mexico State, Team 1-6, Easley Spring 2014
NMSU-EASLEY-S14S1G6
5 Mitglieder
4 Anleitungen geschrieben