Einleitung
If your iHome isn't playing music or is producing awful sound quality, use this guide to replace the speaker. You must open the device and remove speaker grill to access the speaker.
This replacement is best done on a flat surface with plenty of room to work. Opening up the iHome involves the removal of many different screws. It is important to keep track of these screws! You can do this by placing the screws on a magnetic mat in the order of removal. This allows for easy reassembly.
Was du brauchst
-
-
Pull the tab towards you and lift up to remove the battery cover.
-
Remove the two AA batteries.
-
-
-
Unscrew the four 8mm Phillips #2 screws.
-
Unscrew the six 25mm Phillips #2 screws.
-
Reinstall the backup battery cover so it is out of the way.
-
-
-
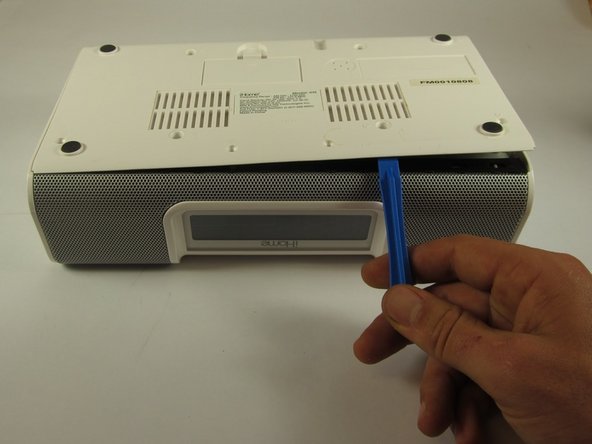
Pry the backplate up with a plastic opening tool between the back plate and the speaker grill.
-
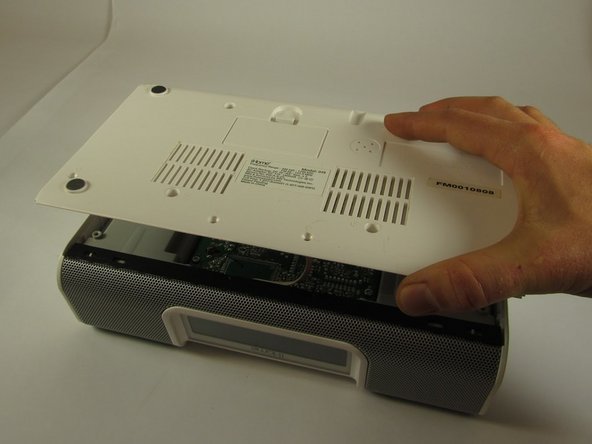
Lift the bottom plate up while making sure the connector remains attached.
-
-
-
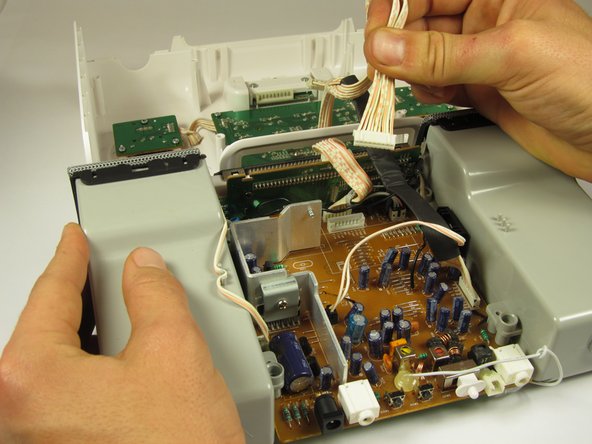
Use your hands to flip the backing plate away from you and rest it upside down on the iH9.
-
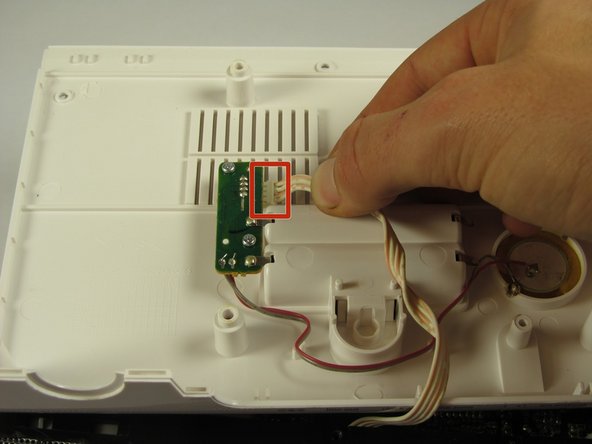
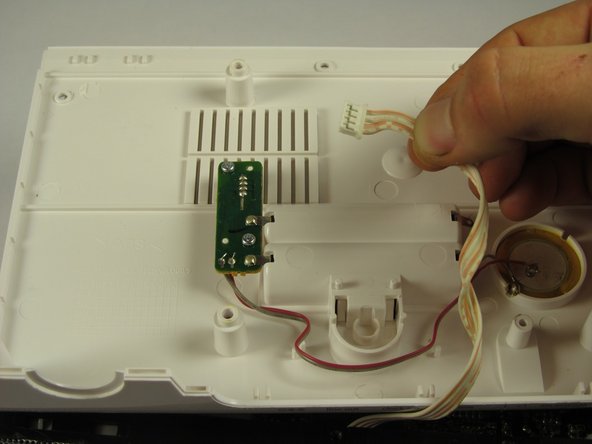
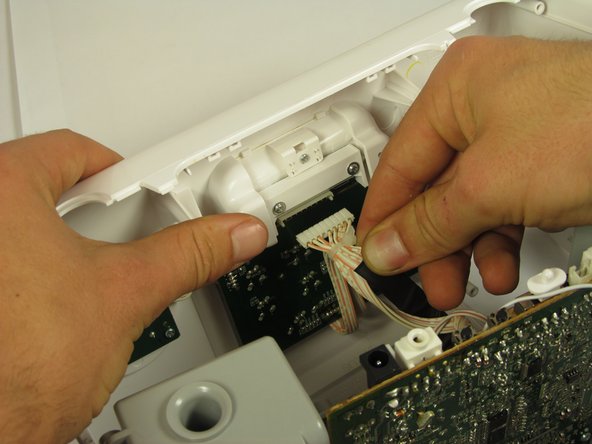
Unplug the white and orange 4-pin connector by pulling it in the direction of the wires.
-
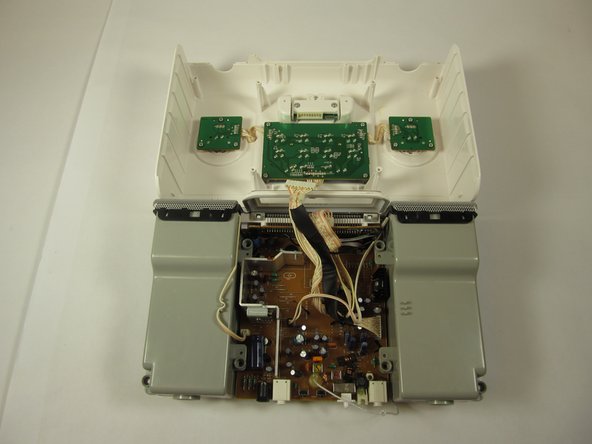
Set the backing plate aside.
-
-
-
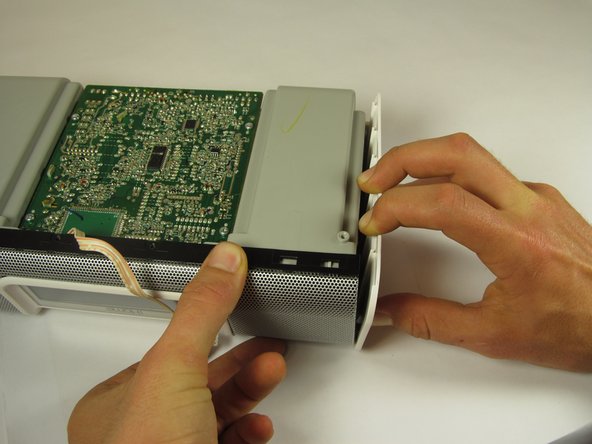
Place the device so that the speaker grill is face down.
-
Remove the two 10mm Phillips #2 screws on interior sides of the speaker housings.
-
-
-
Place the iH9 upside down.
-
Using both hands, pull the housing siding away from the device while simultaneously lifting the motherboard and speaker assembly straight up.
-
Repeat for the other side.
-
-
-
-
Stand the iH9 on its grill.
-
Separate the motherboard and speaker assembly by rocking it back and forth and pulling the assembly towards you.
-
Remove the small back panel.
-
-
-
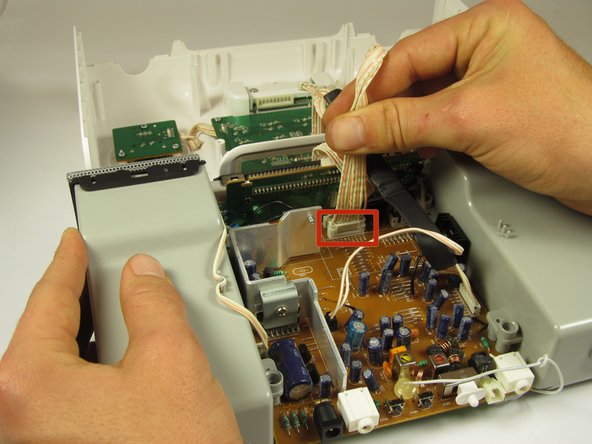
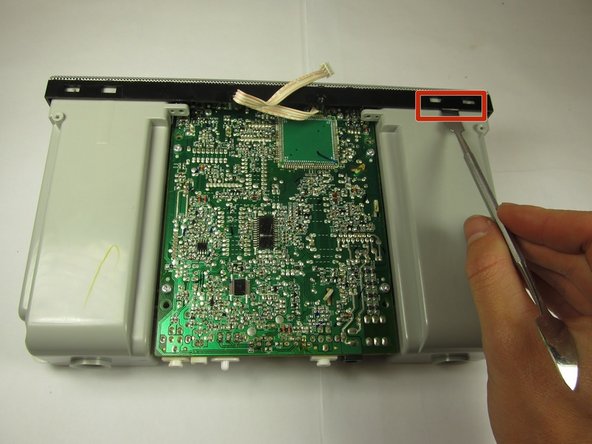
Firmly pull the wide 9-pin connector with black covering on the underside of the upper housing to unplug it.
-
Lay the housing and core assembly flat and close to each one another.
-
-
-
Cut the zip tie holding the wires together with a wire cutter. The two sides of the device housing are now fully separated.
-
-
-
Set the iHome iH9 speaker and mother board assembly upright on the speaker grill.
-
Remove the black ground wire from the grill by pulling in the direction of the wire.
-
-
-
Unplug the 3-pin connector for the infrared sensor by pulling in the direction of the cable.
-
-
-
Set the iH9 flat down with the solder side of the motherboard up and the speaker grill facing away.
-
With a nylon or metal spudger, pry the speaker grill up and forward from the two retaining flanges on the left and right speaker housings.
-
Set the speaker grill aside.
-
-
-
Flip the iH9 back over, exposing the motherboard components.
-
For the right speaker, unplug the speaker wire by pulling in the direction of the wire (pictured).
-
For the left speaker, unplug the speaker wire by pulling in the direction of the wire.
-
-
-
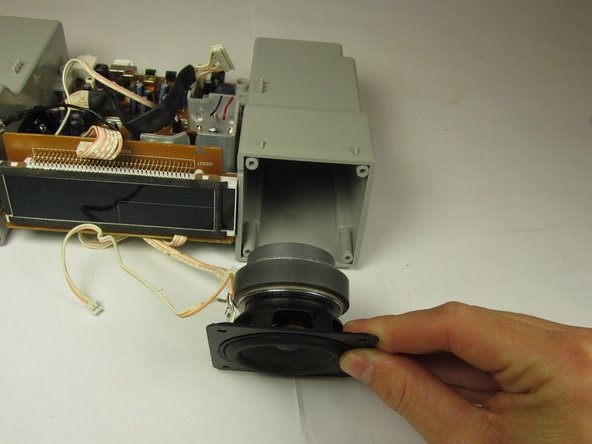
Remove the four 14mm Phillips #1 screws on each of the speaker's four corners.
-
Remove the speaker.
-


To reassemble your device, follow these instructions in reverse order.
To reassemble your device, follow these instructions in reverse order.
Rückgängig: Ich habe diese Anleitung nicht absolviert.
Eine weitere Person hat diese Anleitung absolviert.
Team

Cal Poly, Team 8-39, Amido Winter 2015 Mitglied von Cal Poly, Team 8-39, Amido Winter 2015
CPSU-AMIDO-W15S8G39
4 Mitglieder
8 Anleitungen geschrieben